At the start of this project, I had a few ideas, but after talking to a guest lecturer, I settled intending to show the audience what I see. There were several ways that I could portray this. This is when I first started my initial research, guiding me to later choose to photograph my family and different ways in which I could produce this. But still wanting to keep to the theme of identity surrounding me, to what I personally see.
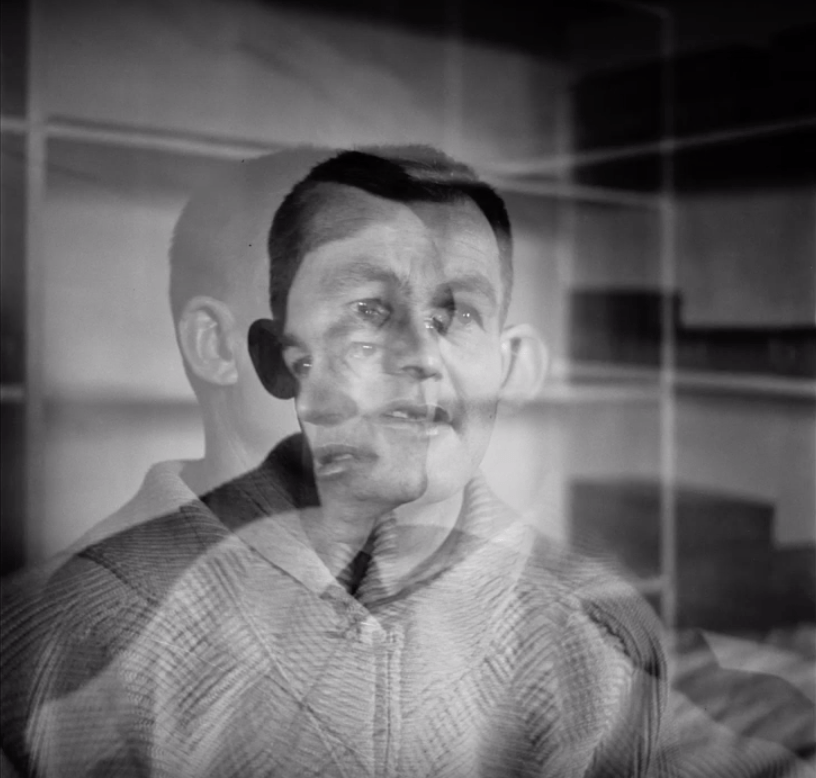
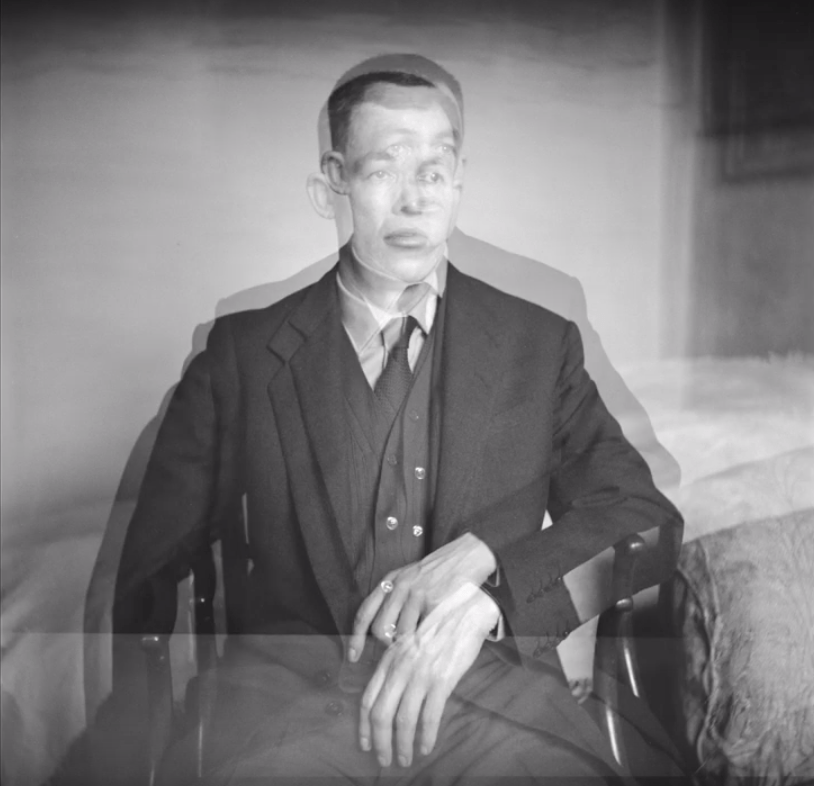
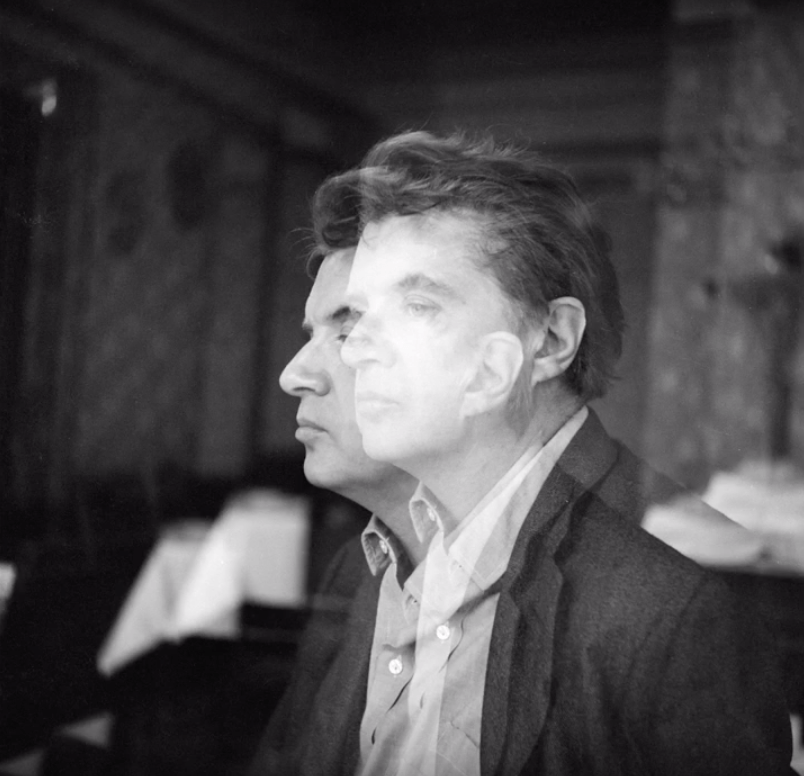
To learn new techniques I had to do my research, I stumbled across photographer John Deakin that inspired me a lot. The way he takes the portraits in multiple exposures is stunning, how he makes the sitter looks so natural, yet mesmerising to look at.
I have never used multiple exposure before, so this process was new to me. Researching it and understanding it was easy, but achieving the desired look I was going for was difficult. There are several settings in the camera that can produce different looks and contrast, and trying to perfect what I see through to the audience, required many attempts and practice.
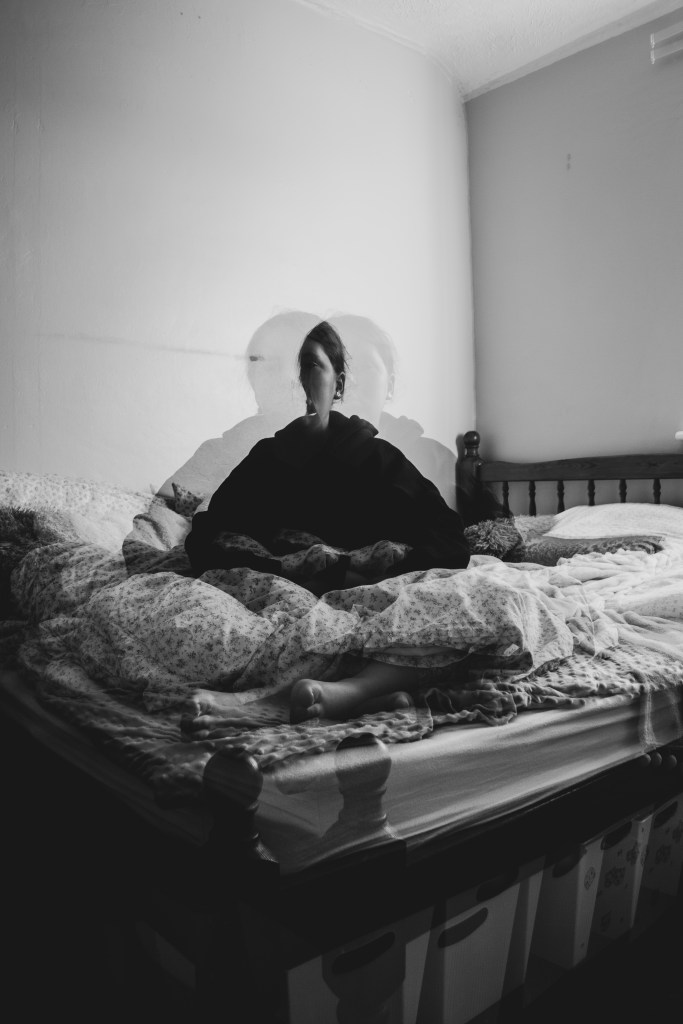
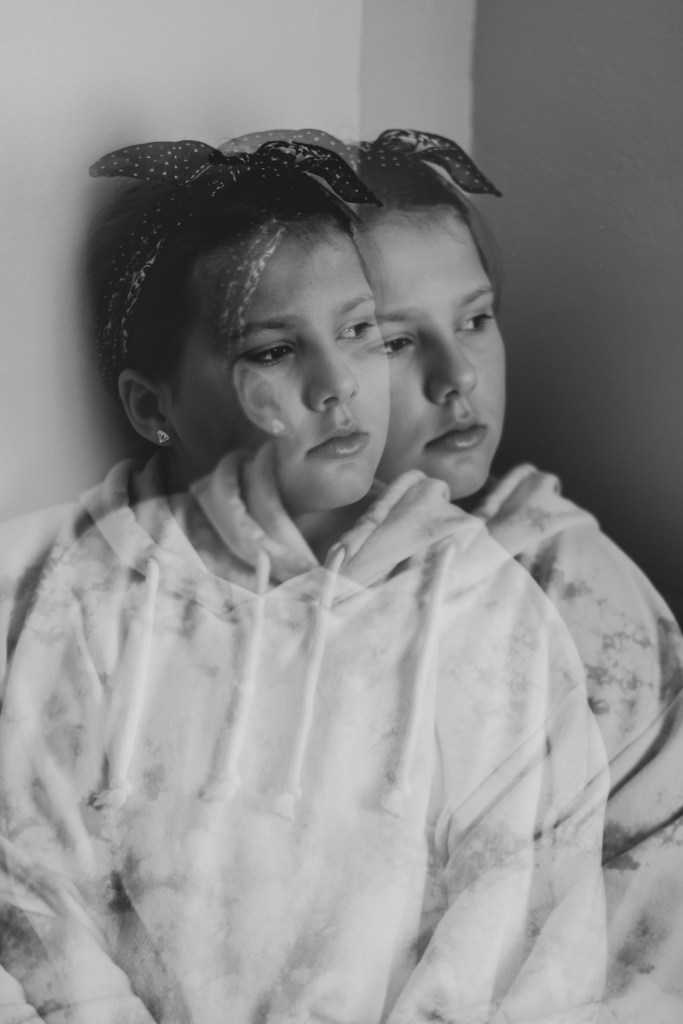
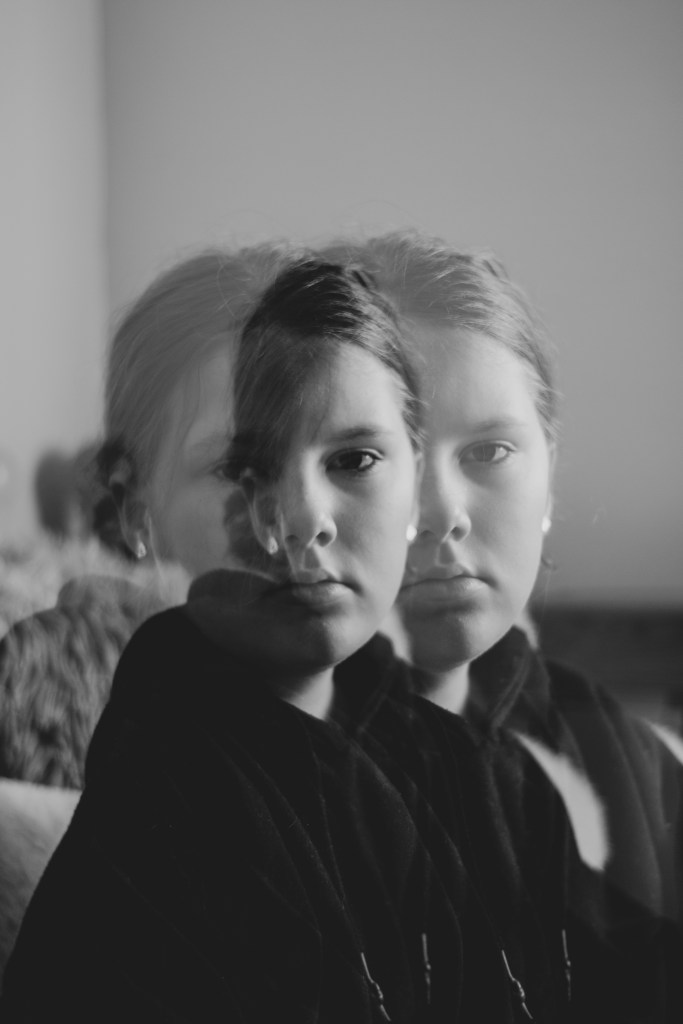
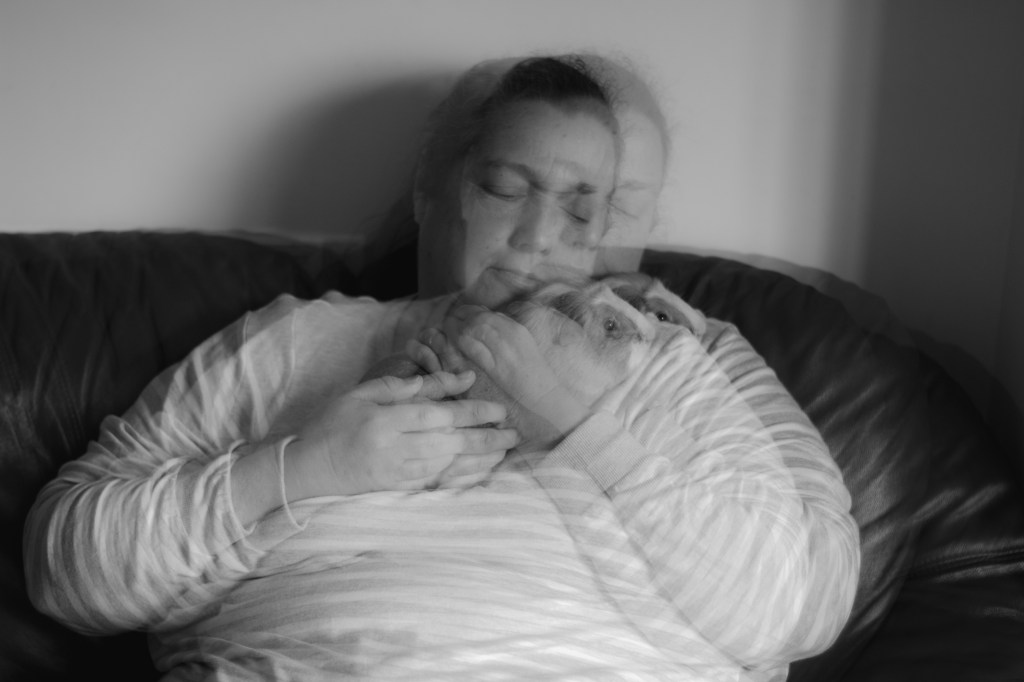
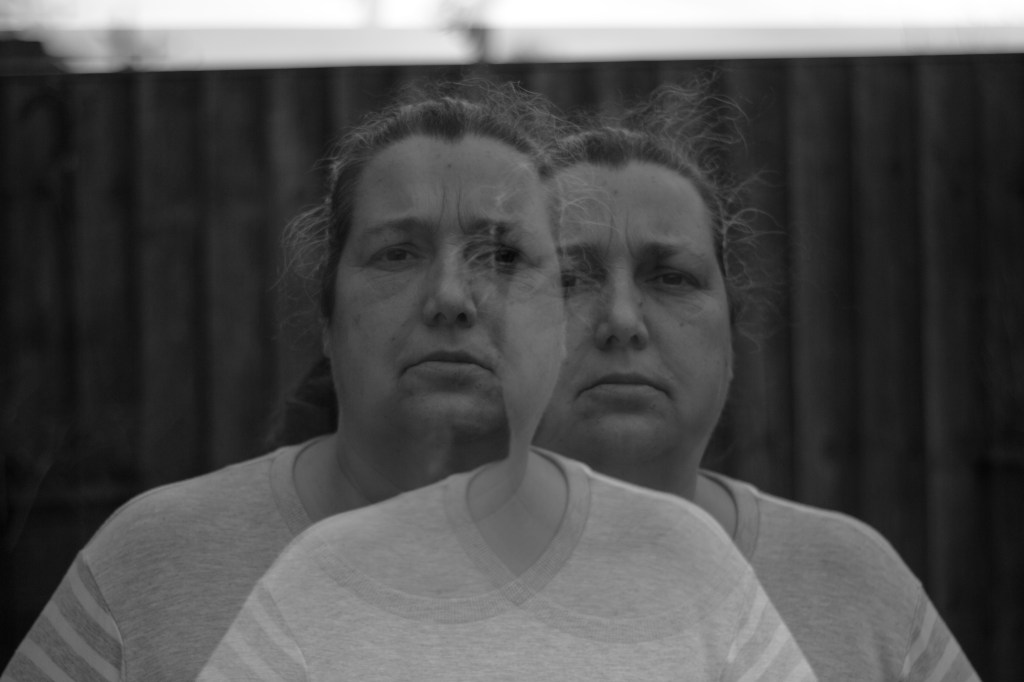
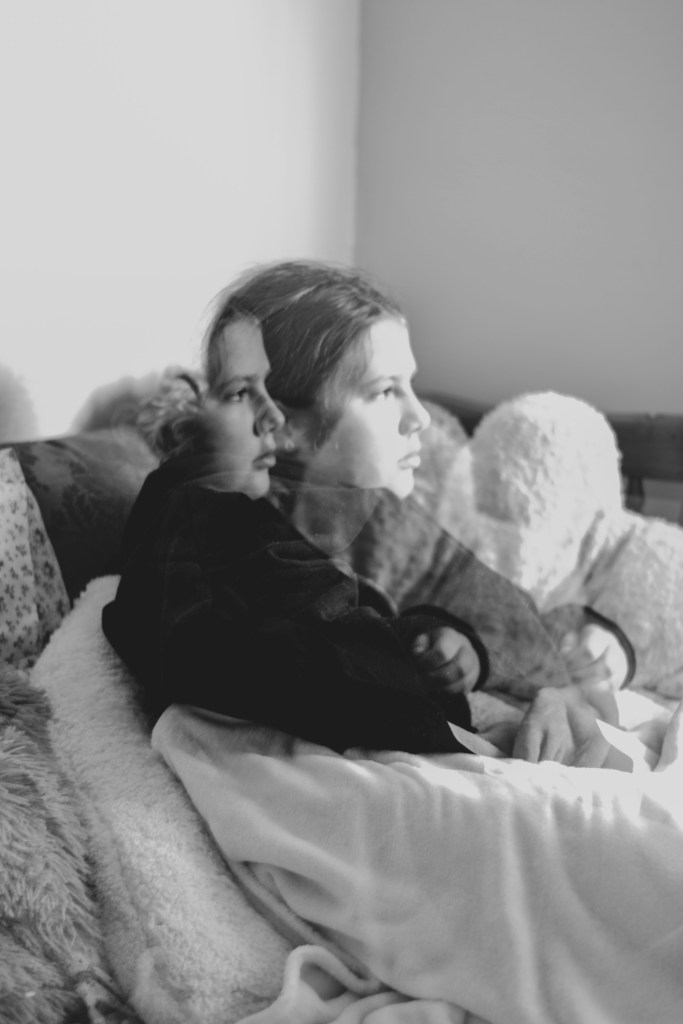
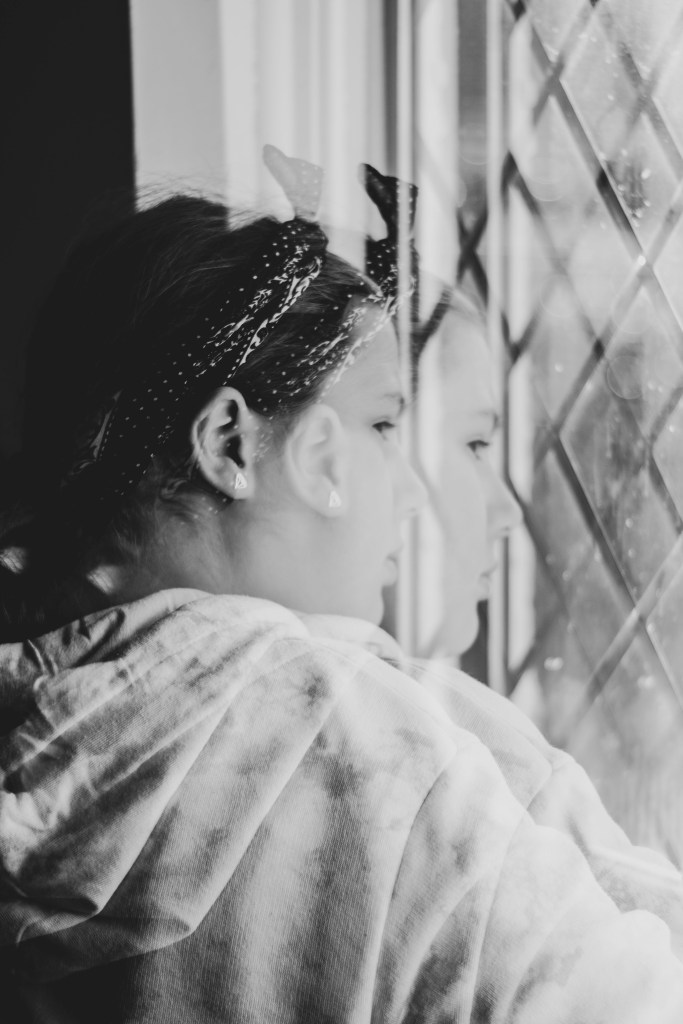
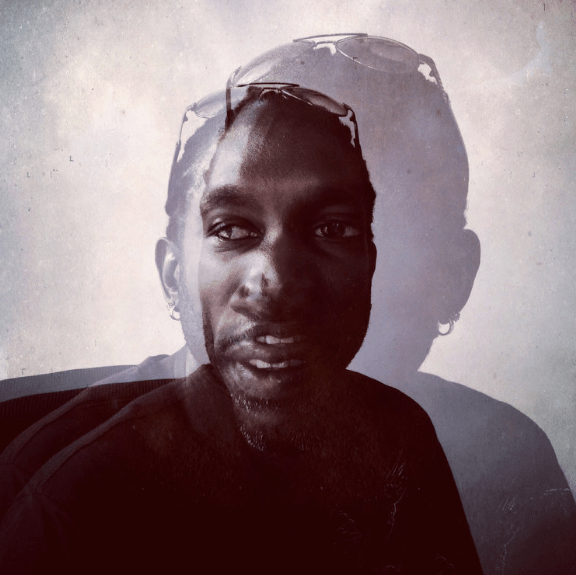
In the final images, I wanted to present how I see people differently, thats why I chose to do a close-up and a more natural far away shot. By doing this, I feel that I have made the series flow better and separate them, making it more visually impactful.
I would prefer it if I had done more shoots with more family members, e.g. my dad, it would’ve made the final images complete. However, I had to prioritise my time for printing, and there were delays because of illnesses. Although I think my final four images are still strong together.
Producing the images was easy once I had perfected the lighting and location. The light couldn’t be too dark or too bright, or it would have caused contrast, which ruins the double exposure effect. Another thing what was difficult with the location was the background. It had to be plain-ish, if there was anything in the background, it would make the image messy like, and confusing to look at. So looking for areas around my home that relate to my family and me was important.
Overall I am pleased with the outcome, this was a challenging project for me while learning a new process and trying to perfect what I see visually through to the audience. However, because of the research, and challenges, it has allowed me to show the viewer a part of my identity, that visually people can’t see or understand.
In this project, I have to produce 4-6 images surrounding the idea of identity, and now I have to choose my final images for printing. I want the images to flow through the sequence, but I’m going to narrow down the best images between the two shoots.
I wanted to photograph my dad for the final two images, but because of time restriction, I decided not to focus on getting my printing done. I am getting feedback from fellow peers and friends to see which ones they are visually taken too.
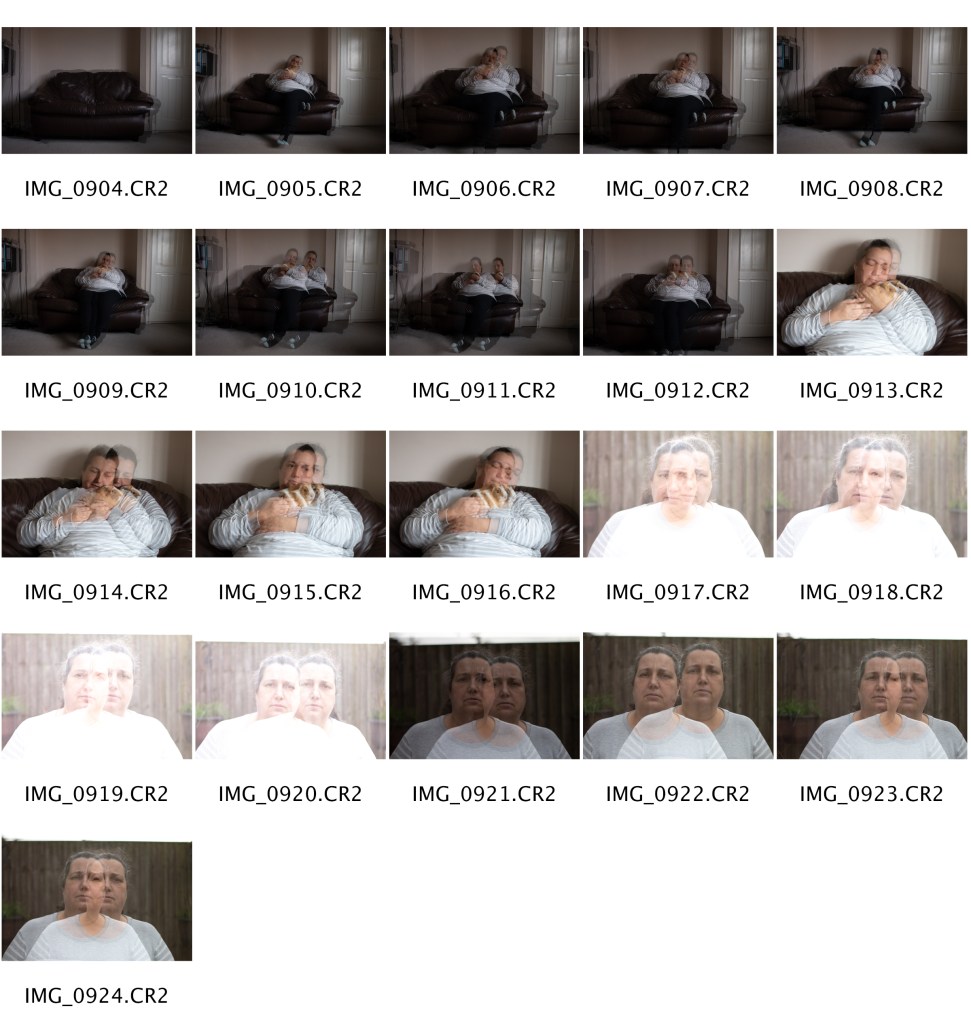
THE SELECTION TO CHOOSE FROM
I have rounded down my favourites from these shoots, which relates to the theme of this project, however, which are visually exciting. I definitely want to use one of the closeup portraits of them, it best shows what it looks like when perhaps I’m talking to them. The other images are either closeup or distance, and I think it would be nice to show the difference between the two.
FINAL IMAGES
From all the feedback and putting together different images, I’ve decided to go with the four above. Because i like how half of the photos are close-ups so you can see the details of there face, but then the distance images put them in place to where their identity links them to.
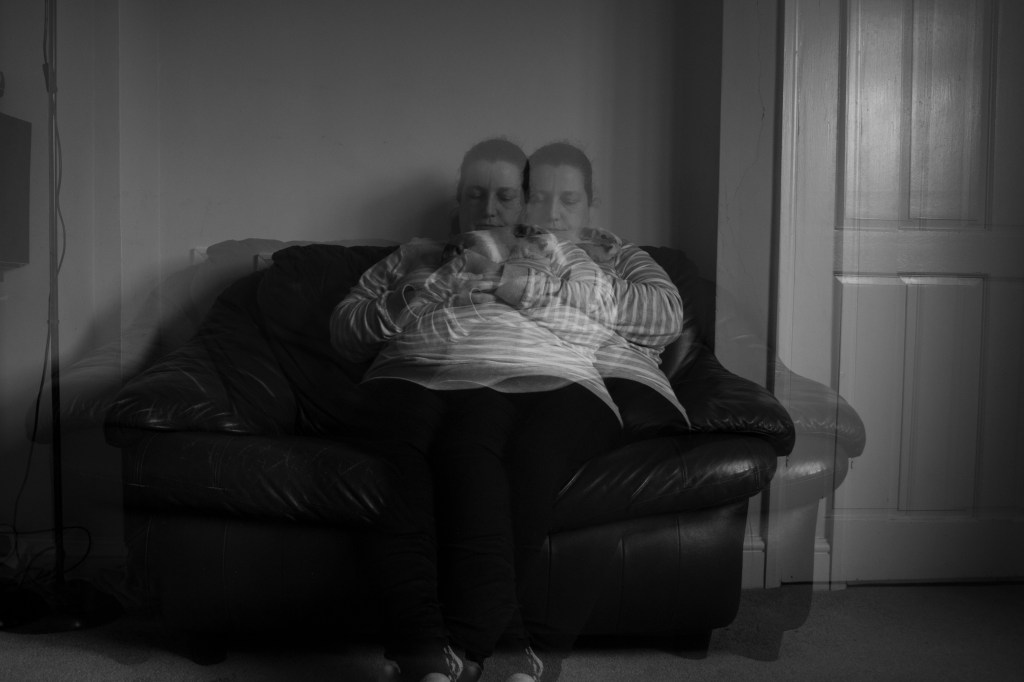
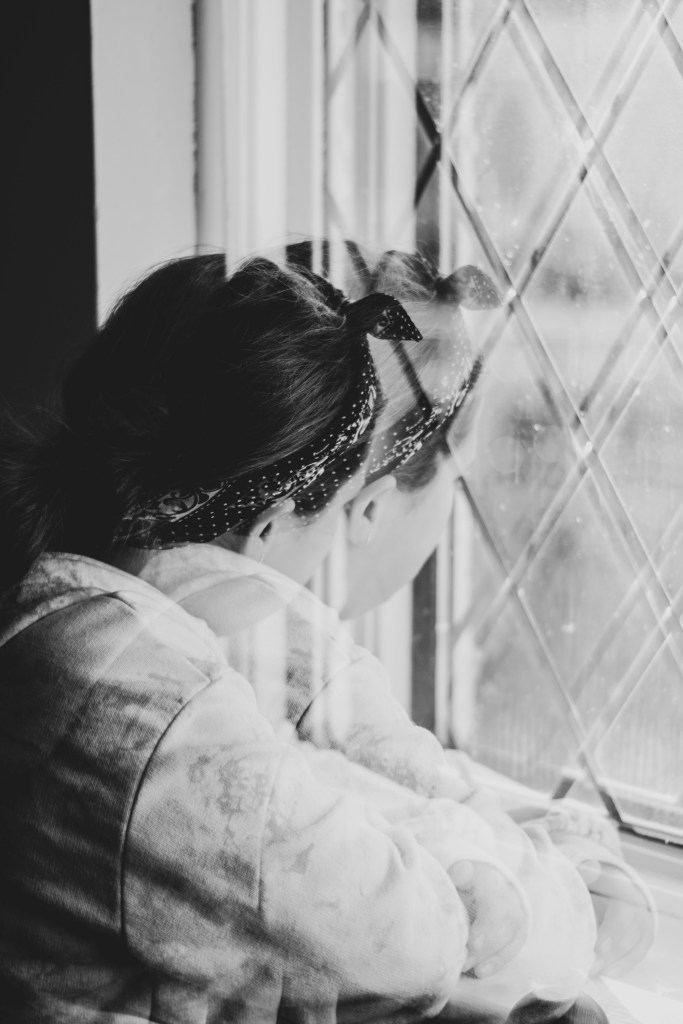
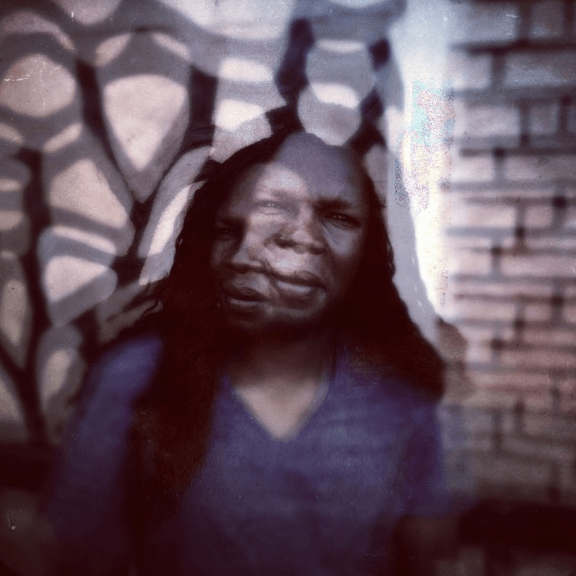
The last image of the series above, I was not going to use, but instead, use a close-up of her holding the guinea pig, but it felt like a series that mostly consisted of close-up portraits. That made the first image feel left out. So when I put the fourth image in it completed the series.
I want to print them in A3 Lustre paper, but I’m also going to print A4 because when doing to double exposure it looks like the quality decreases. Though my camera is 20.2 MP, it is just as a back-up.
The title of this series is going to be called ‘What I See’, as this is one of the most common phrases I use. It represents these images because this is literally what I see, through my own identity.
I decide to follow the route of photographing my family at home, even though the location of Ramsgate produce visually exciting photographs, I feel the area of my home would make more sense to the theme of identity.
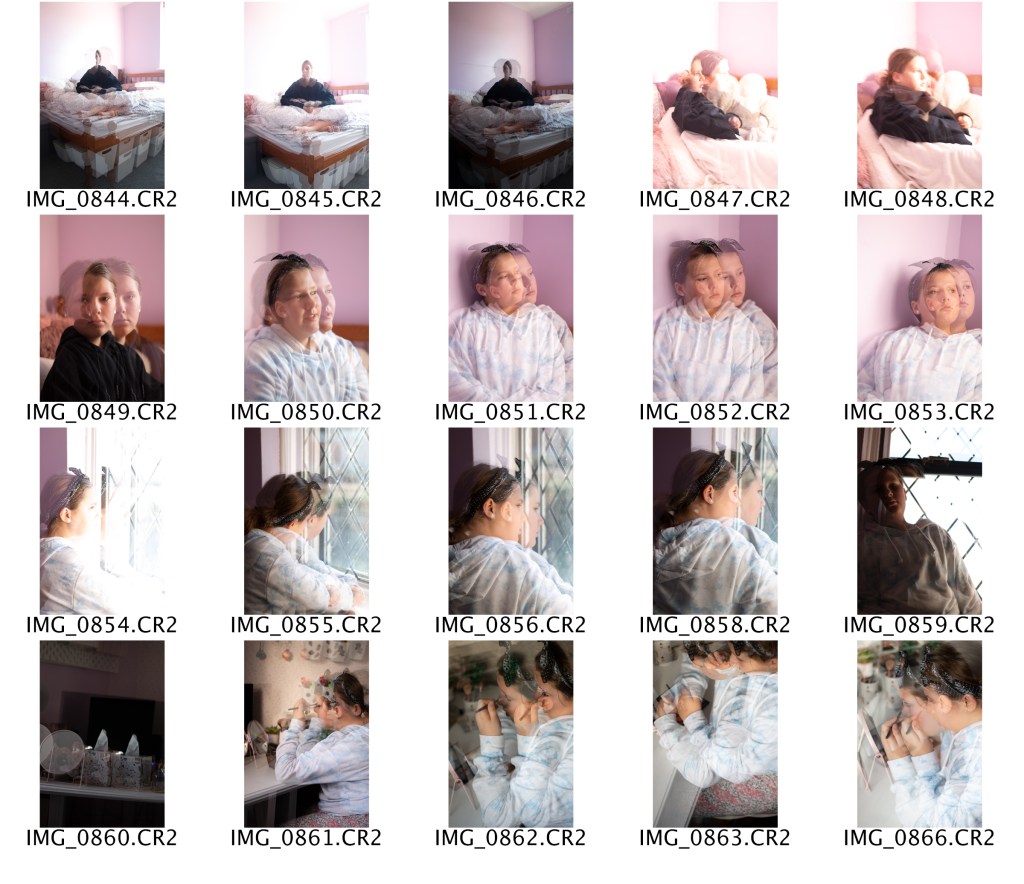
CONTACT SHEET
RESULTS
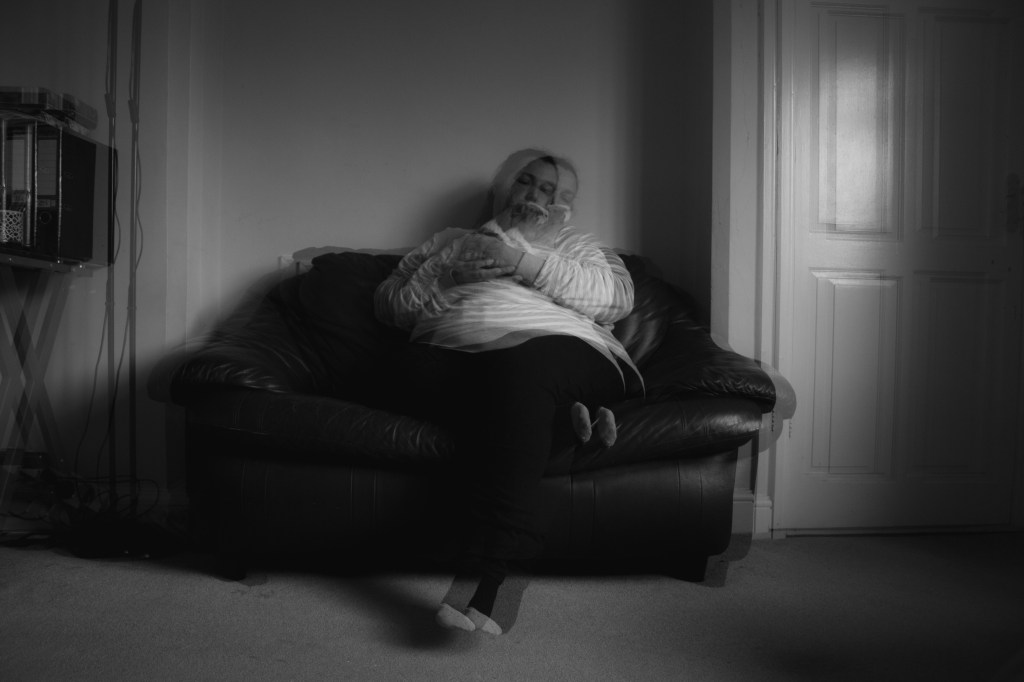
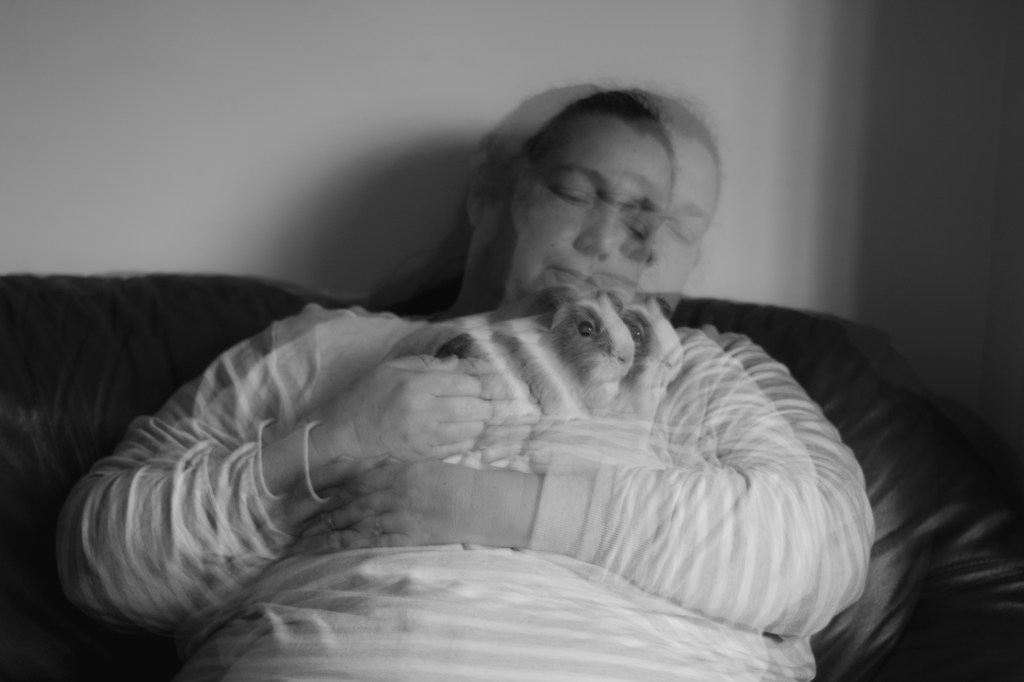
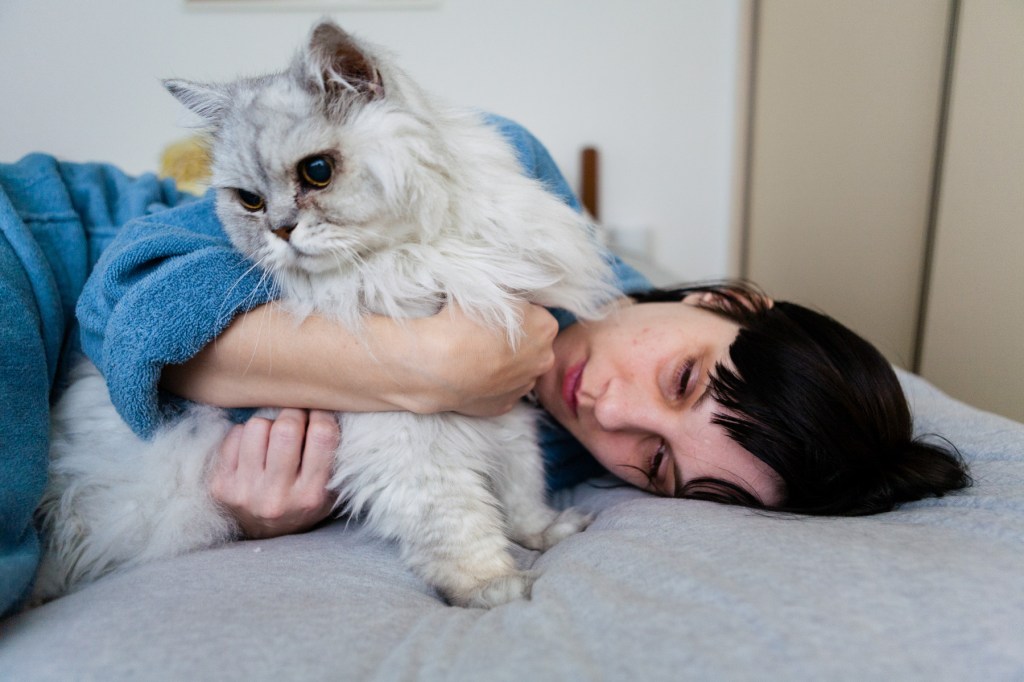
My mum doesn’t like to be photographed, but I wanted her to look natural. So for one set of images, I sat her in the living room sofa, while holding Peppa, our guinea pig. My mum is a carer of animals, and like me is very creative. We have a household of 2 dogs, 2 rabbits, 8 chickens and a guinea pig. So, I wanted to look natural and comfortable.
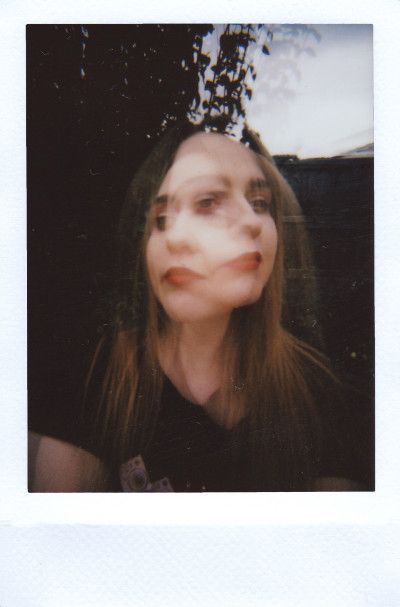
Then I did a close-up portrait of her outside, I wanted to shoot with a neutral background, in a place she likes, which is the garden. It produces very cool effects while making it look natural and not stage at the same time. I used the same editing process as before, by changing them to black & white, with a raw adobe preset.
From the experimental practice shoot and talking to Rikard Osterlund, I have a clear vision of what I want my output to be. I want to produce a selection of images that consist of places around me and my family members in double exposure. The portraits are going to be close-ups, because when we talk to a person, that how we see that person, to make it as close as possible to what I see. The images below are what I’m going for.
LOCATION
For this shoot, I’m going to be shooting my Mum, so any place around the home, which relates to her. But also looking for a possible plain background to help with the double exposure.
Living room – the family space
Garden – like her gardening
Kitchen – loves to bake and cook
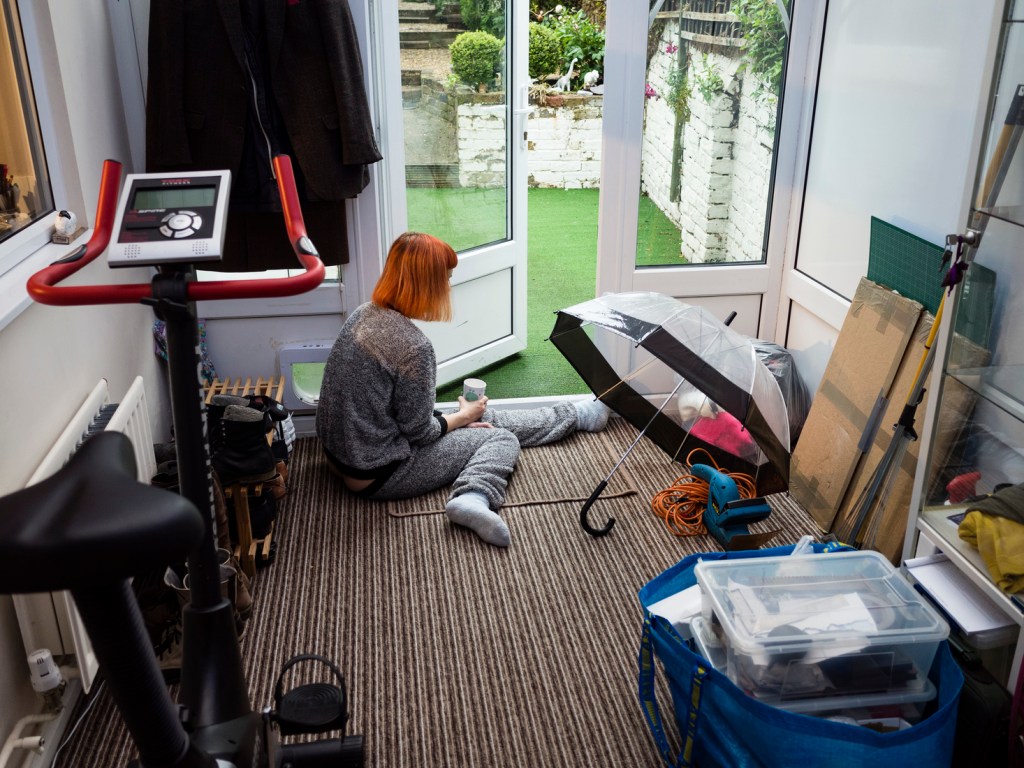
Conservatory – place were she does her crafts
EQUIPMENT
Canon Body
Family members – Models
50mm Prime lens – Mostly for the portraits
Standard Camera lens – for the location images
Tripod – Possibly used to get a cleaner double exposure comparison
Before getting my family together, I wanted to practise with my younger sister. This was to get an idea of what to expect and how to get what I want to produce.
LOCATION
I wanted the location, to have a connection to me and also my sister, so I decided to shoot in her bedroom. This is one of her favourite places because of its comfort and secureness. But there is a plain wall in the background which will allow the double exposure to work better. She has be diagnosed with ME (CFS) Chronic Fatigue Syndrome, in were she has had laryngitis for just over four months now. She sometimes can barely get up the stairs without getting totally exhausted. I also have this condition 3 years ago, and was off school for 6 months, so I know the need to feel comfort.
EQUIPMENT
I’m going to be using a 50mm lens, as I like using this best for portraits, a tripod, and a standard lens for non-close ups.
Rikard Osterlund came to our University and gave us a talk about his works, techniques he has used, and experiences. I had the pleasure of having a 1 to 1 discussion with him about my ideas for the identity unit. His work below is from Osterlund series ‘Look, I’m wearing all the colours’.
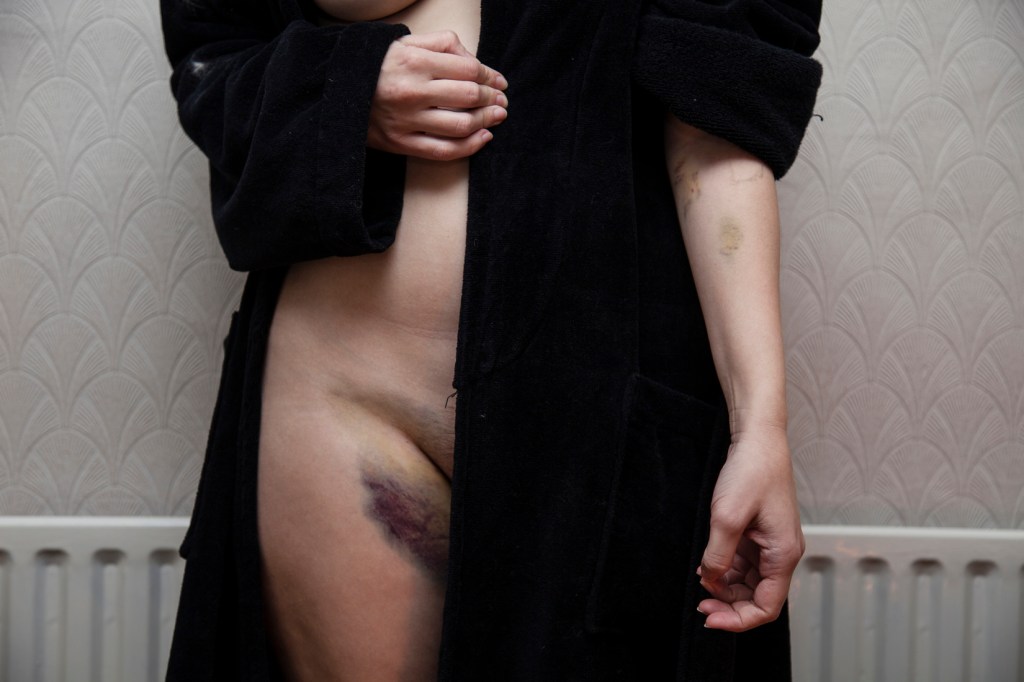
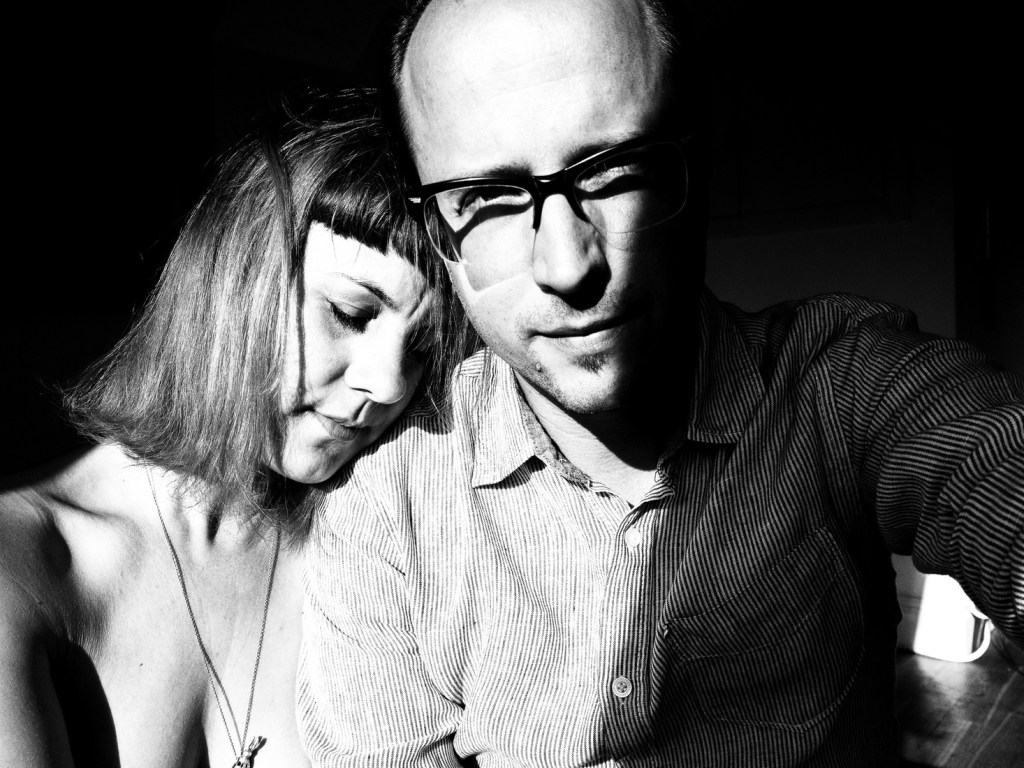
“This book is an intimate story of my journey as a husband trying to understand my wife’s illness. It was made using photographs taken over a 13 year period. Shown here is a small sample from the book. I started photographing Zara when we first met. Images of nights out, eating and kissing were soon joined by images of flare ups and hospital visits. She has fibromyalgia and hypermobility – conditions causing constant pain and which lead to life often feeling like it lacks cohesion and order. They join us as silent partners in our relationship with each other, and our wider world.” (Rikard Österlund, n.d.) Obviously, I can’t understand what his wife goes through, but I can understand the part of people not understanding and the endless hospital appointments, as I have other medical problems.
TALKING WITH RIKARD OSTERLUND
In the afternoon of that day, I had a 1 to 1 talk with Osterlund about my identity work. Overall I found this very useful and gave me some pointer in ways I could possibly produce and display my work.
At first, I told him my idea, which consisted of explaining my eye condition. He was really intrigued by the idea and wanted to see if I had any work to show. The only work I had to show was the practise shoot 1 location images. I told him this was experimenting and practising the technique of double exposure, and I want to photograph my family as well. Below are some of the ideas that he mentions, that has help me guide the path I want to go down.
He like the location images, so the final 4-6 images won’t all consist of portraits, a bit of both
While shooting the portraits, do close-ups shots, as most of the time thats how we see our families faces
If on the day of the shoot you see something else, photograph it
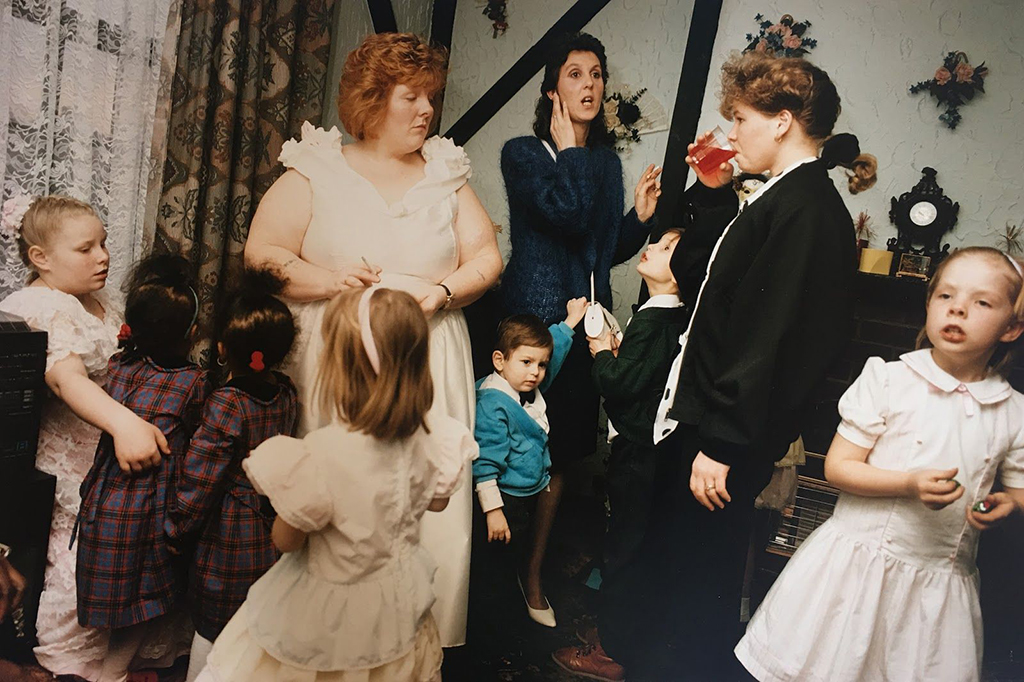
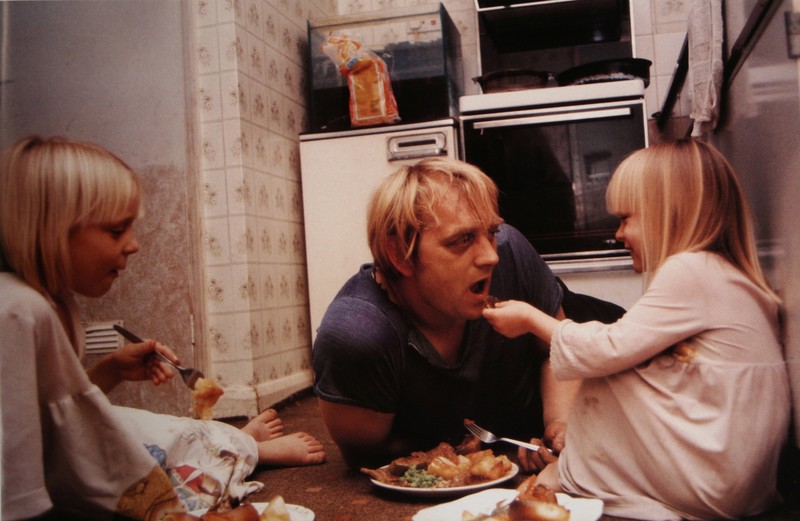
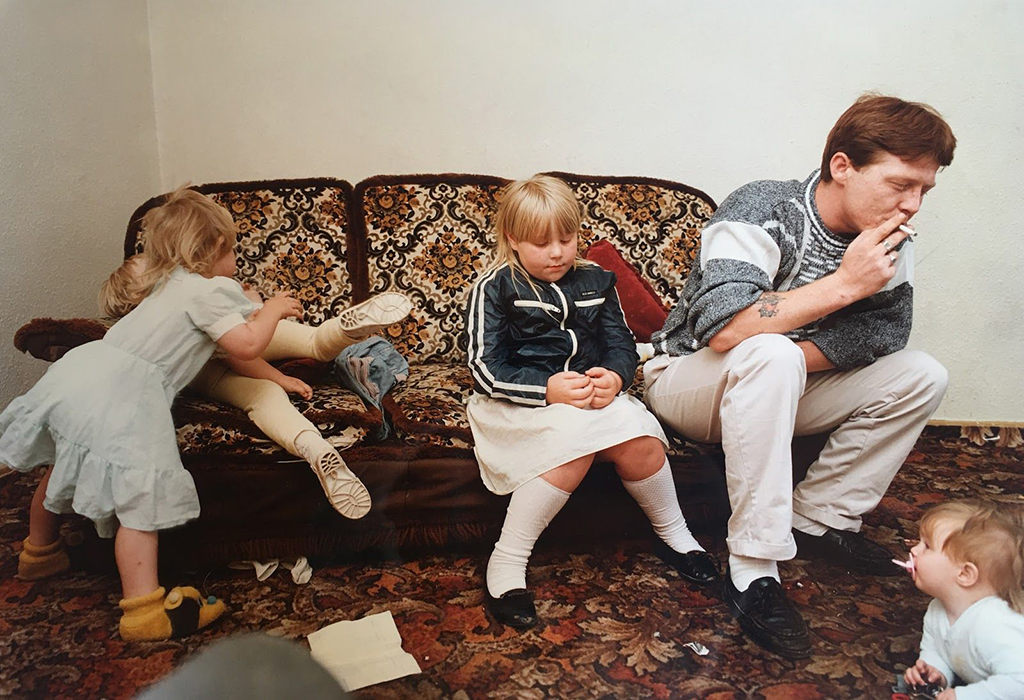
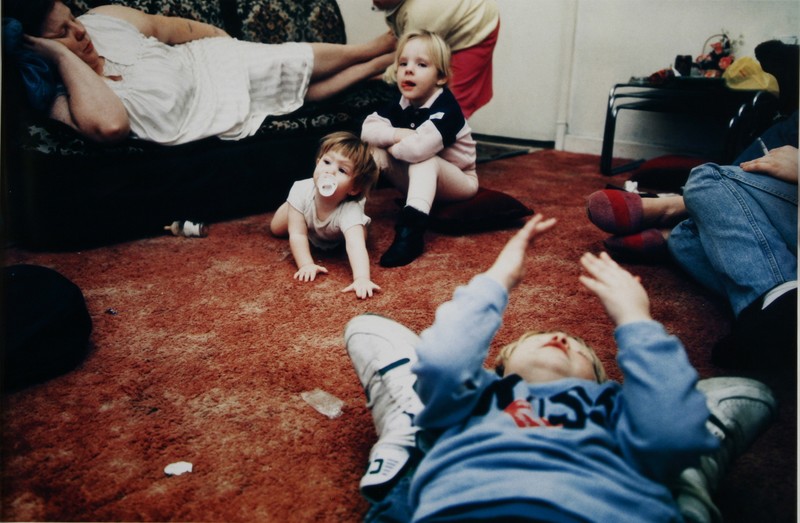
Waplington has capture bare and unstaged realness of everyday life. His images are taken in the heart of the family home, the living room. Above, you can see mixed emotions, from chaos to tender loving families. Waplington’s work shows a broad range of feelings, which were taken within the moment. These candid shots show many ways they used the living room; you can tell by the living conditions that they are a working-class family, where all the glitz and glamour of an ‘ideal’ house being spotless is unreal. I think many families can relate to the images above, as nothing is posed, from the families to the furniture. It feels real and not fake.
Everywhere from social media, to TV, you see all unreal expectations of what you should have and be. But in this case, it is the opposite. Even though in some of the images they are arguing, you can see that they have a family bond together, which most of the time on social media is the complete opposite. Waplington has produced these images, in which you feel like you are there. As none of the families are looking at the camera, and they are acting their usual self (not staged), it feels that you are looking in on the part of a real loving family.
TINA BARNEY
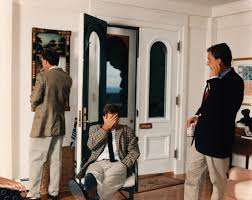
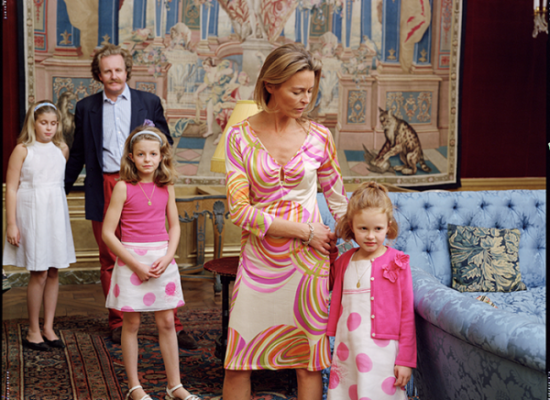
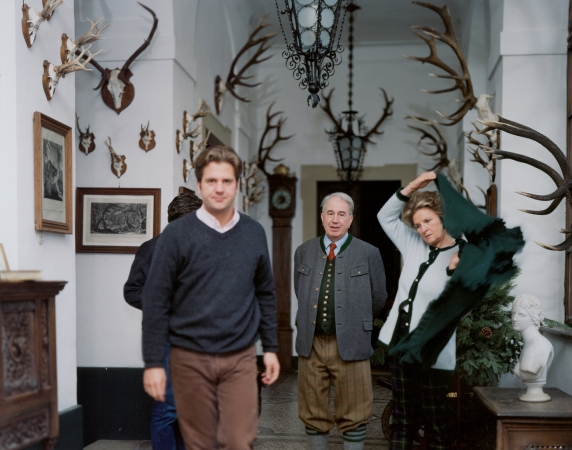
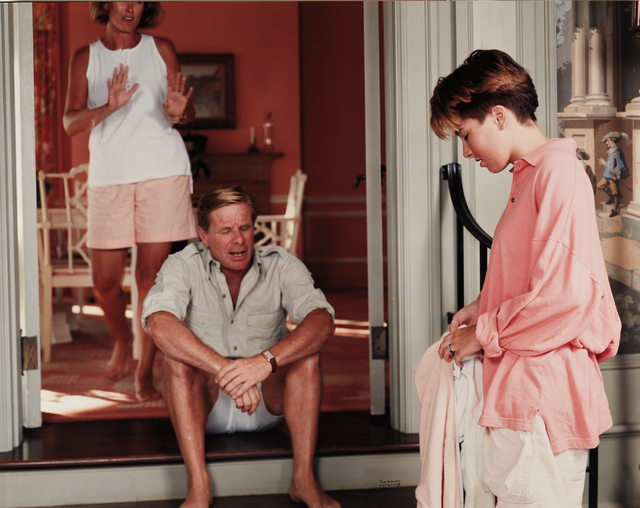
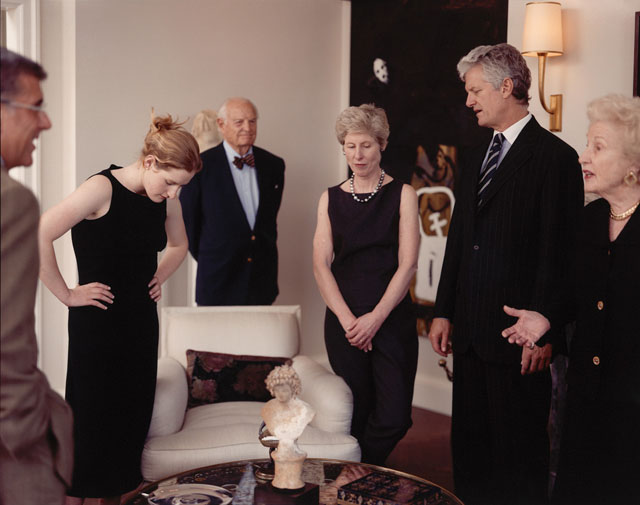
Similarly, Barney has photographed families within their homes as well, but in Barney images above, you see a different type of family life. You can tell that Barney has used a similar approach to Waplington, in taking candid shots within the moment. However, the difference here is the type of people. You can tell compared to the Waplingtons families that these families are wealthy and have a lavish lifestyle, from their home, to what they wear and even how they stand. But Barney had photographed these families just before their portraits were going to be taken, showing the truth behind these lifestyles.
To me, it feels less real and more uptight than Waplington images. It seems that they are more fuss about how they present themselves and what they have. Perhaps the images are what the outside world doesn’t see behind closed doors. I feel angry and frustrated, not by the families, but the expressions they are giving off. Not one of them seems to be happy or comfortable. Almost like they don’t want to be there.
Both photographers that I have analysed have one thing in common that they both photographed a family within their home. However, both families are very different. One family has a wealthy lifestyle, and the other has a less fortunate one. Nevertheless, I feel that the privileged family is cold and distant. But the other feels loving and like a real family. So does class matter? Overall the family life and connection between them is very different.
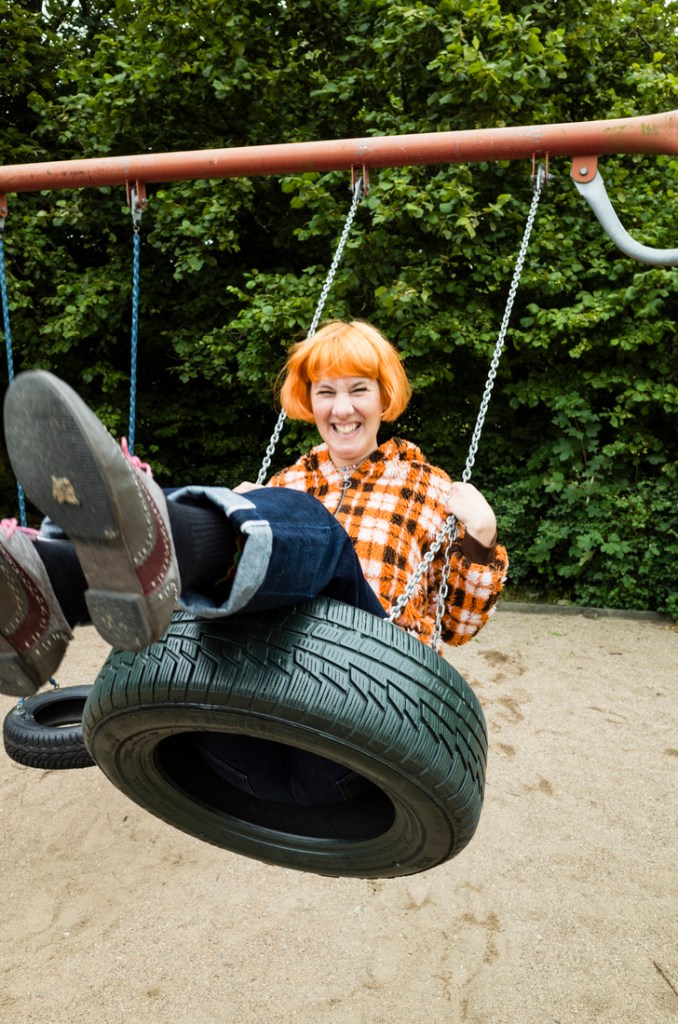
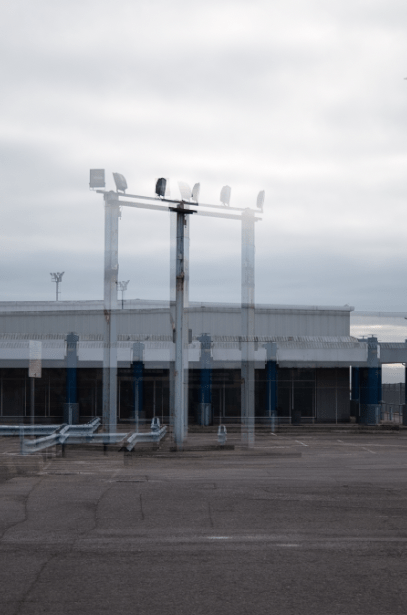
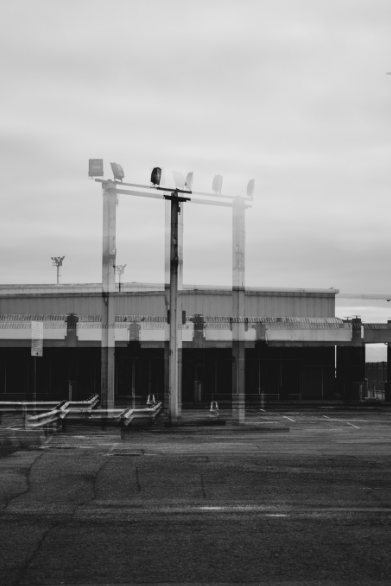
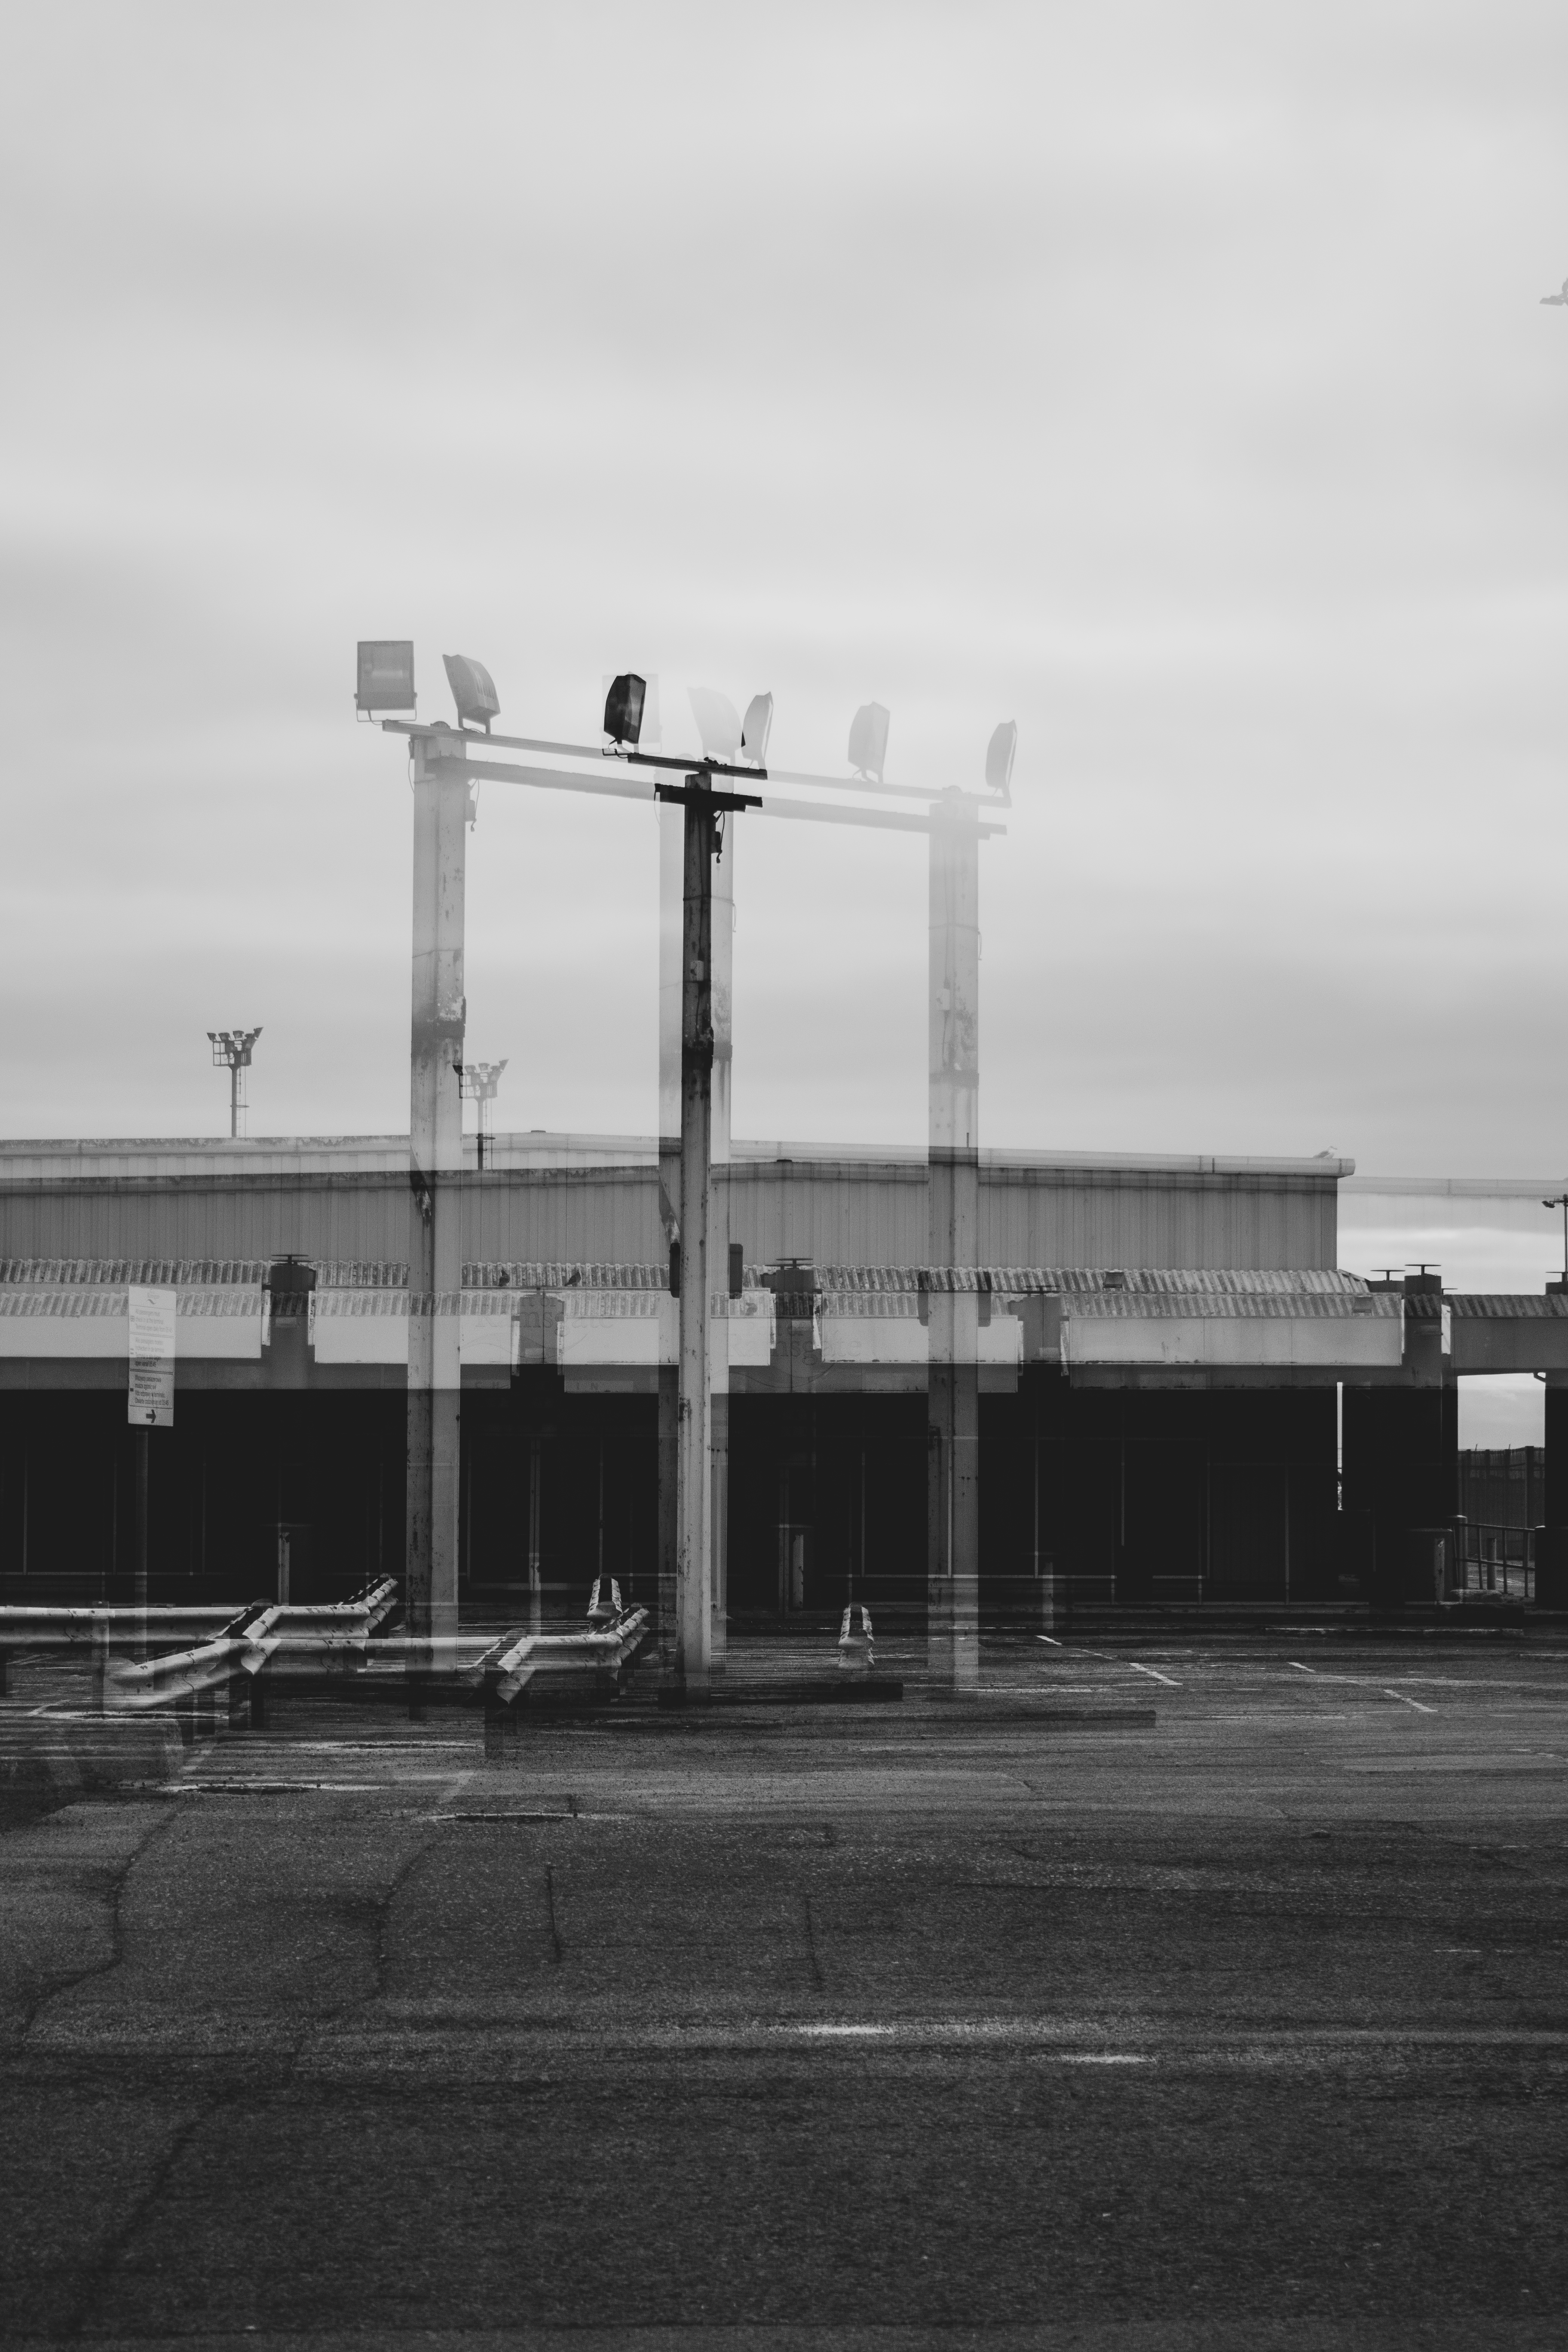
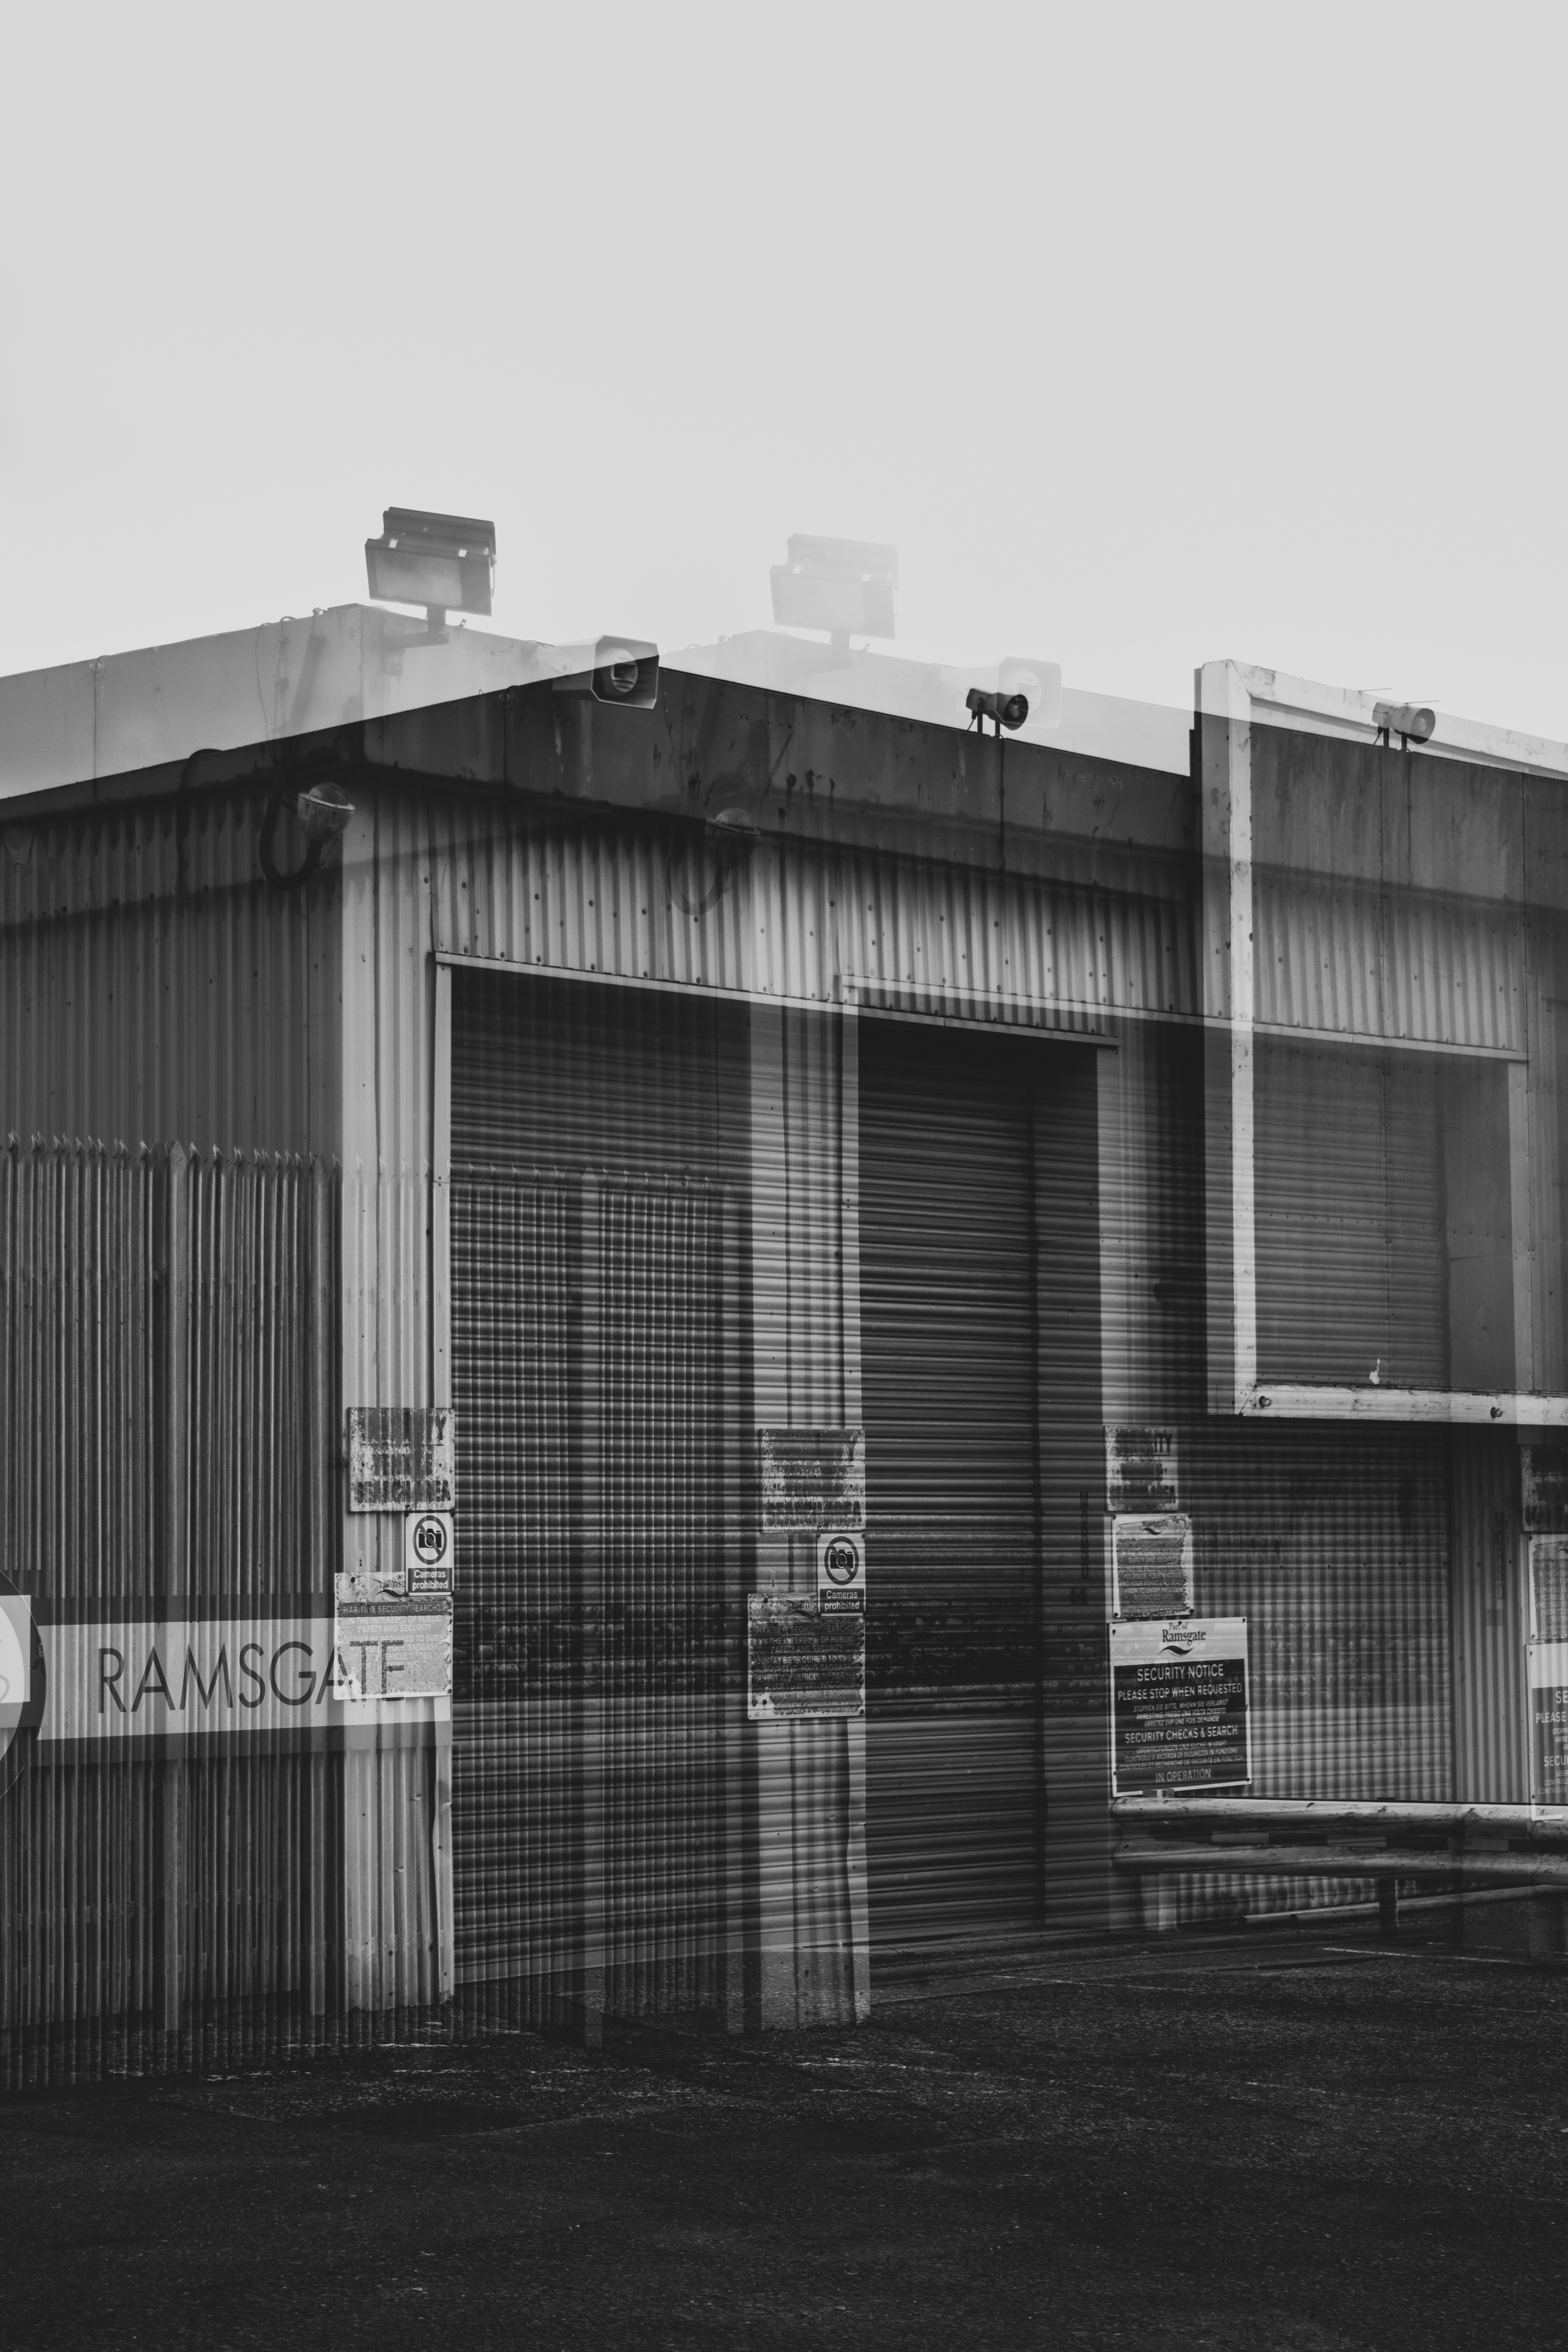
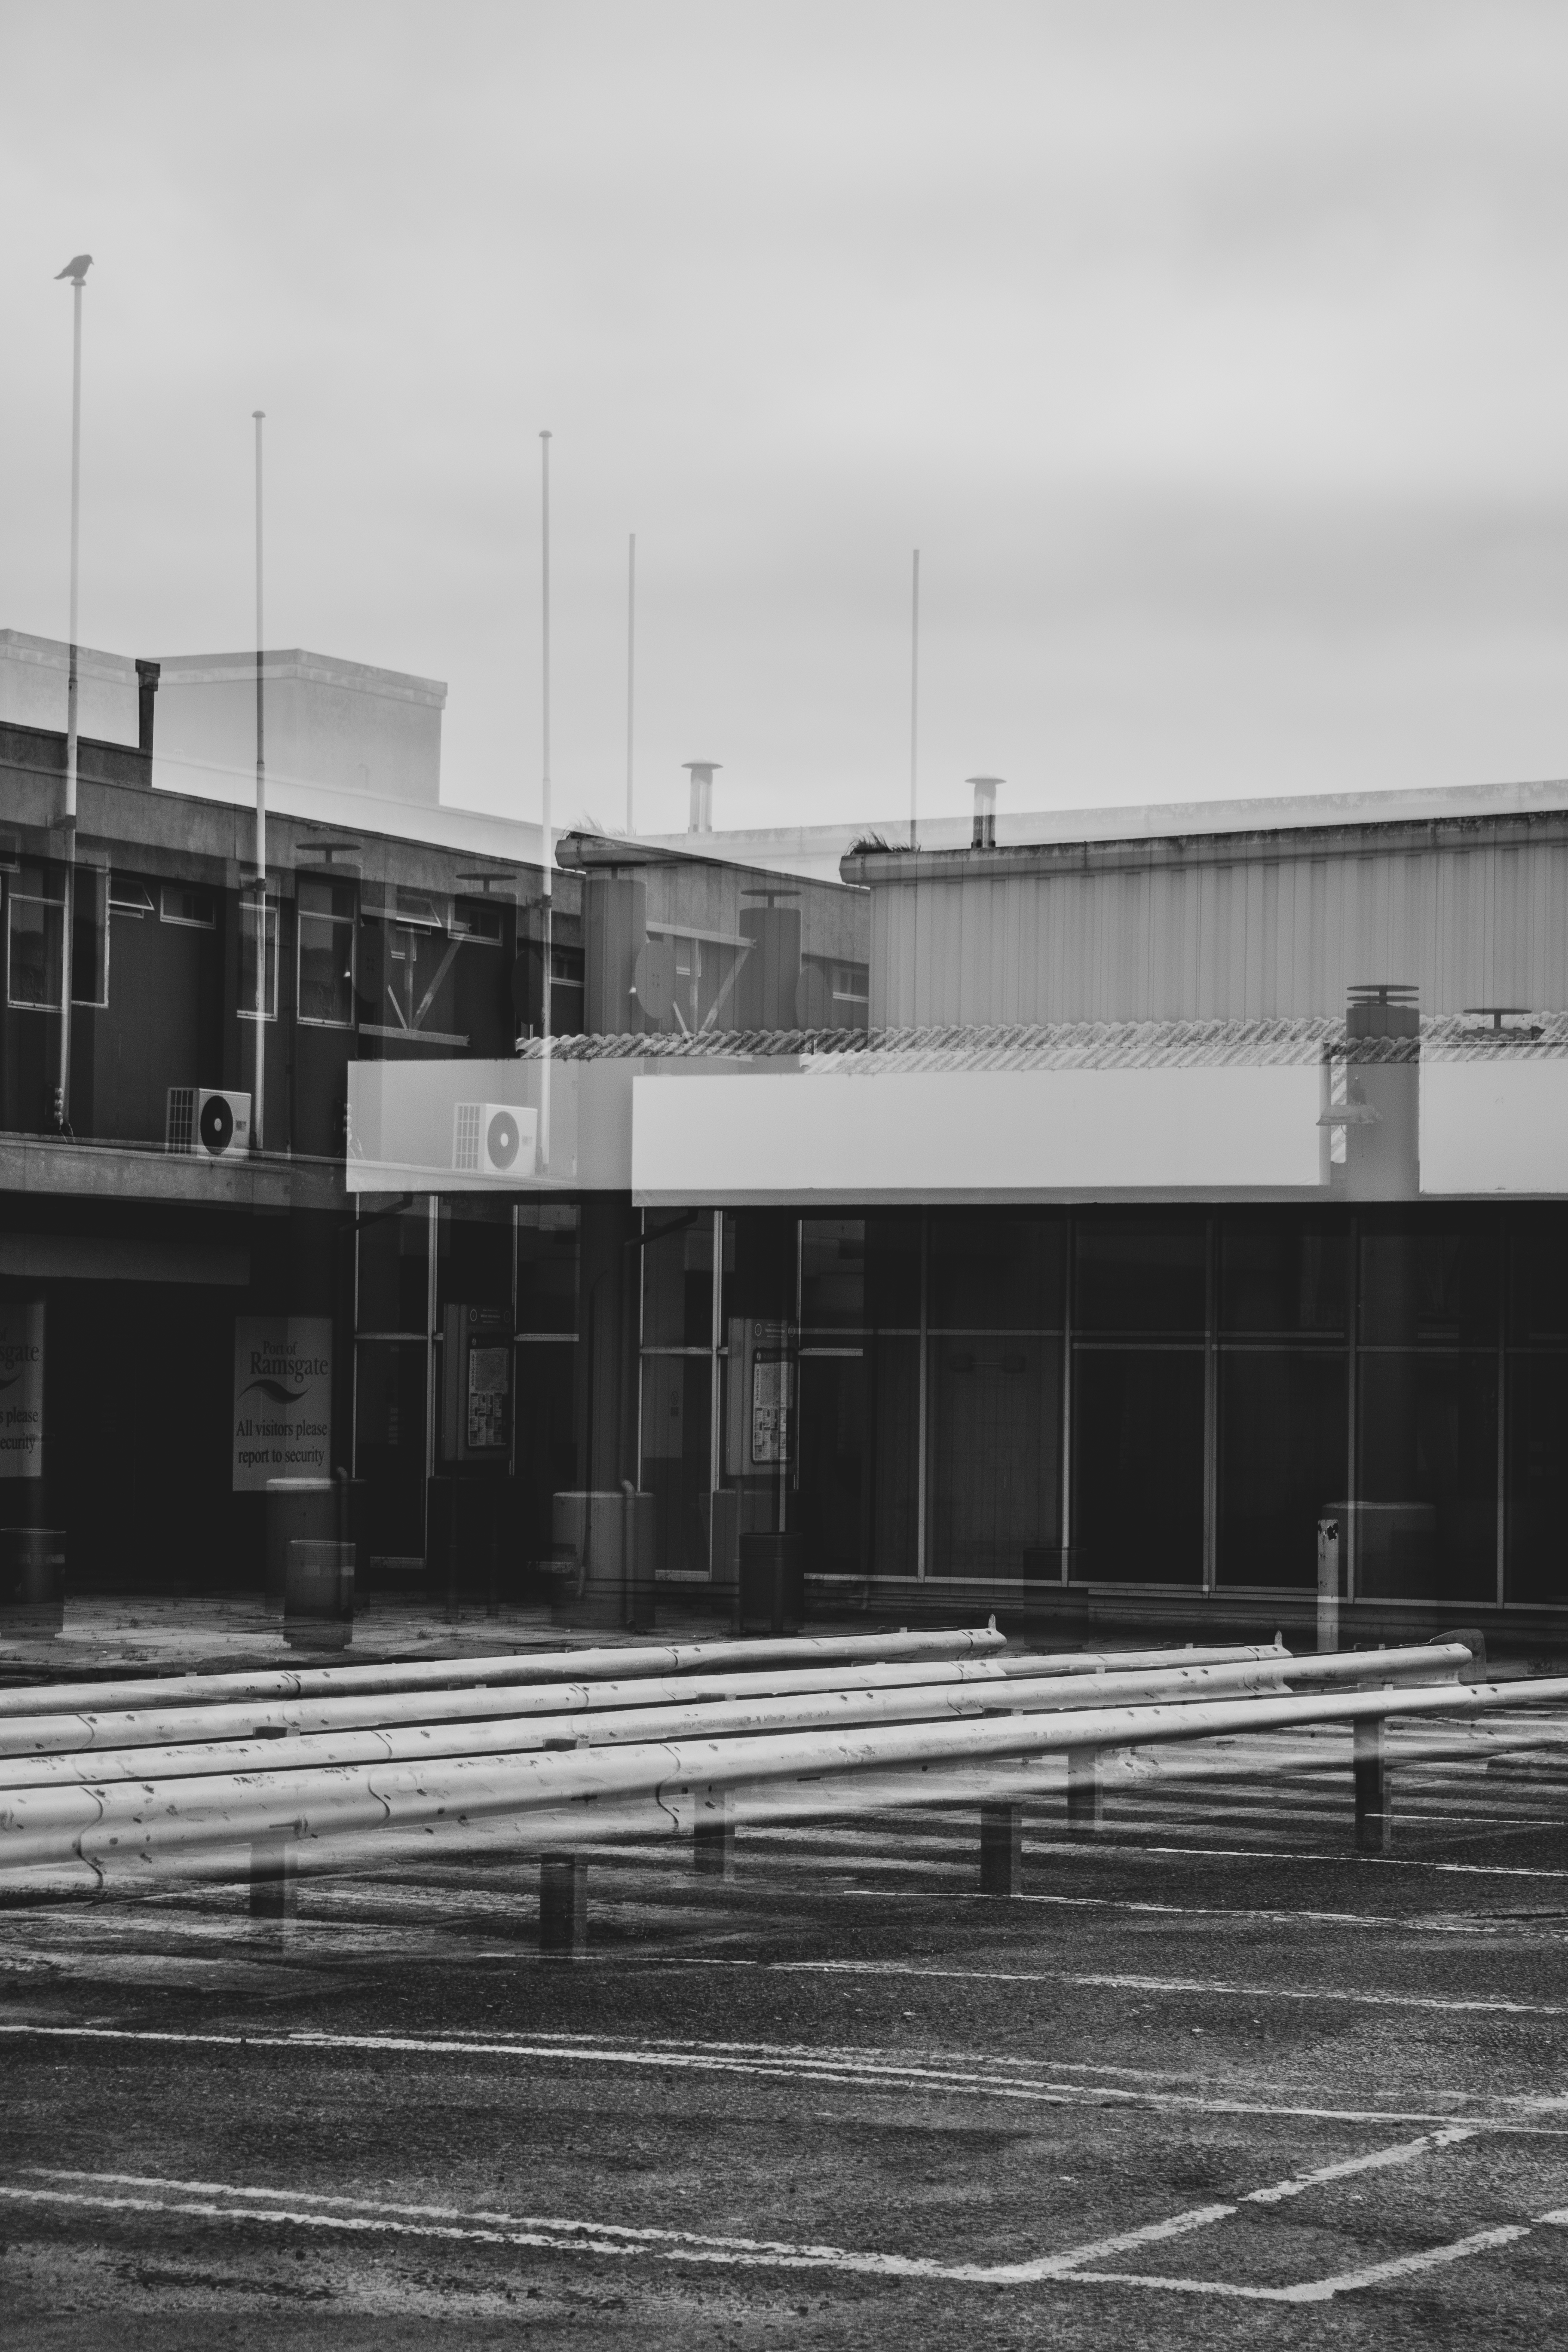
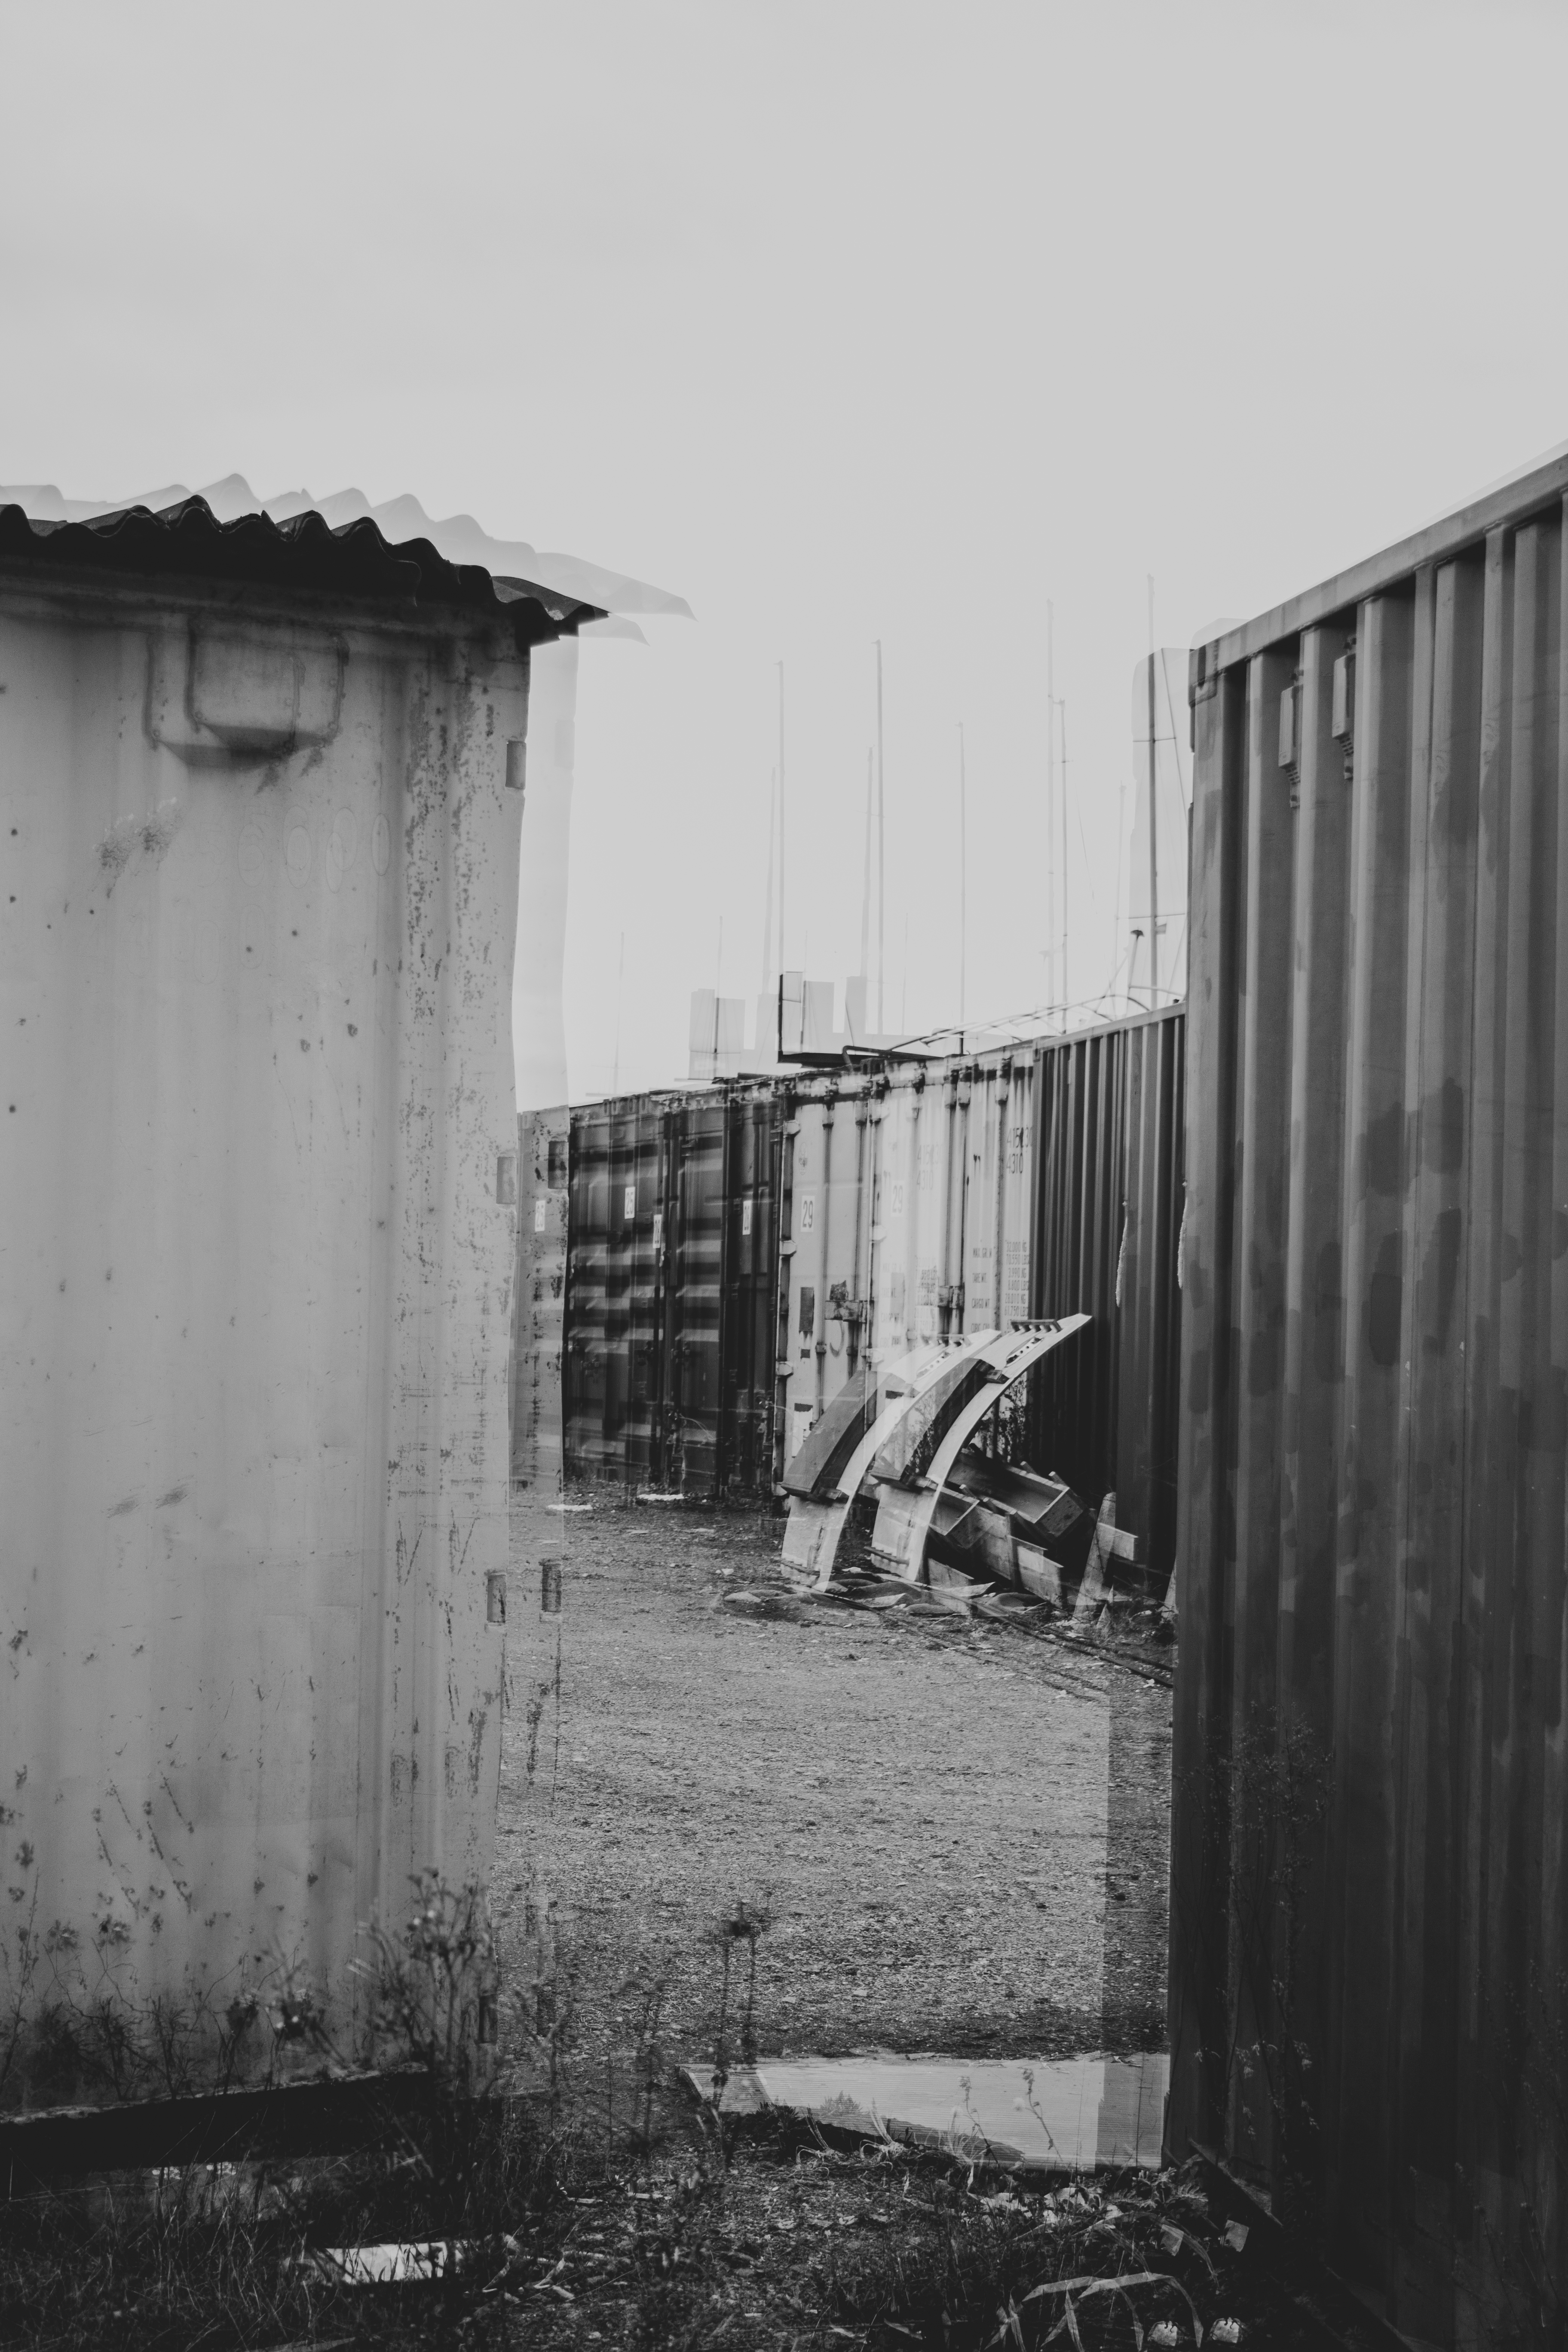
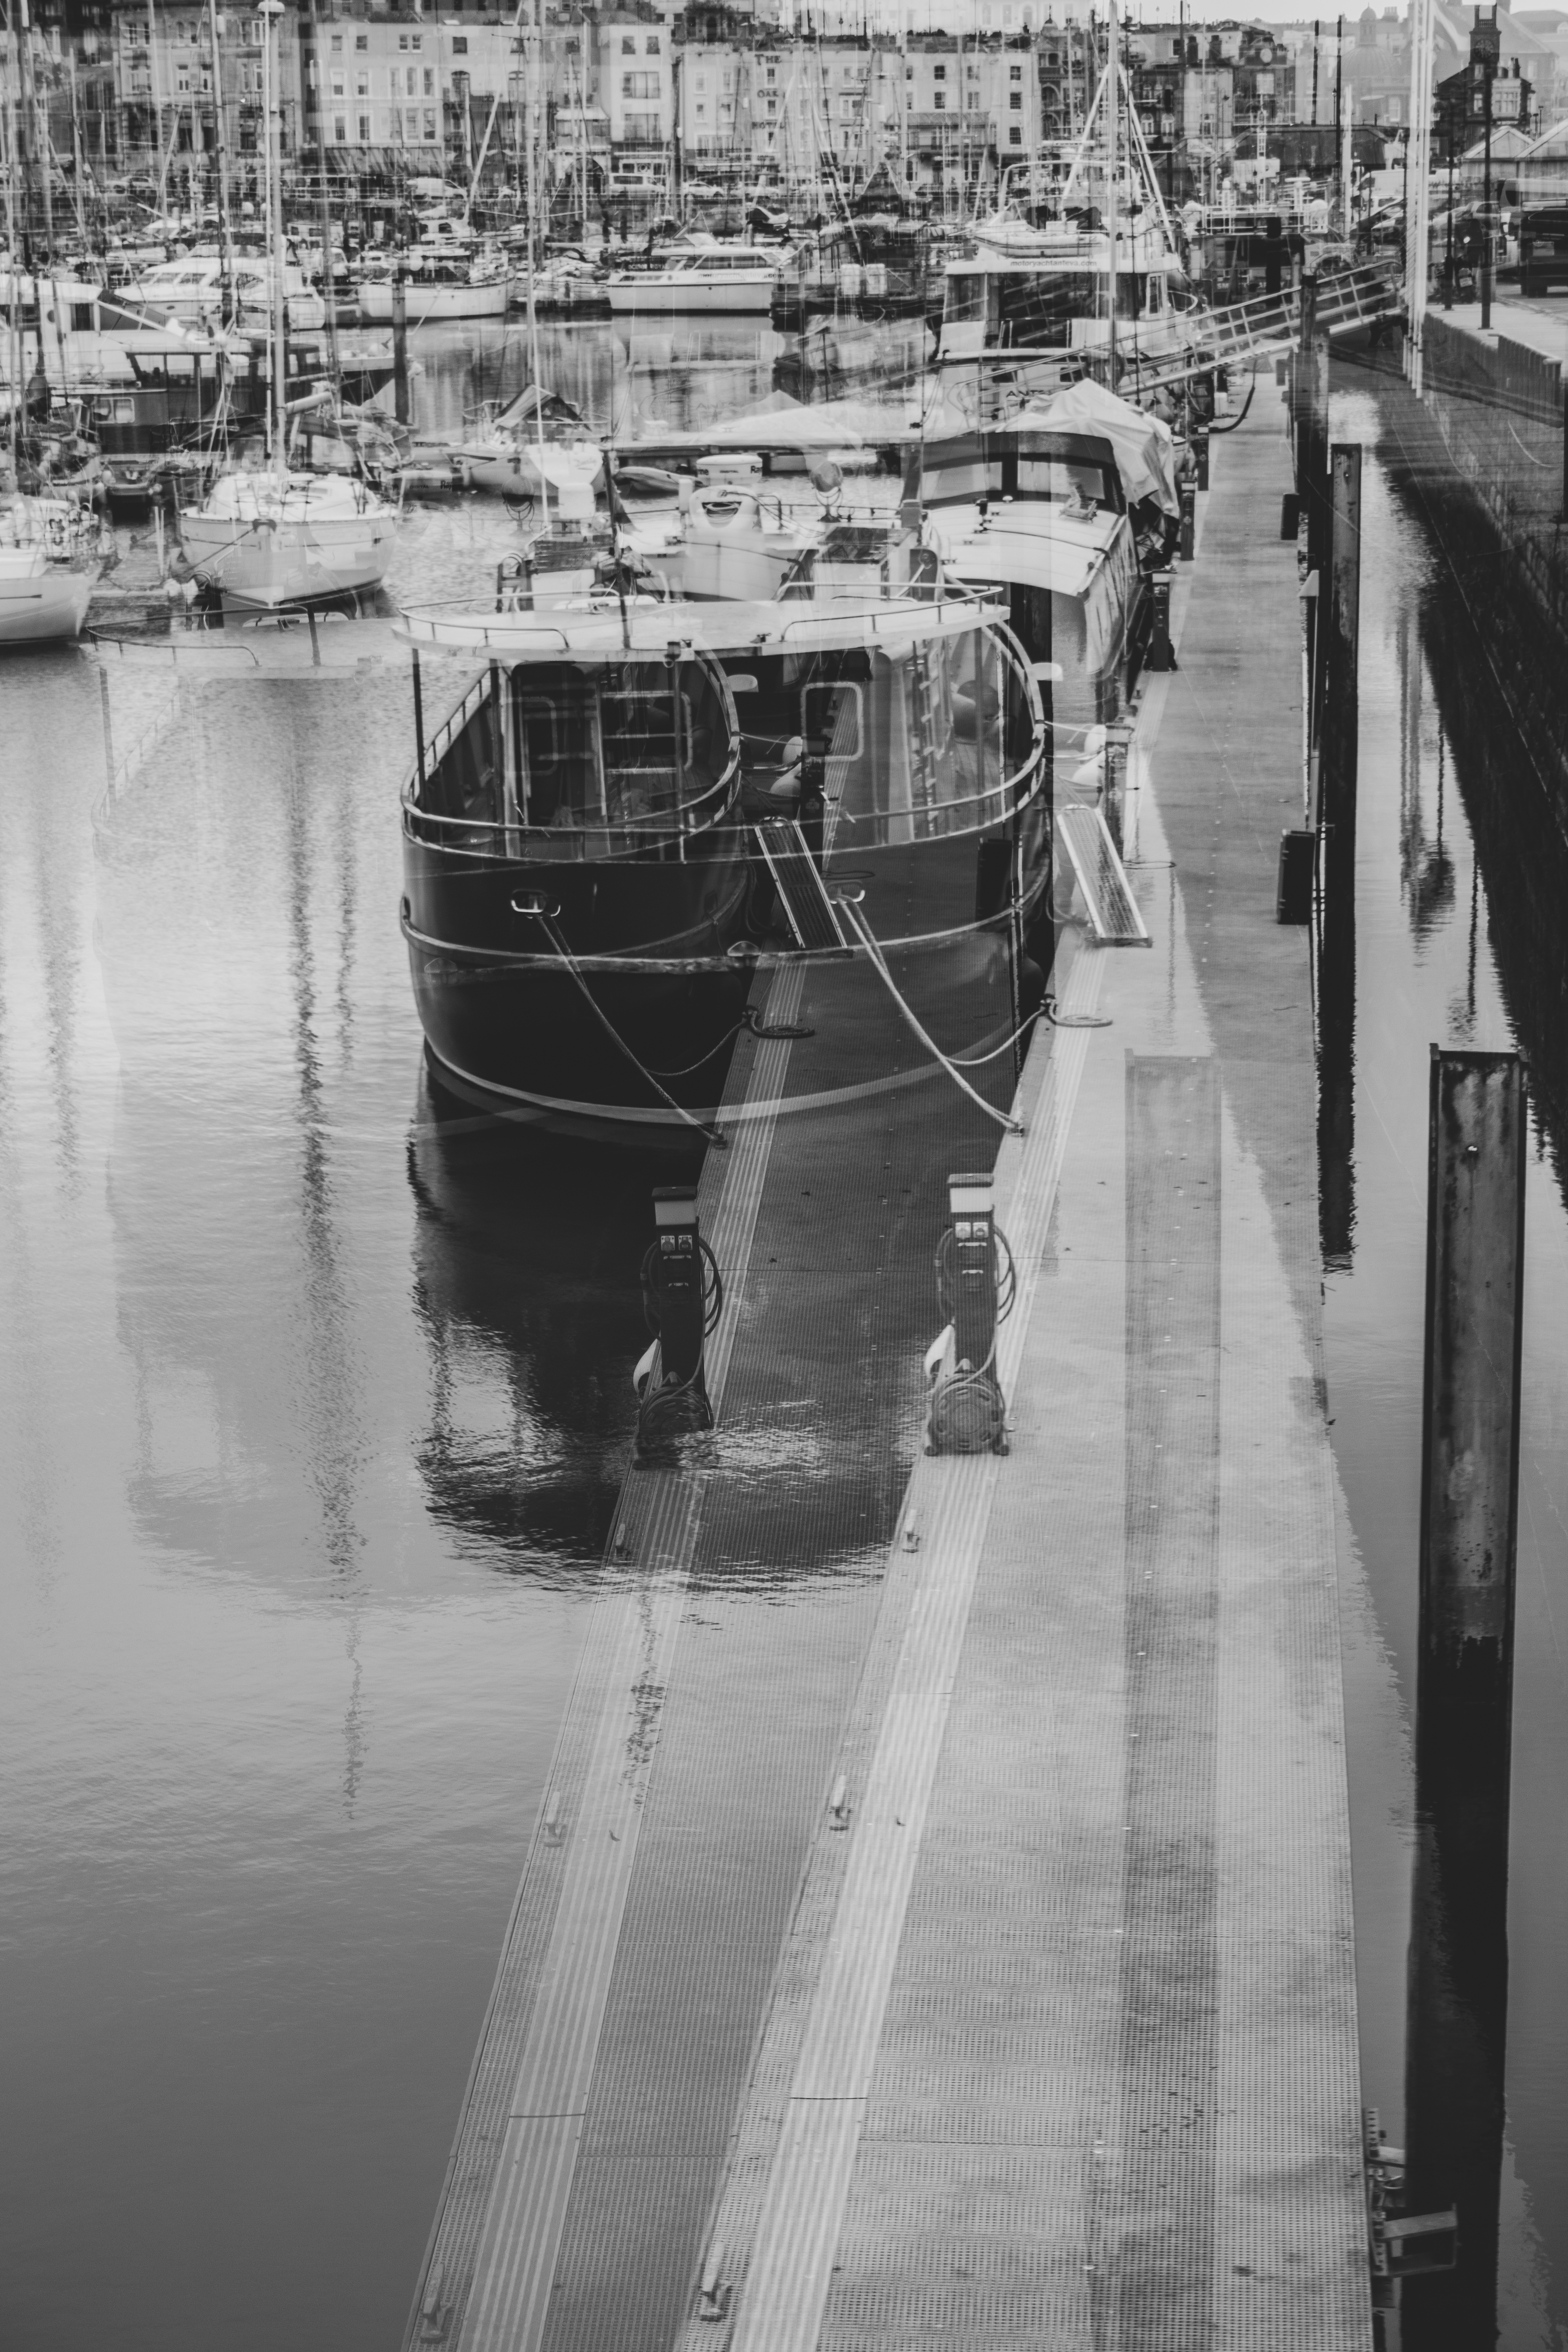
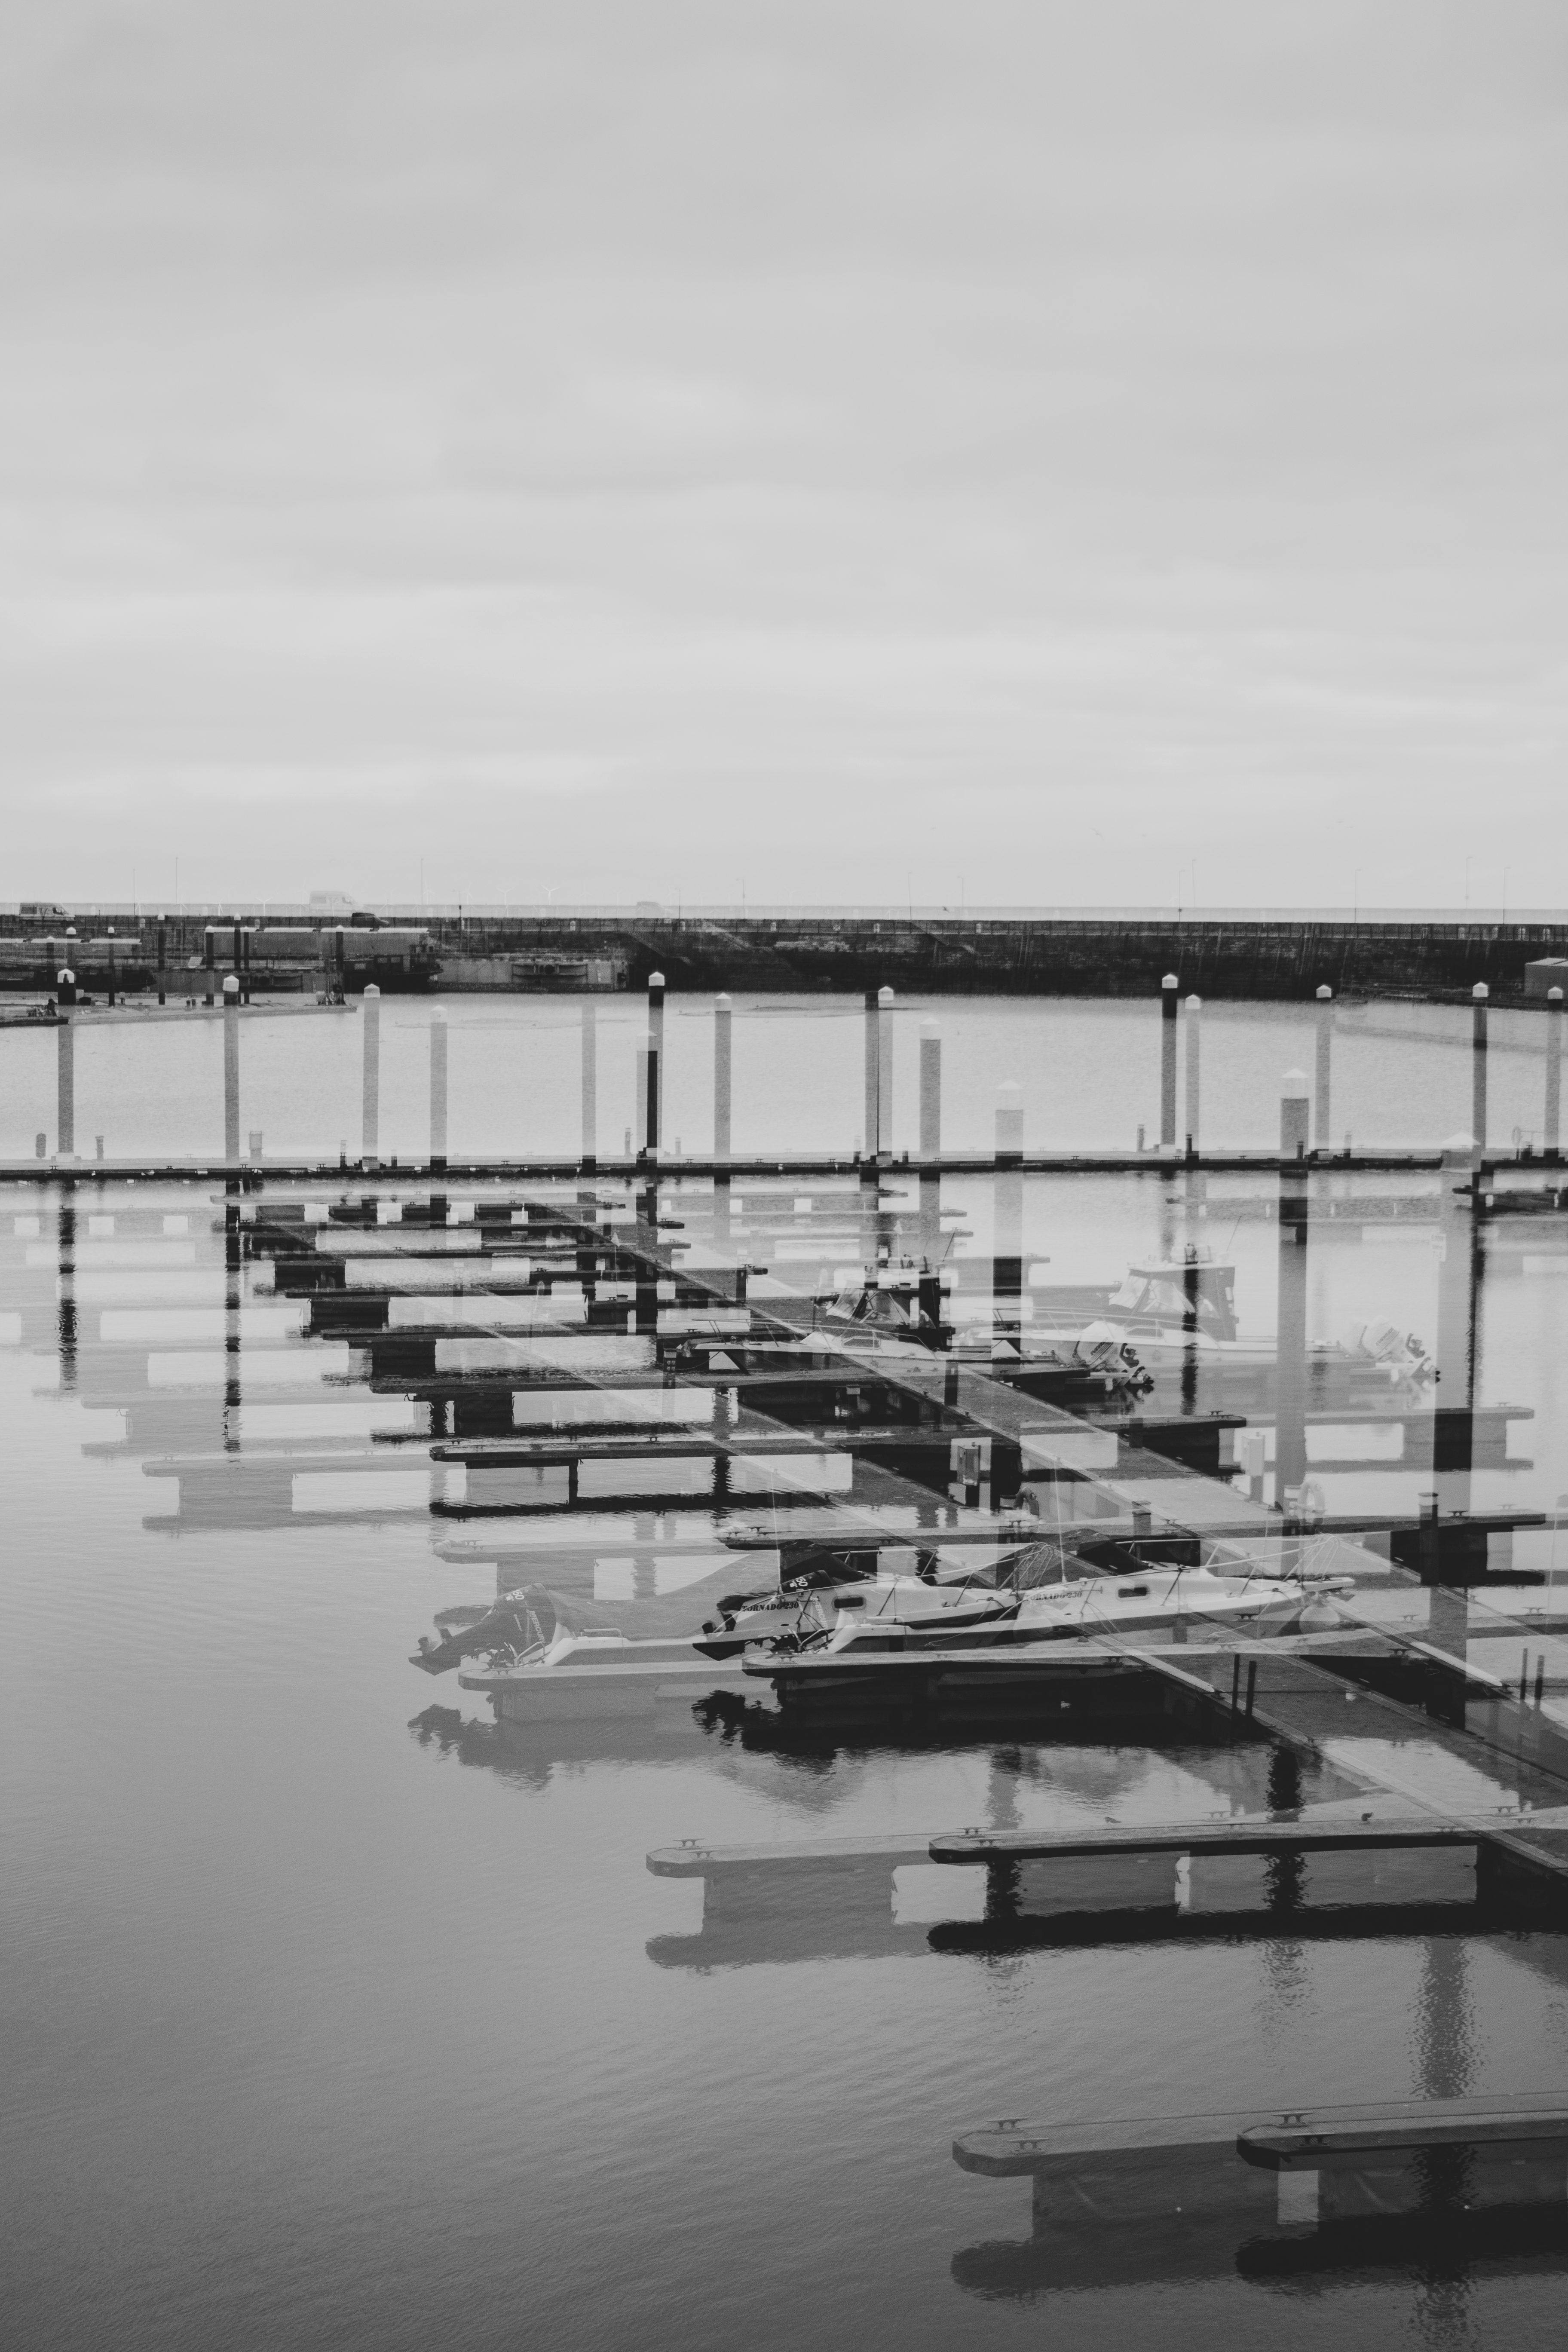
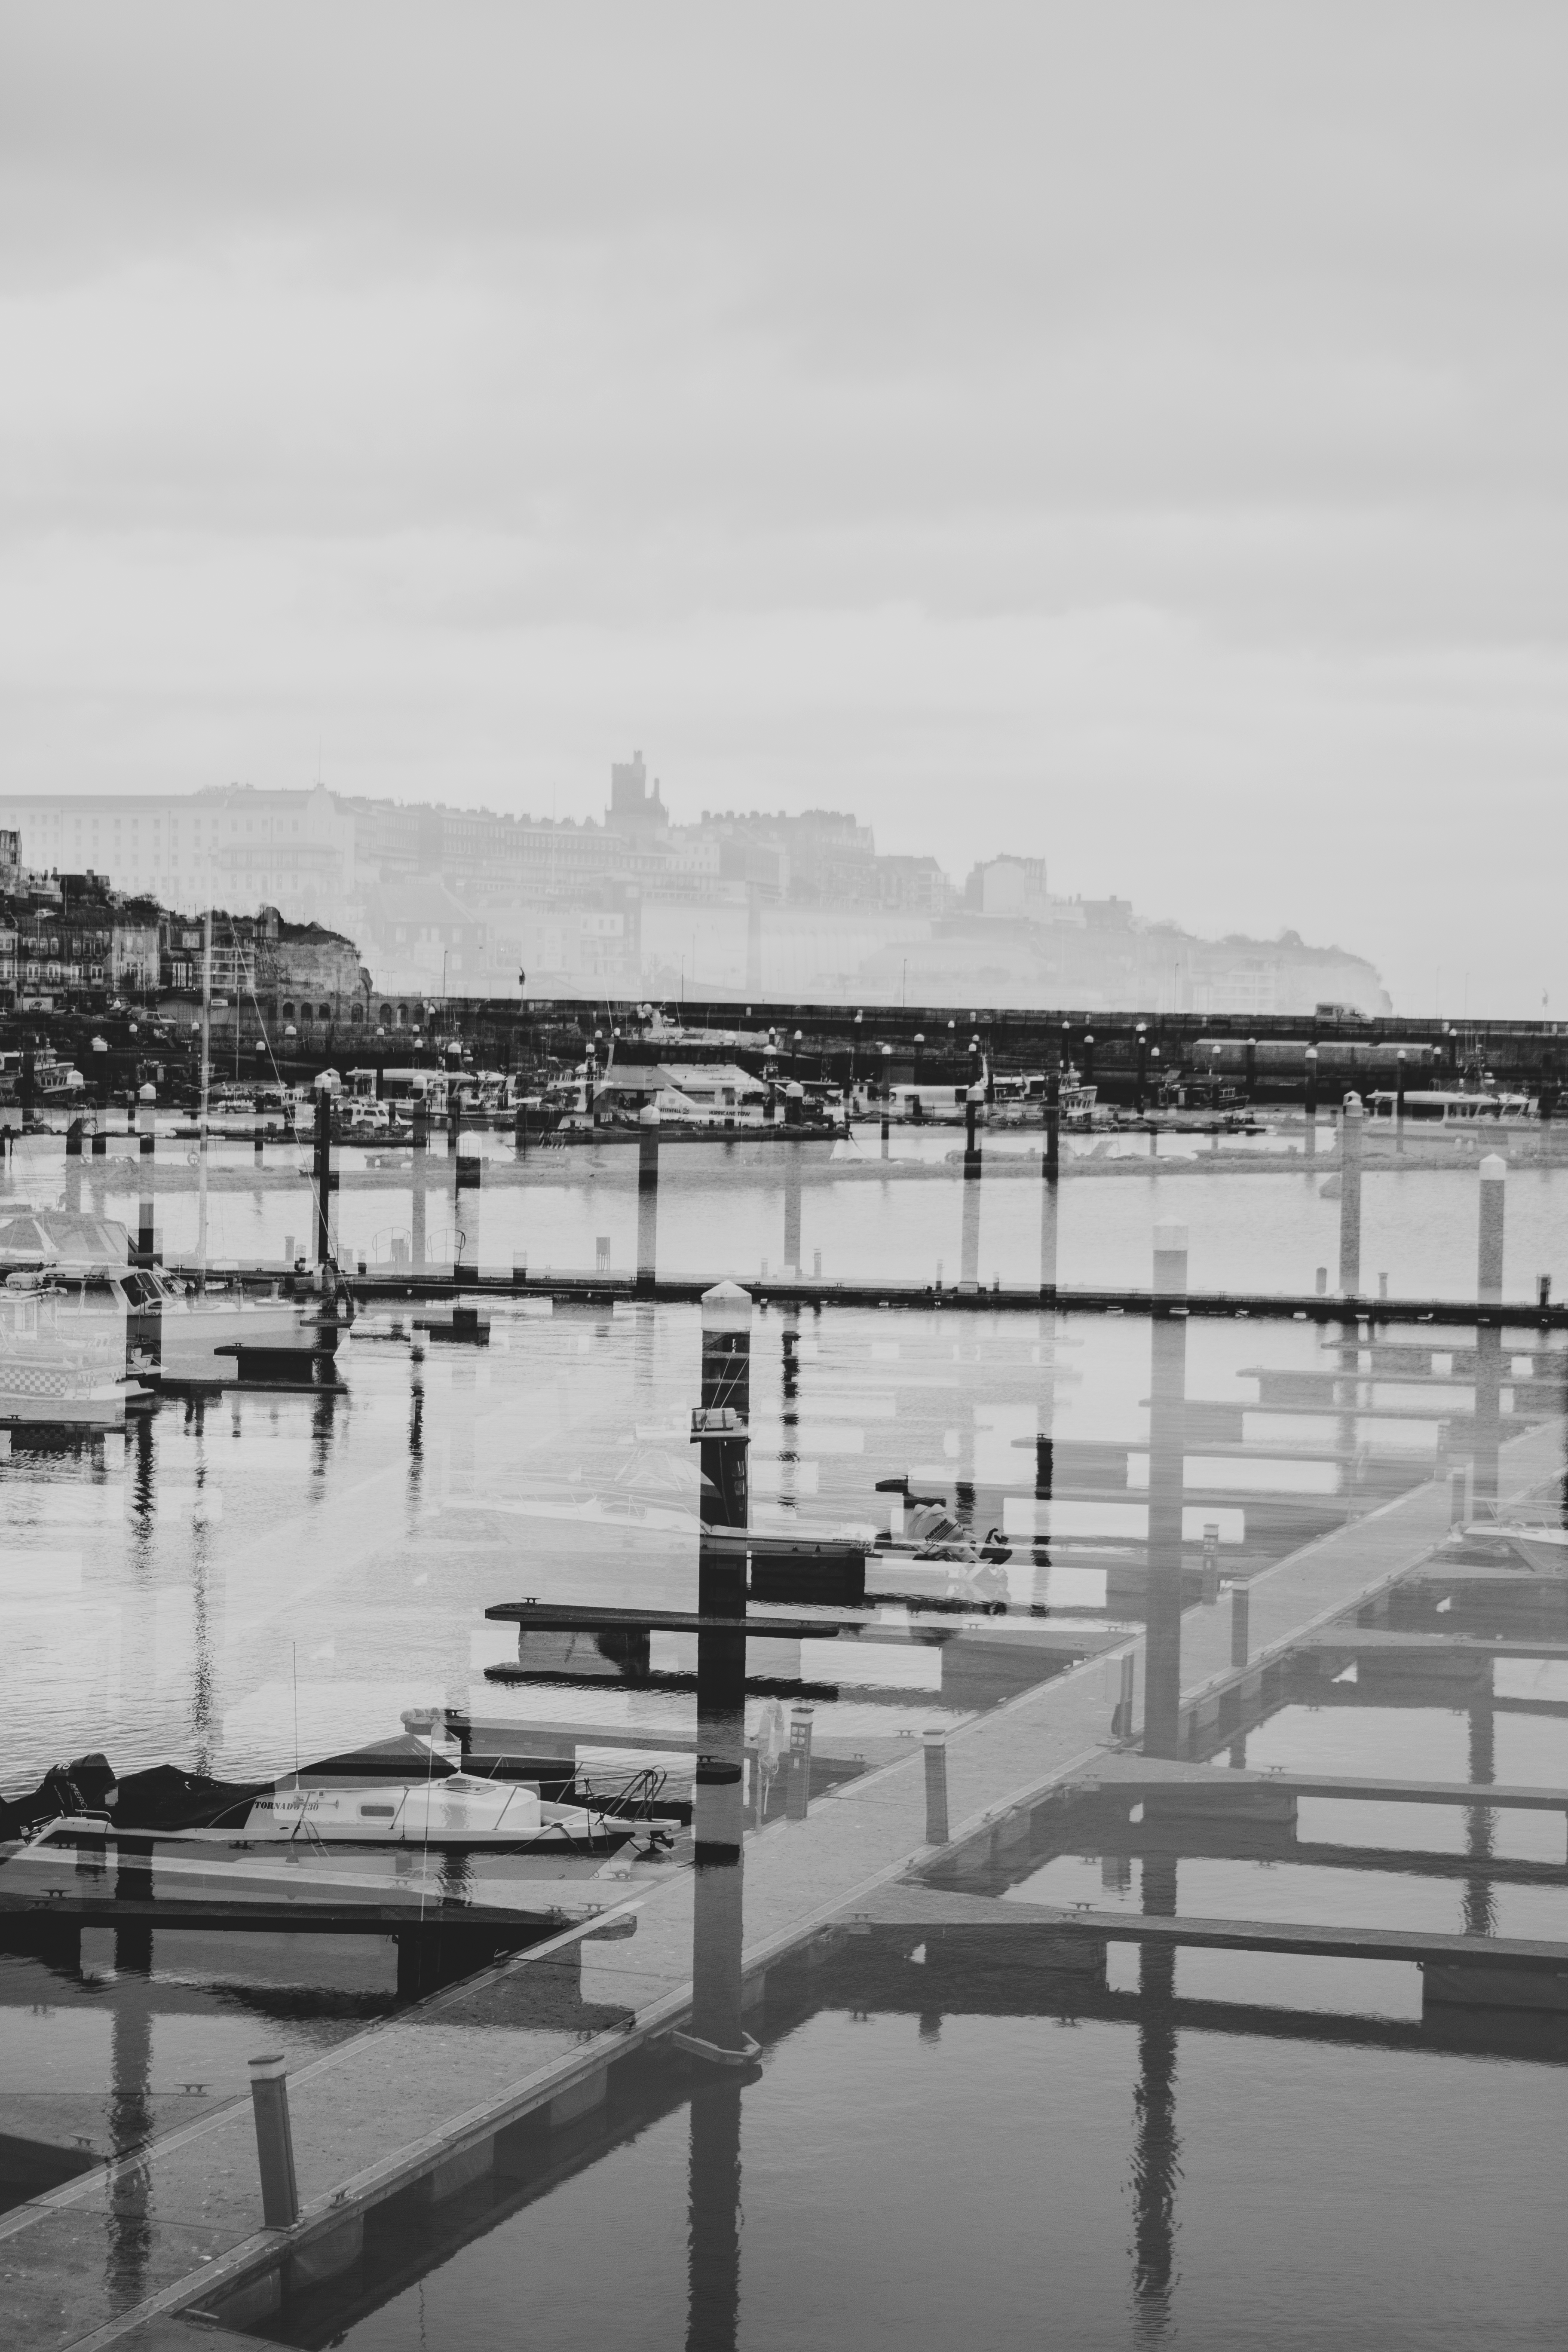
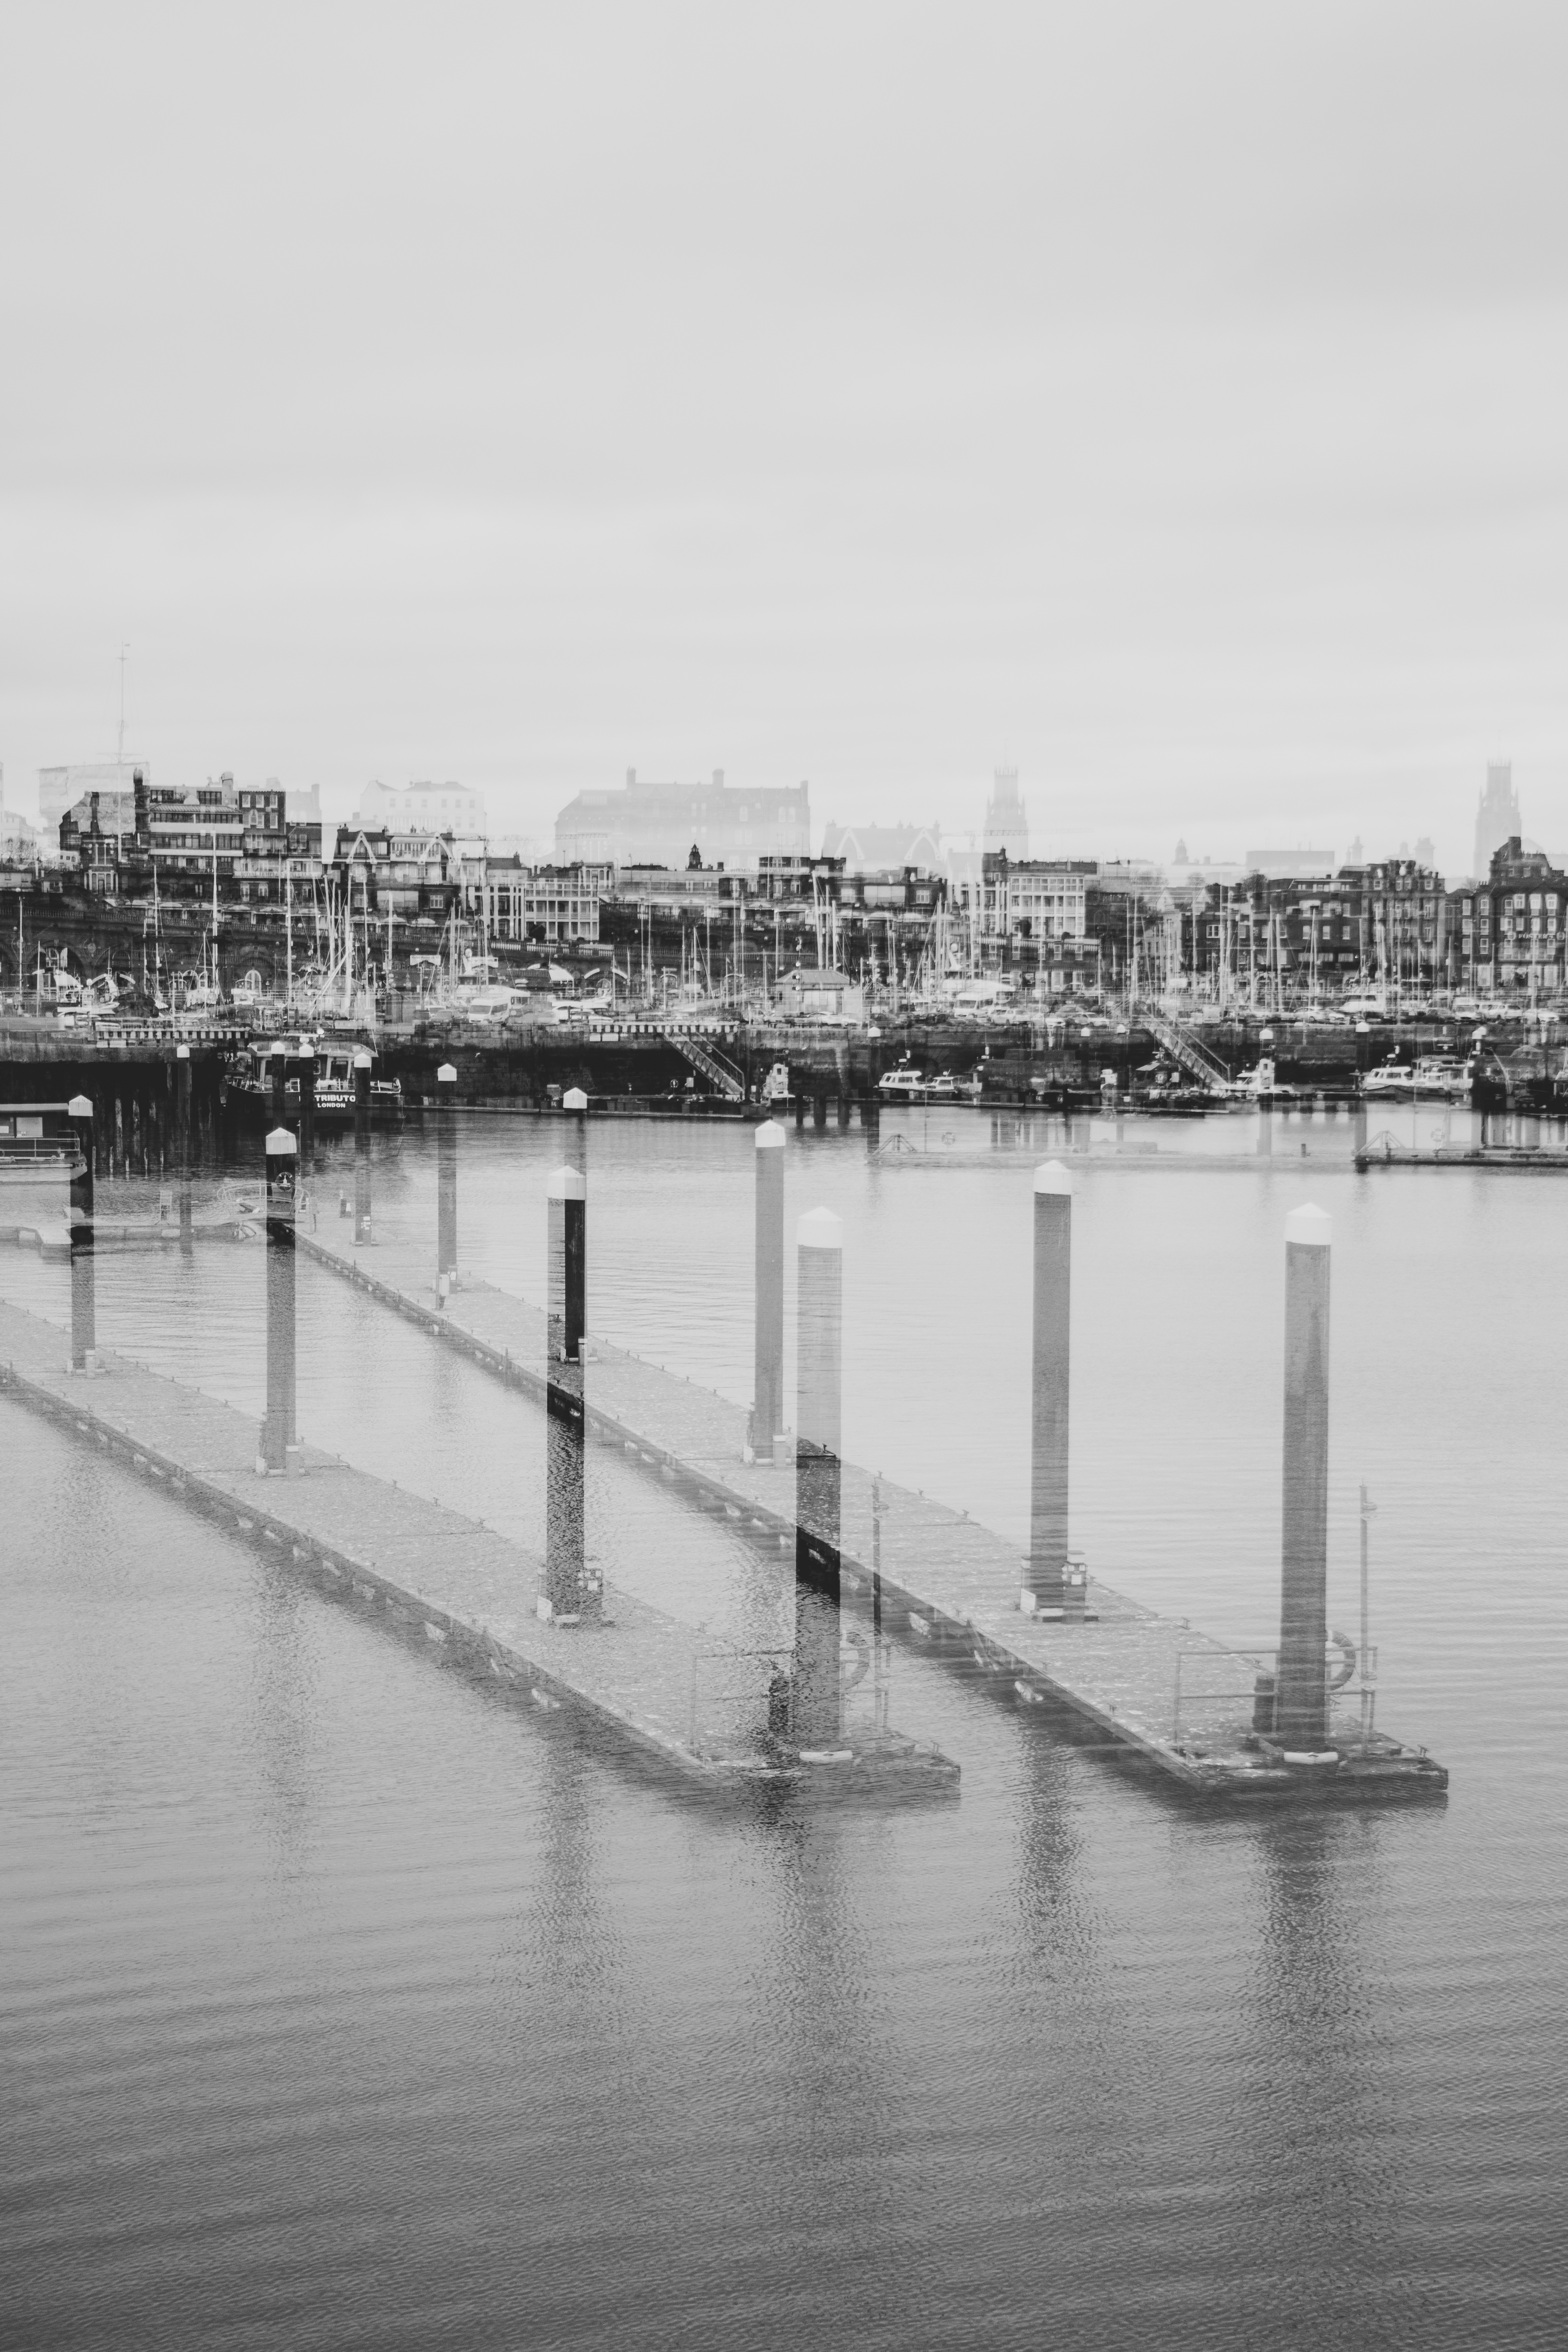
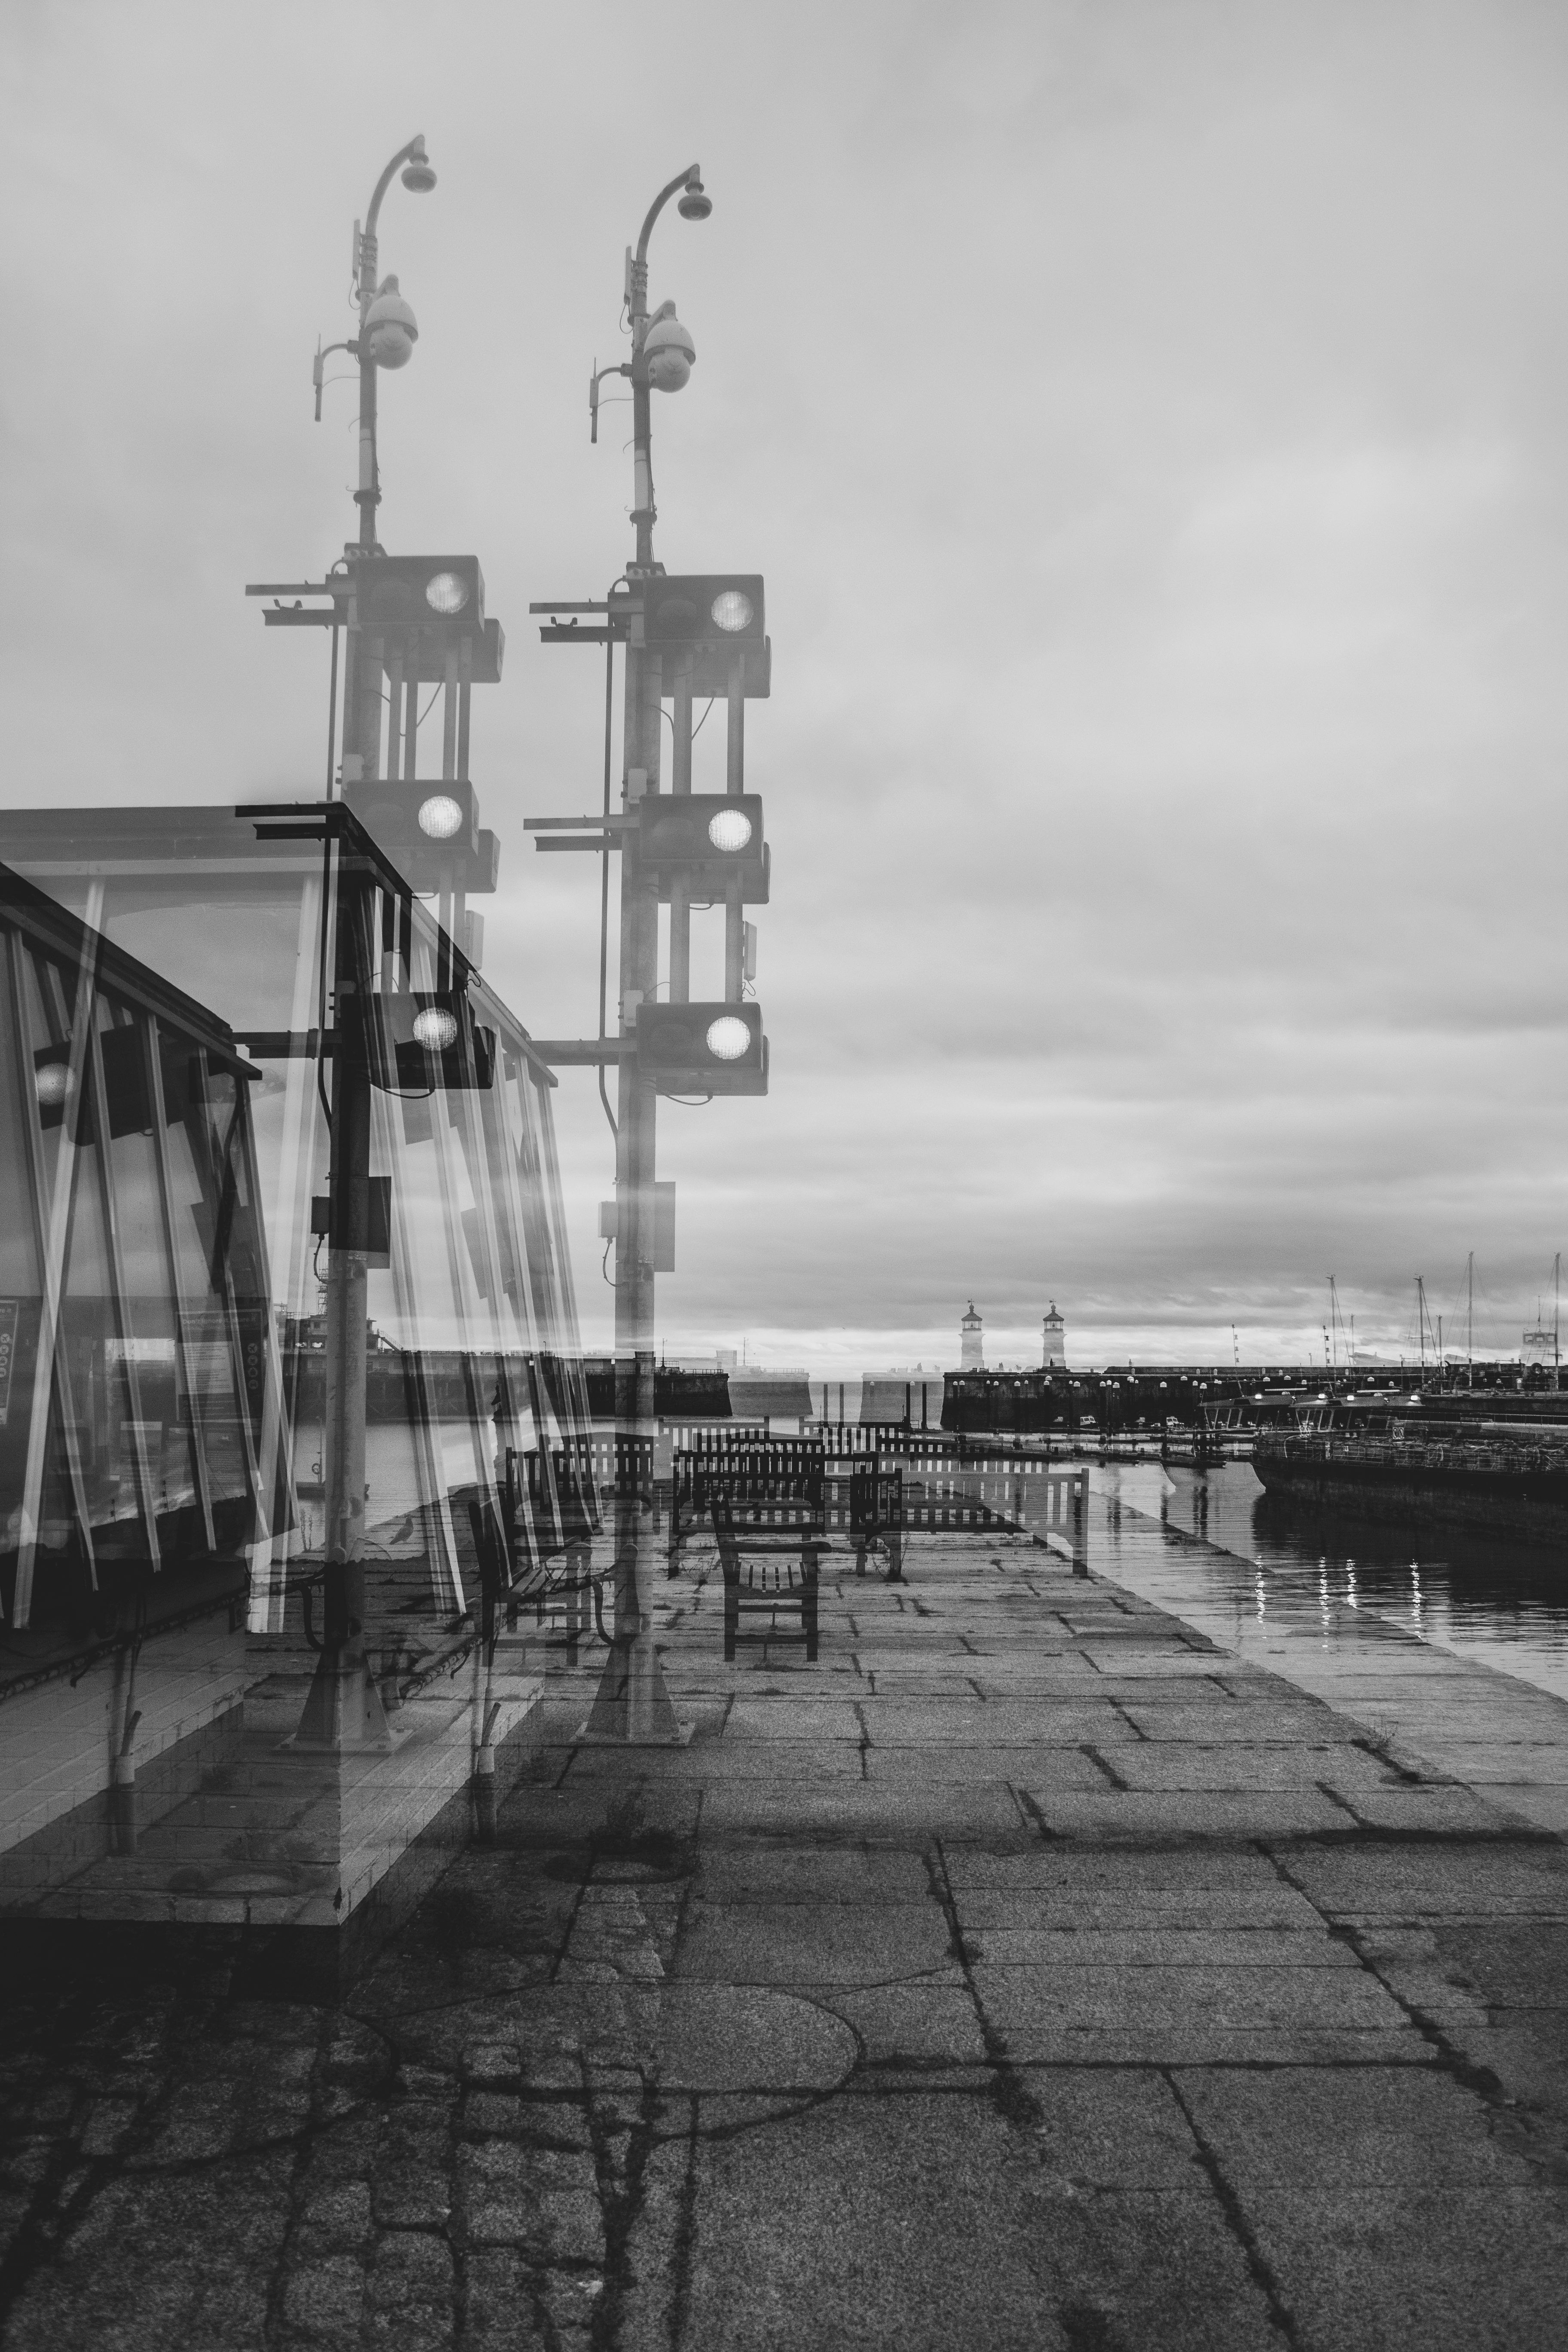
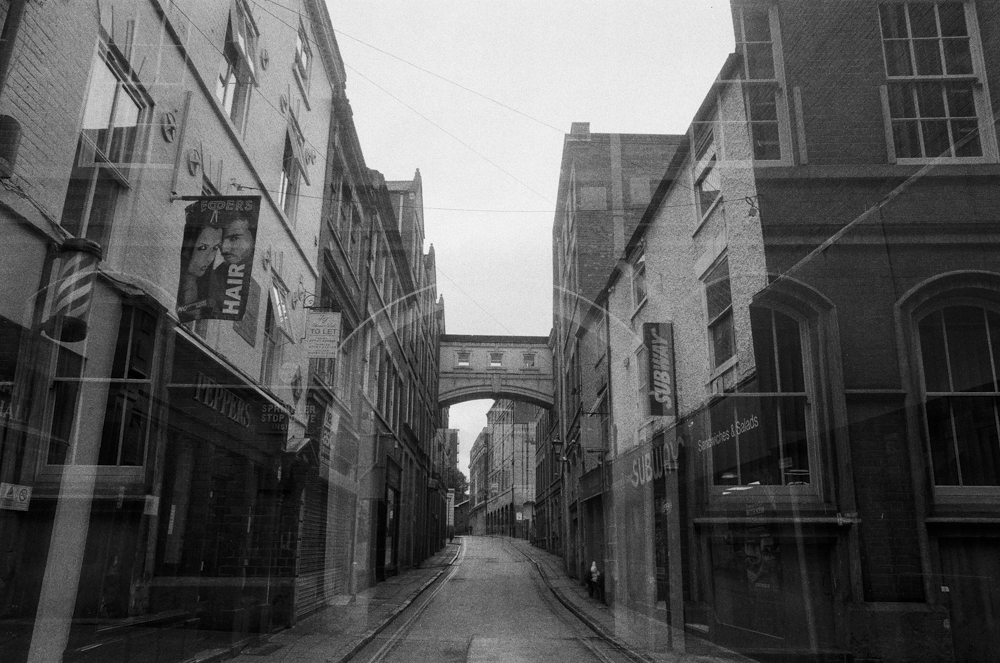
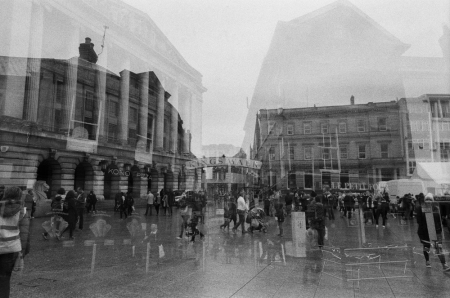
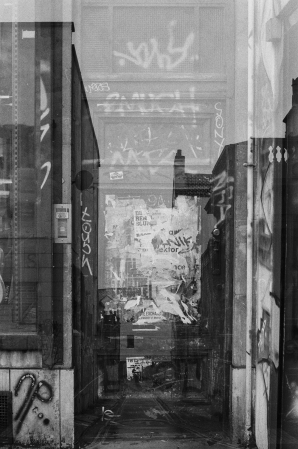
As a result of wanting to take portrait images, but not having actually practised the technique, I decided to go outside and practise in my local area. I could still photograph people in my pictures, but the backs of them (strangers), and I got a lot of inspiration from Martin Dietrich. I want to go to a location and wait for the perfect moment to take the photos.
LOCATION
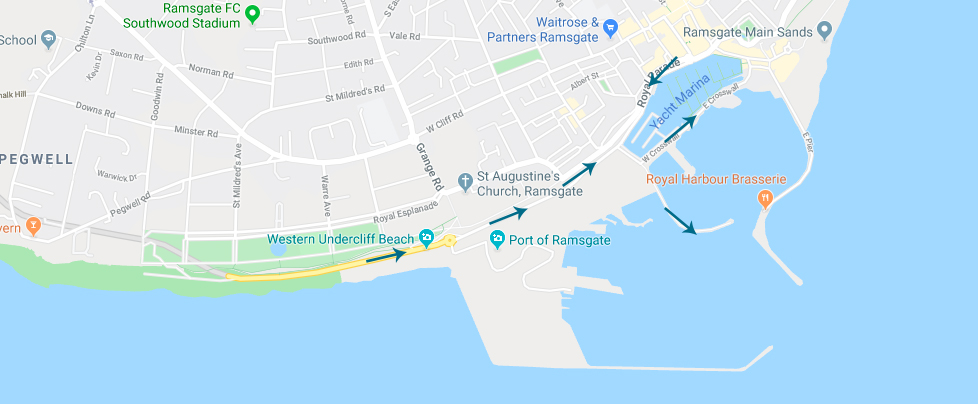
I thought interesting locations that are related to me and close by. For this experimental/practise shoot, I’m starting at Ramsgate Port and making my way down to the Harbour.
EQUIPMENT
I am going to be taking my 70D Canon camera with a standard lens, I wanted to take the 24mm lens, as it closest to what we see, to make the audience feel they are looking through my eyes. So for another shoot, I will hire that lens out from the kit room.
Another part is the setting up of the double exposure, I have research and look at what different settings there are, and I like additive the most. It gives a double exposure look of film but also matches the best to what I see. Some of the others were too strong and not enough opaqueness.
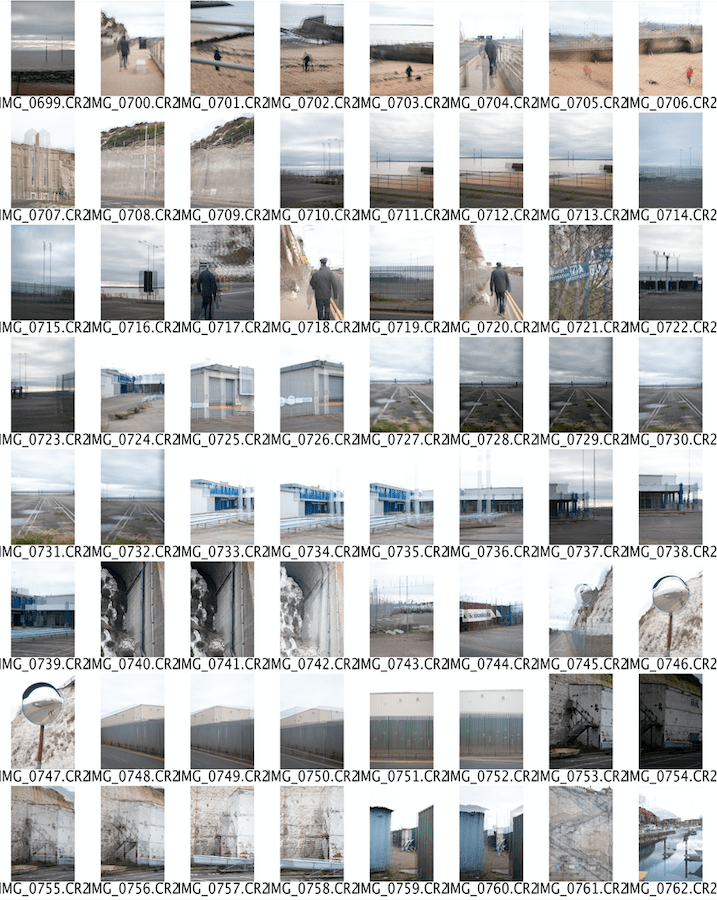
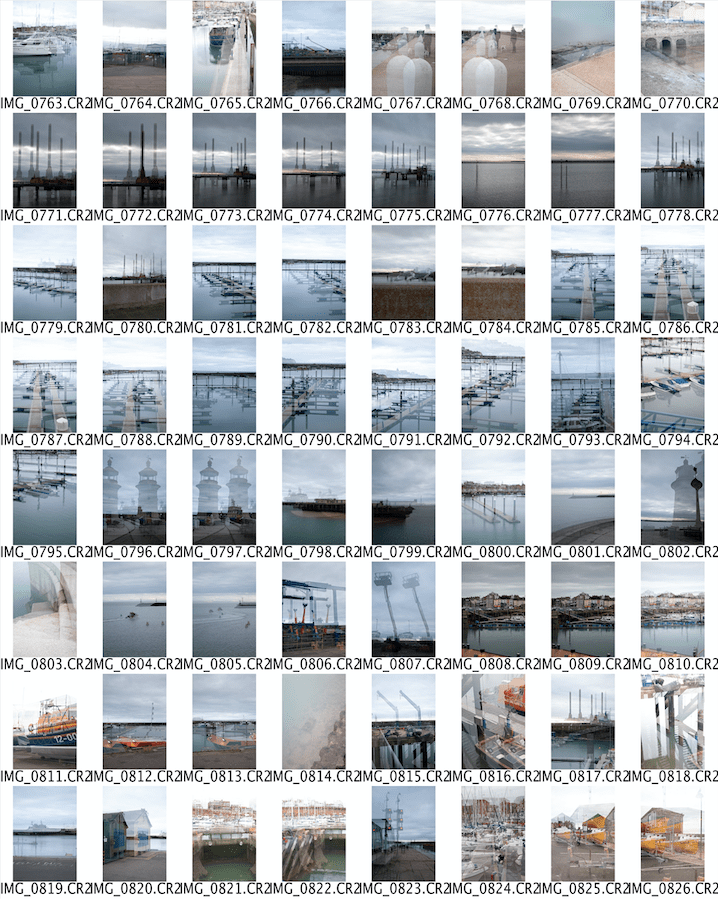
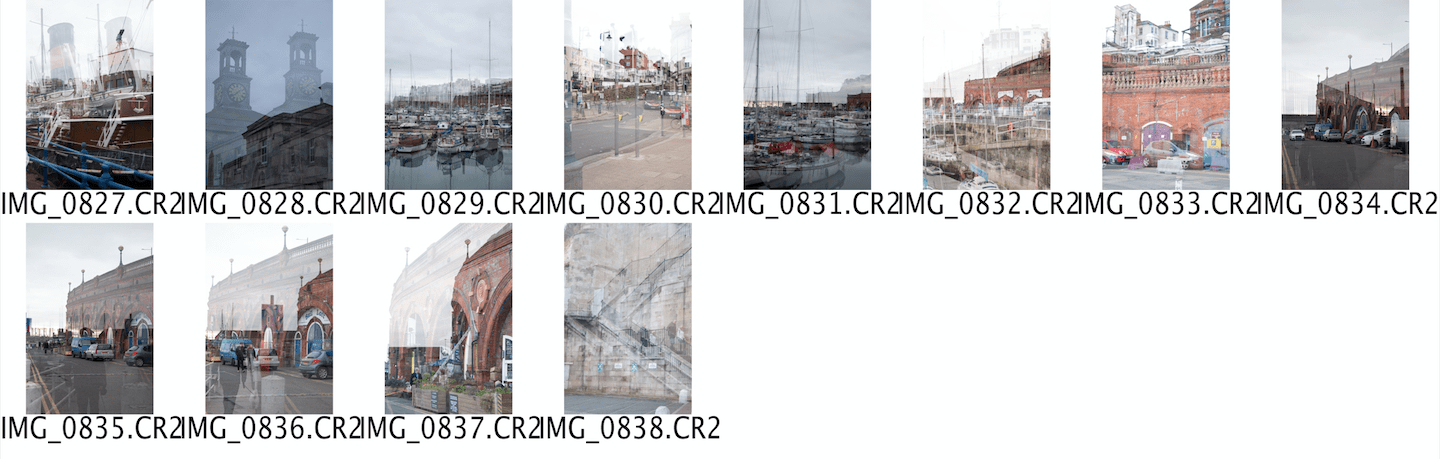
CONTACT SHEET
SCREENSHOTS OF EDITING
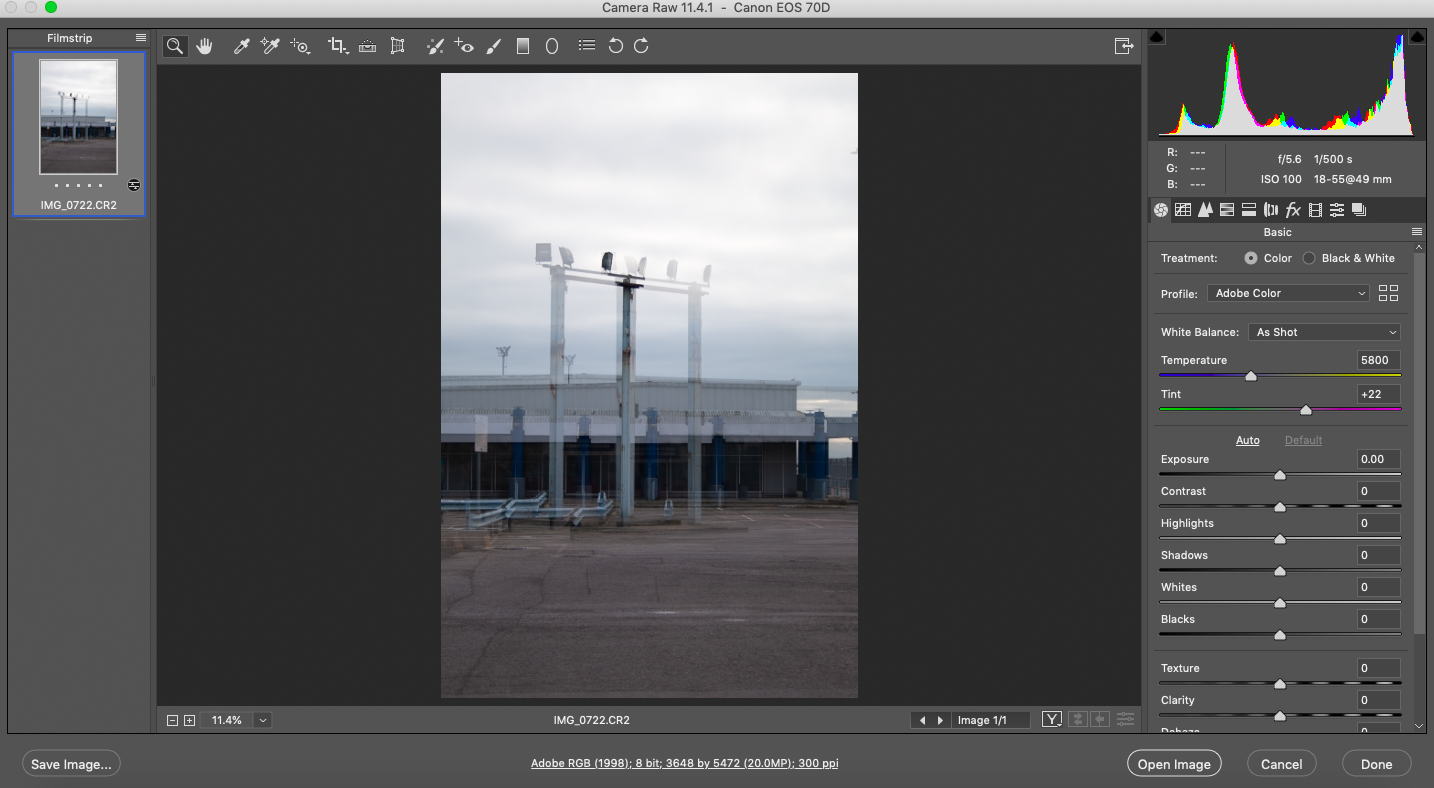
I opened up one of my images in Adobe Raw Editing
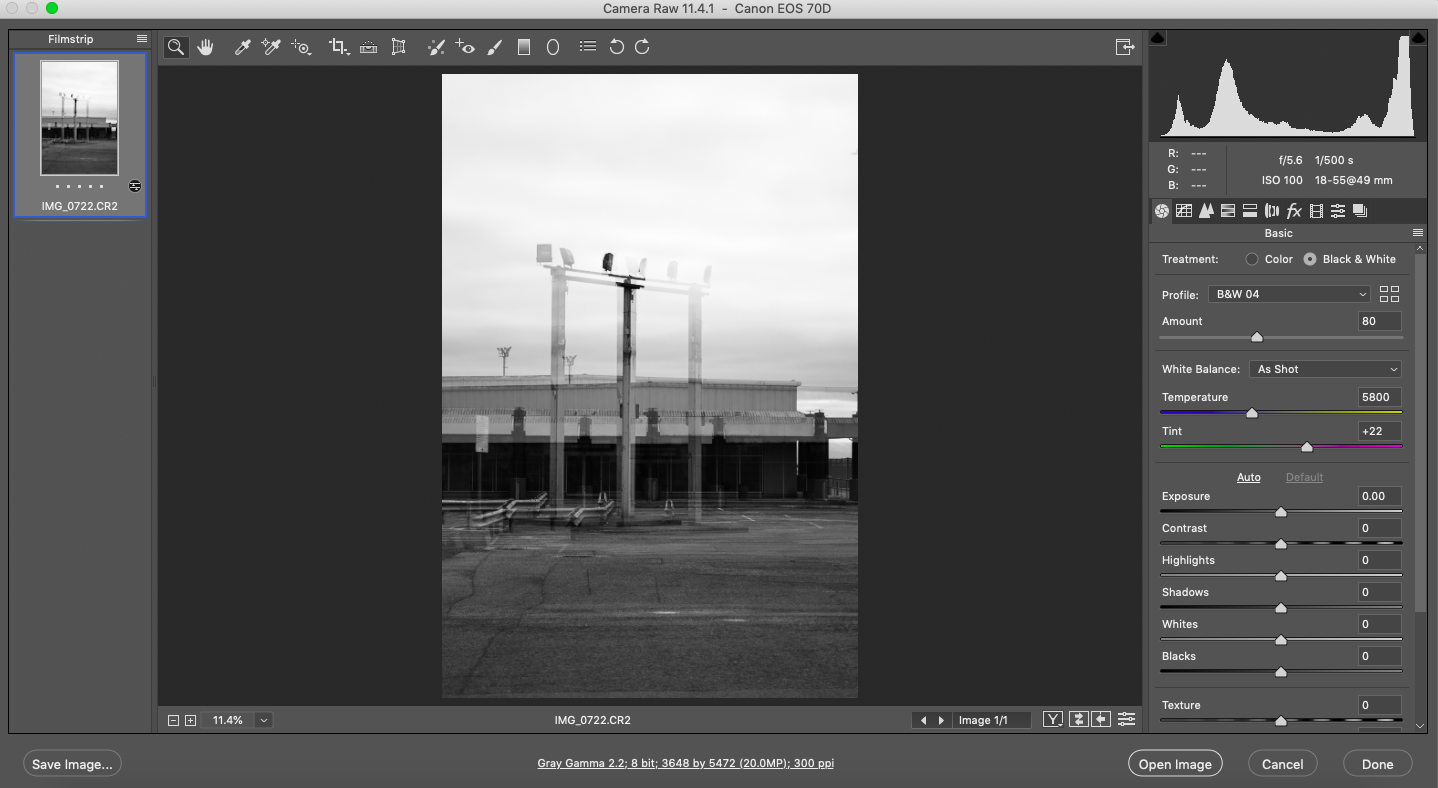
I knew these images would look better in black & white; however, it was getting the right tonal contrast. I first tried the traditional black & white option at the top.
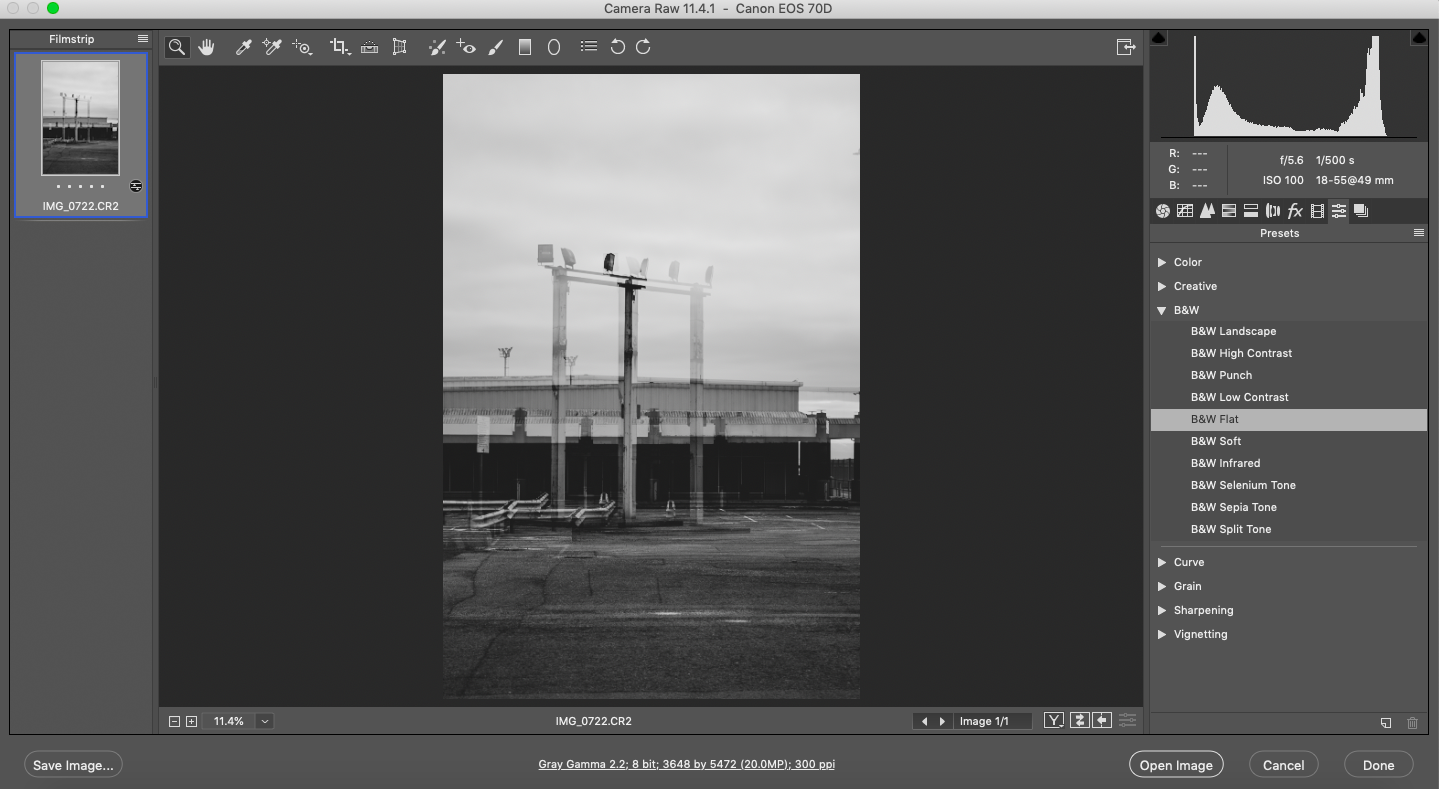
Then I tried different presets out that were available. I found that B&W Flat was that best one. It had gentle tones and brought out the double exposure the best.
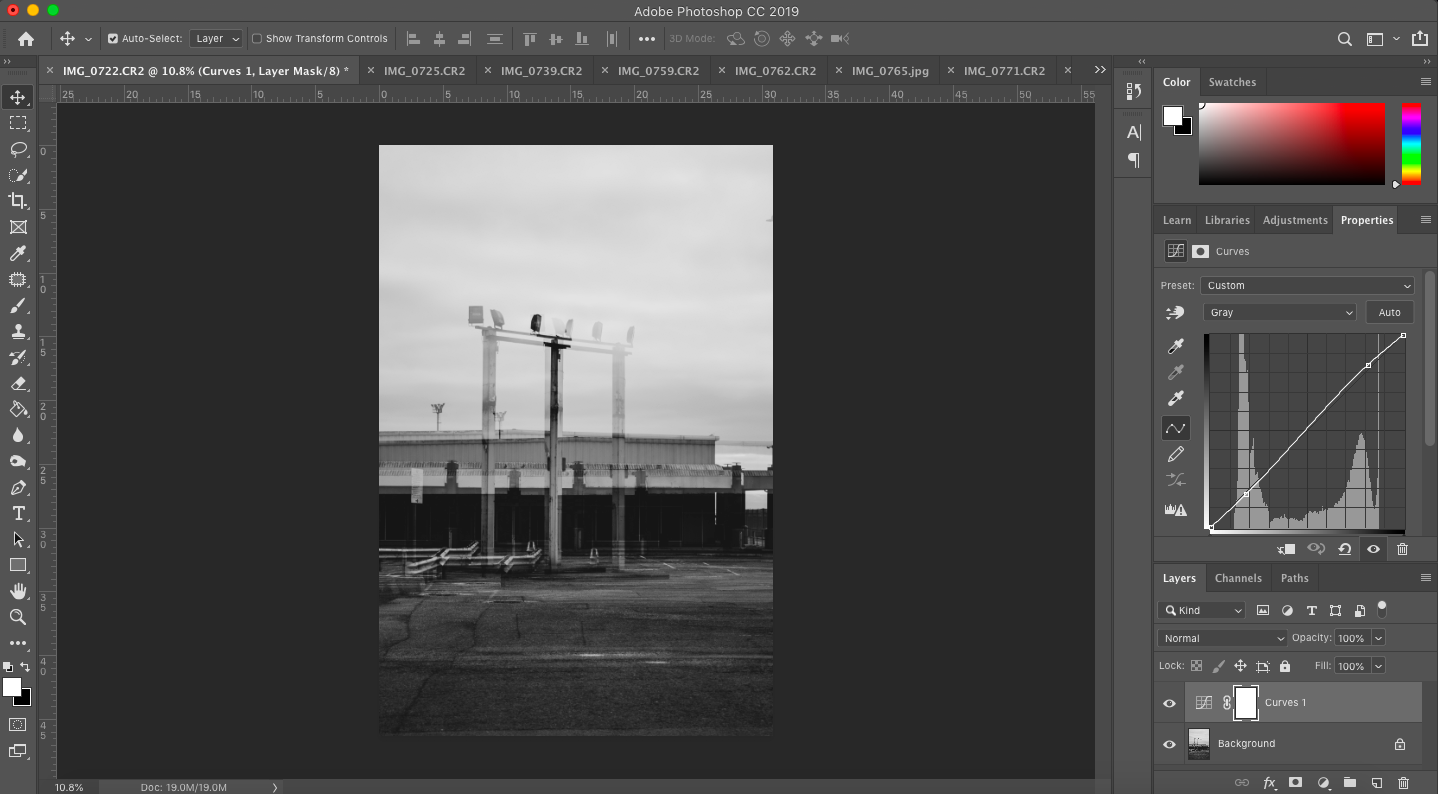
Next in Photoshop, I open curves and created a ‘s’ shape to add a little more contrast to the image.
BEFORE
AFTER
RESULTS
I didn’t know what to expect, but overall, I feel that I have produced some interesting images. At first, it was hard to create what I see with particular objects, but the location of choice was perfect, and also was the weather conditions. It was a cloudy dry day, and this white cloud background is the ideal conditions for double exposure. It almost acts like a white studio background.
I would say the only negative was that after doing each double exposure, I had to wait about 5-10 seconds for the camera to process (busy) it. Which was fine, but I couldn’t capture the people walking past fast enough, to create what I see.
Overall, I think the key to how I see things, is by finding shapes and moving the camera subtly, just enough to create a double effect. Another thing was having a lighter clearer background work well.
I have the concept I want to do in mind, what is to show what I see through a photograph, in double exposure. But I have struggled with what to photograph. So below, I have several different ideas, that have been developed from research, but from my own identity and experiences. I have to think about will this idea allow me to complete before the deadline, will it enable me to produce 4-6 final images.
PLACES
While thinking of ideas, I thought, why not keep it simple and stick with my own life of my identity. So places came to mind, photographing locations, that means or have importance to me. One being where I live, Ramsgate. I have lots of places that would be photographically exciting but with also fit in with the brief of identity. I feel that looking at Martin Dietrich work, he has inspired me to have this idea.
PORTRAITS
Again while researching, I found John Deakin, I love his images, from the location, lighting, positioning and emotion. As I got inspired by this, I possibly could photograph people that are close to me, or random.
The location of these images are plain, however, has texture and a bit of life to the background. So I would look at places that don’t have a busy background. The lighting is soft and clean. By my judging, I think Deakin took all of these images by a window, so using natural sunlight lighting. Also, the subjects are all looking at the light, not directly into the camera, which I like. All of the sitters look natural and comfortable as if they are not posed at all. I don’t want my subject to look posed; I would want them to look natural.
TASK THAT I STRUGGLE WITH
Many everyday tasks are typical or comfortable for some people, but for me, they have become challenging.
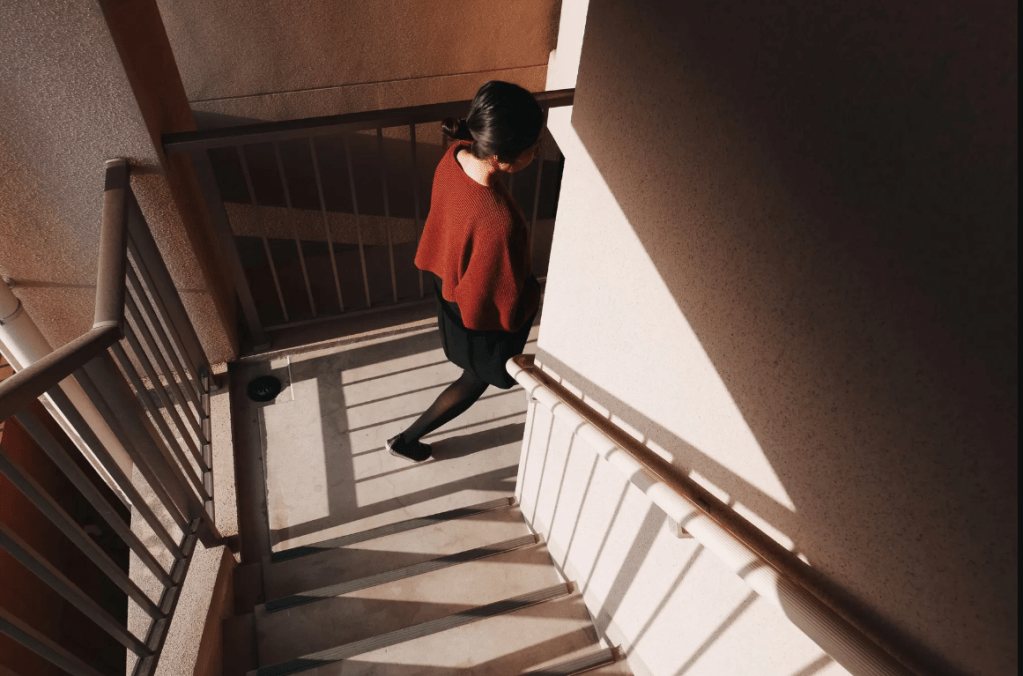
STAIRS – One of my worse nervousness is going downstairs (going upstairs is difficult but not as much as going down). For me it the angle and POV which causes double vision. So when going down the stairs, it takes me ten times longer than everyone else, either going slow or going down one stair at a time. Another struggle is when places have stairs that blend easily together, in the picture above, you can tell when the new step is, because of the end colour. But some places they don’t have that, and that’s when it makes it hard. I’m not going to lie, I have fallen down the stairs way too many times, but that’s why I take my time. Because I now have that fear of falling. I also admire the people who can run down the stairs really fast and not look where they are going in movies, even missing steps.
READING – Reading has always been difficult for me, not that I cannot read, but having the patience to sit down and read. I’ve never liked reading, and this is because of my eyes. I can read a small sentence over and over, but the information won’t stay in my mind. Another thing is that after reading a page, it makes my eyes extremely strained and tried, even the words in the book becomes blurred. Which most likely develops into a migraine.
FAMILY MEMBERS
Even though this is similar to the portrait idea, maybe using my family members would have a better connection to the theme and concept of this project. As you can see above, these images were taken with no real models, just ordinary people. I could photography them somewhere around my home or other locations that relate to me and also them. Overall this idea would work because I mostly see these people every day or regularly. And have always been a part of my life. The struggle is to persuade them to be the subject; i know some people would be up to it, however others I’m not sure. And also I have to think about having enough people for the final 4-6 photo deadline. I would ask around and see who would be up for it, and see if it fits in with the deadline submission.
“A double exposure is a combination of two images into one where one image is overlaid onto another at less than full opacity. This is done with artistic intent (unless you’re shooting film and forgot to wind it between shots, but still you might get a serendipitously happy accident.) This can be done in-camera or in post processing. In film photography, double exposures are made by exposing the same portion of film twice, resulting in an the second image being superimposed on the first. In digital photography, double exposures can be made in-camera in some cases when it’s available as a creative effect in a body, in photoshop, or in apps designed specifically to make digital double exposures.” (SLR Lounge, n.d.)
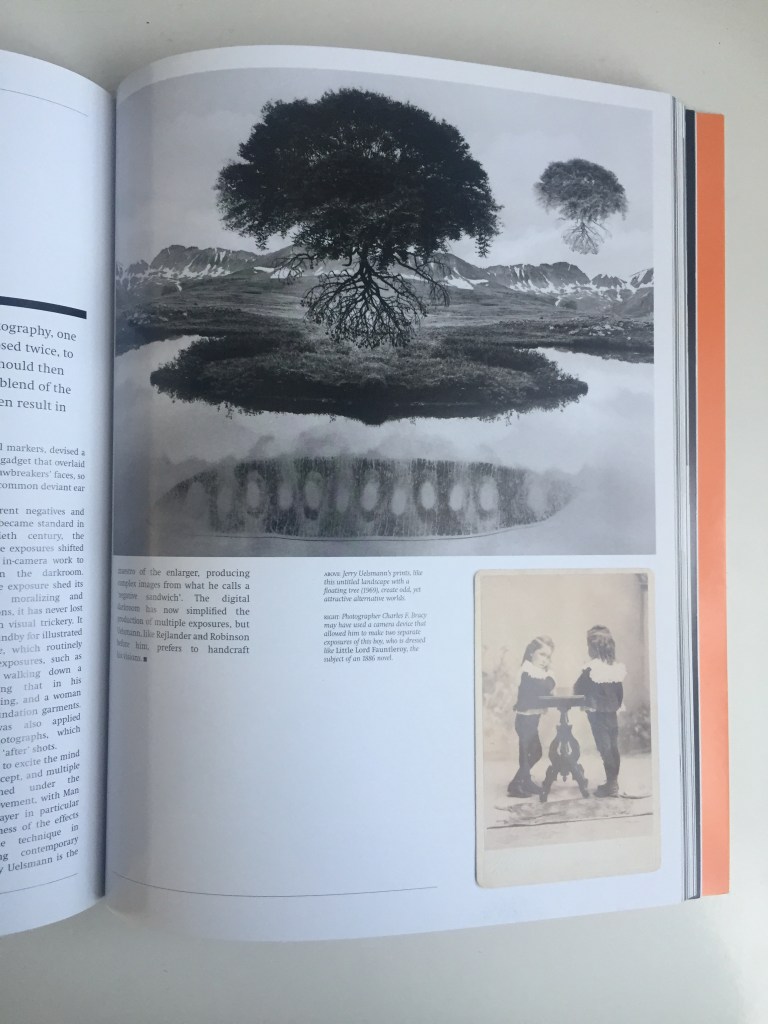
In the book above it talks about the authors experience and techniques she used in order to produce analogue multiple exposures and talking about how other people approach this method.
OTHER WAYS THAT CAN DISTORT OTHER PEOPLES PERSPECTIVE
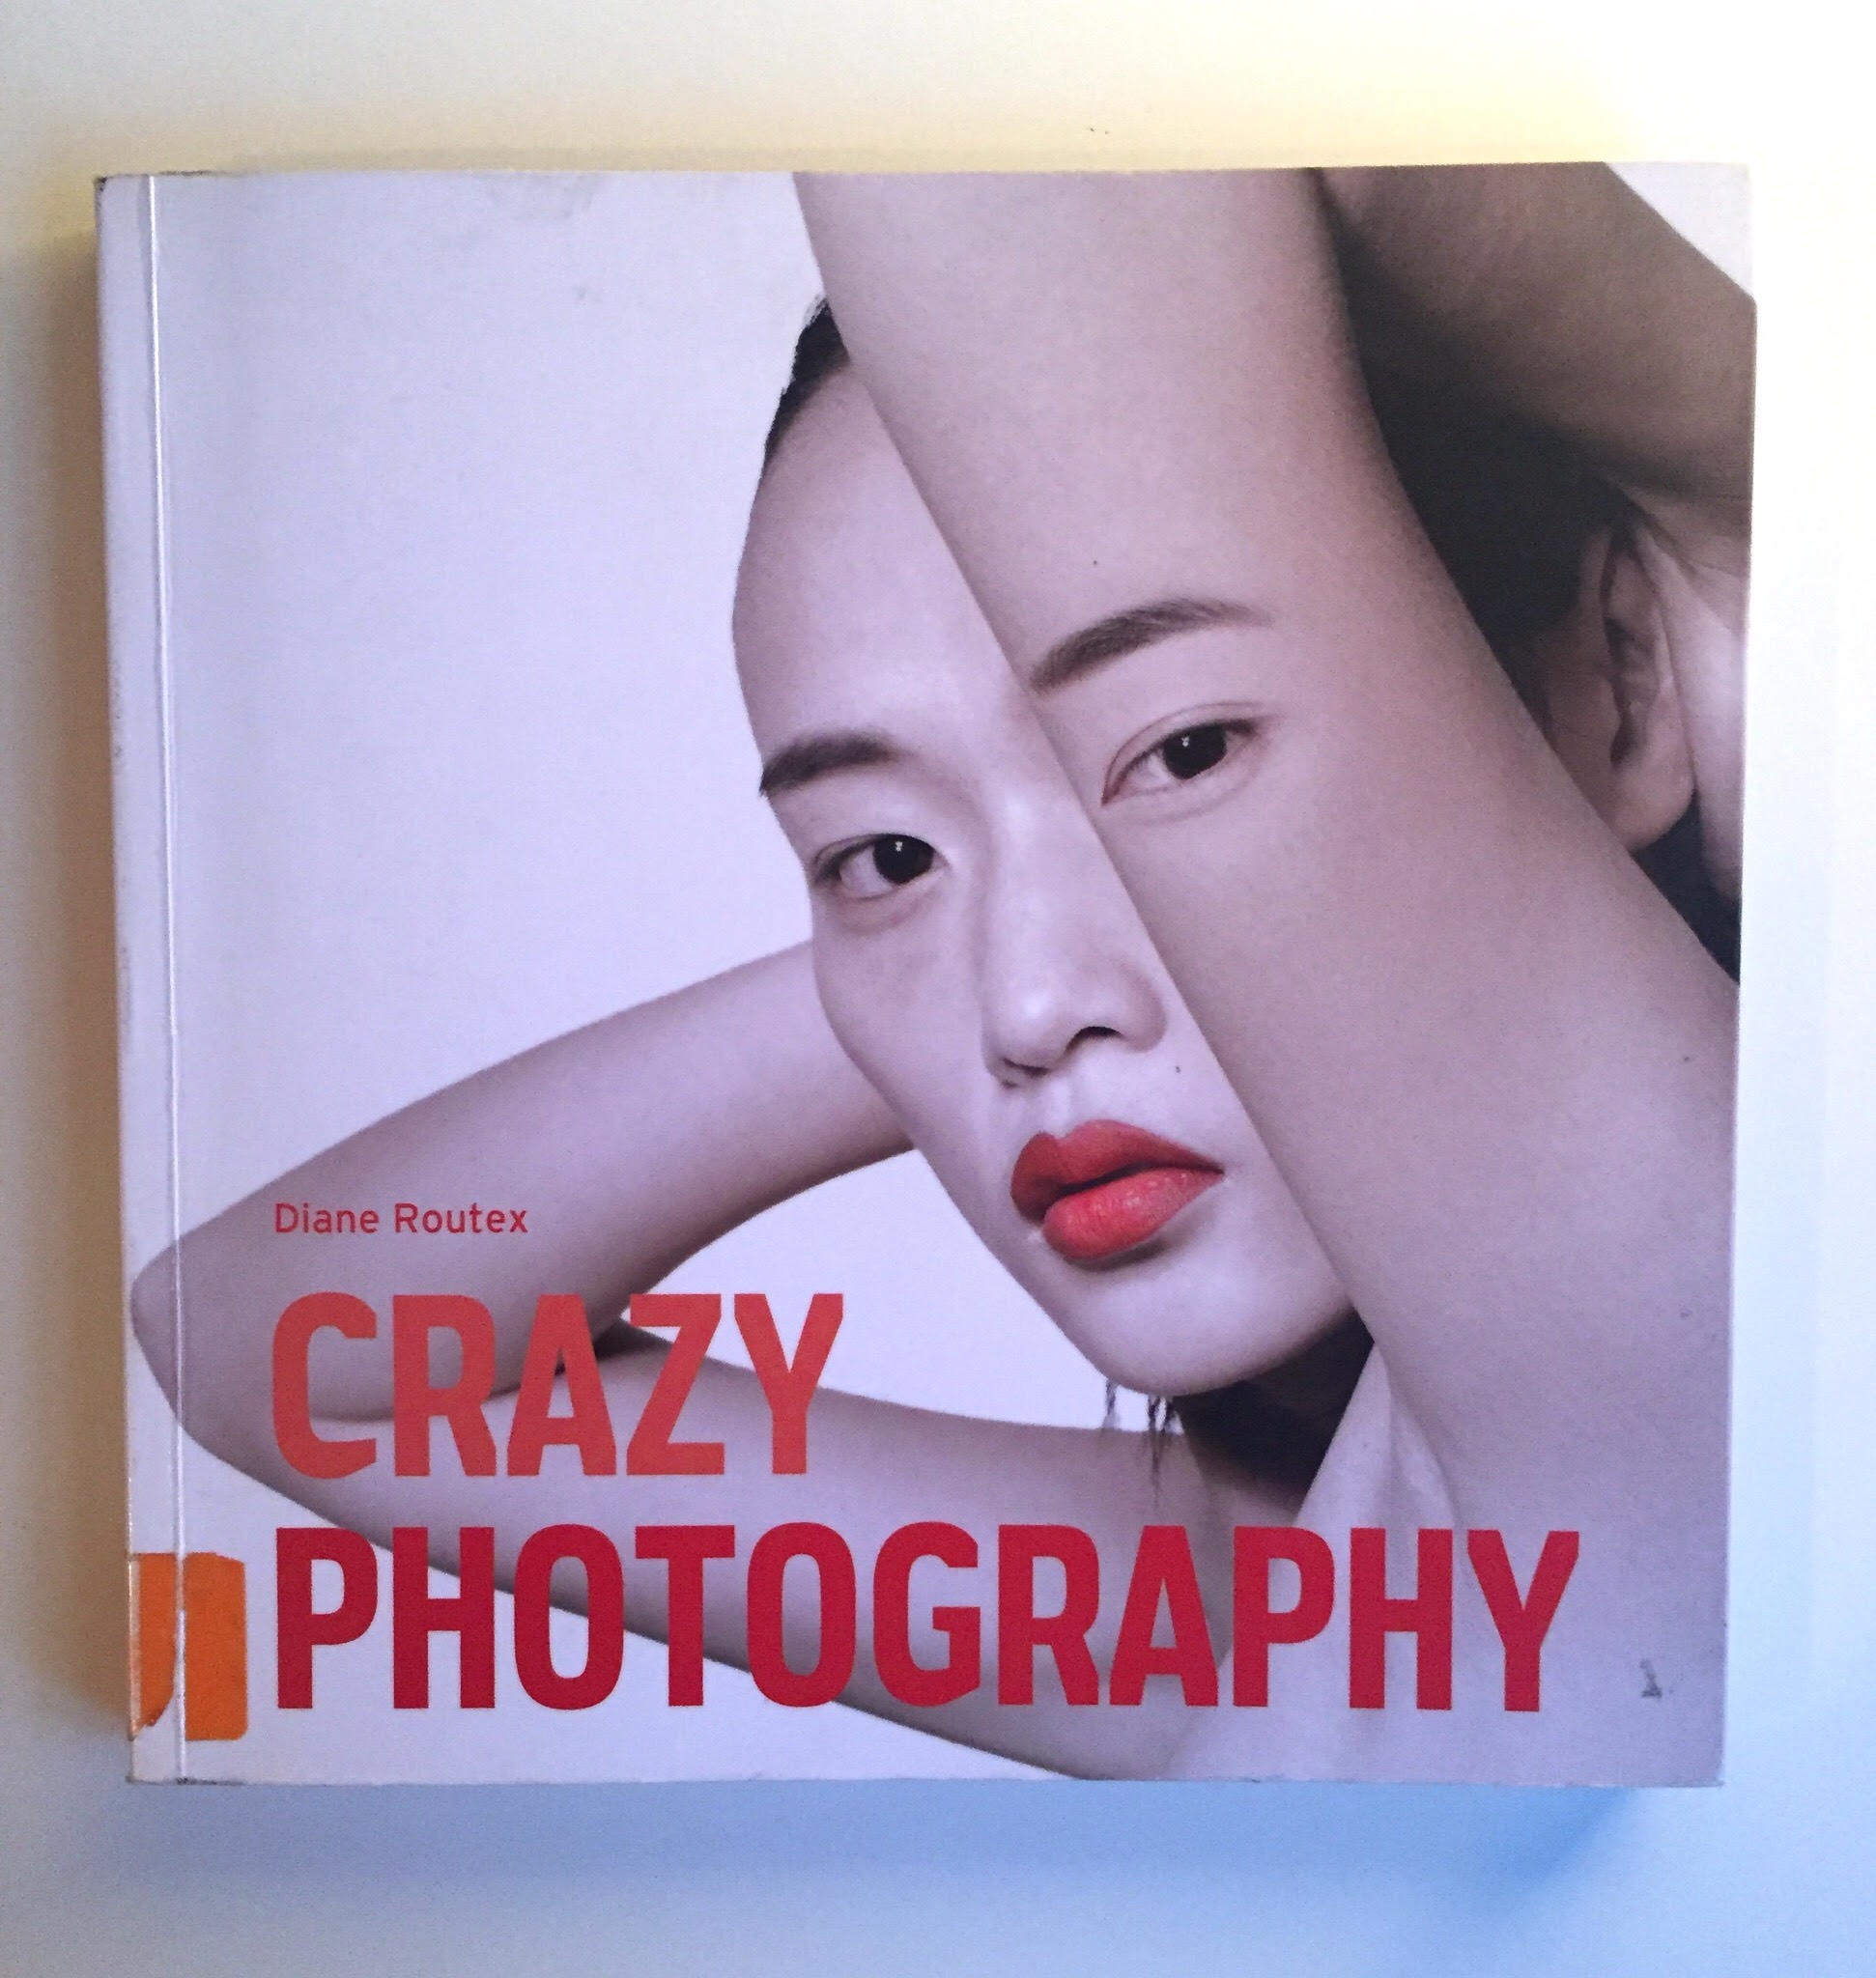
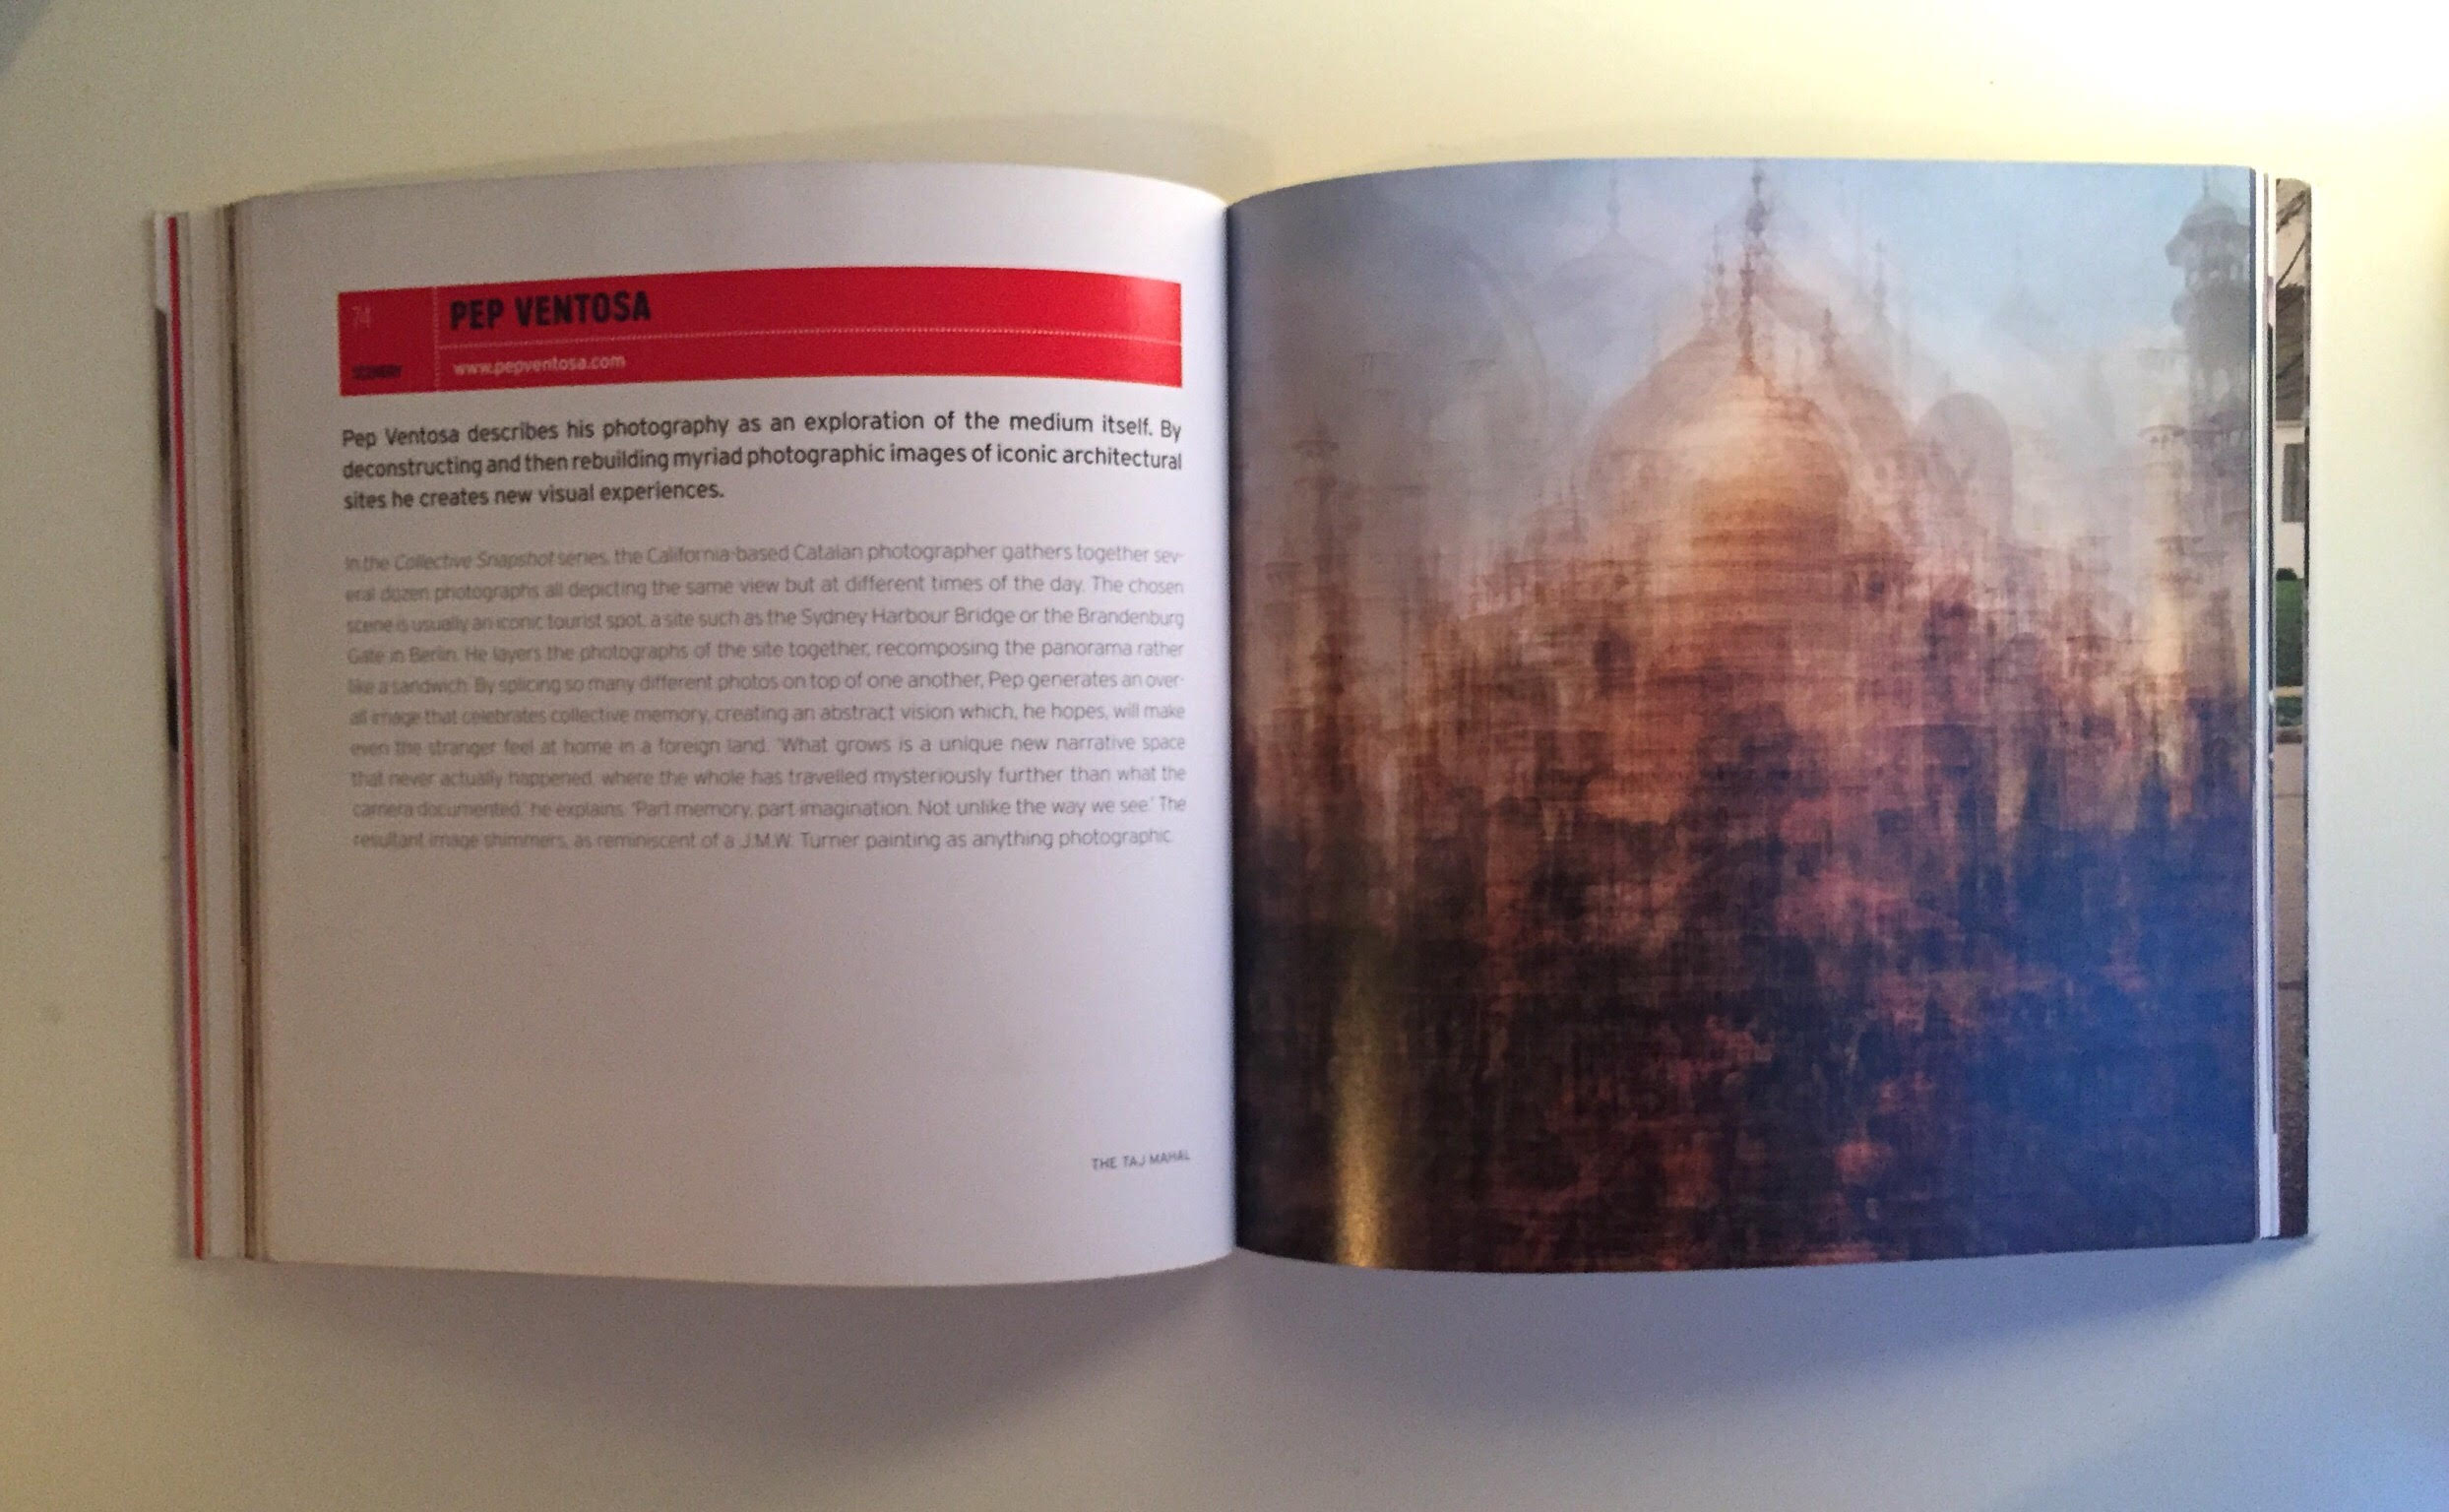
The first book I looked at was Crazy Photography, on page 74/75 Pep Ventosa uses the technique of layering multiple images over each other, each image having a low opacity. Even though this is not what I’m exactly doing, it has the same principle – multiples exposures, layering, opacity. By doing this he has created new texture, colours, shapes and a new building.
“Pep Ventosa describes his photography as an exploration of the medium itself. By deconstructing and then rebuilding myriad photographic images of iconic architectural sites he creates new visual experiences.” (Routex, 2012)
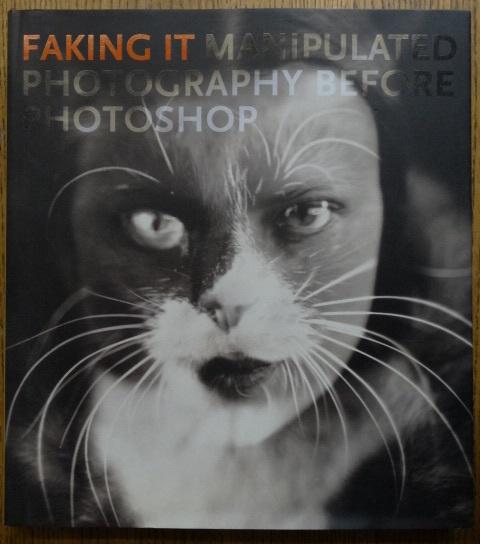
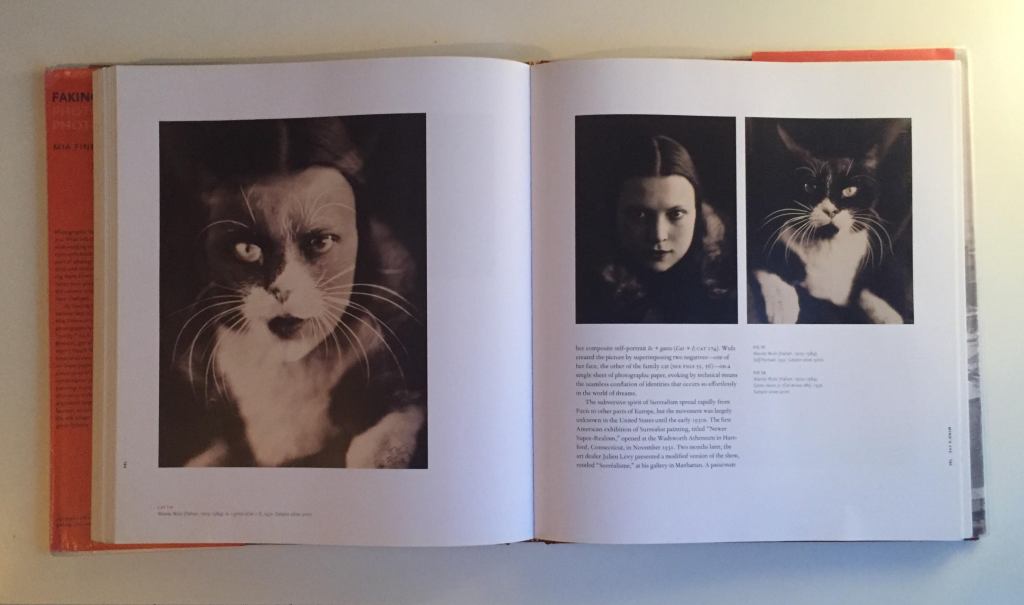
The second book I looked at was Faking It Manipulated Photography Before Photoshop. Fineman demonstrates that today’s digitally manipulated images originate from the earliest years of photography, encompassing methods as diverse as overpainting, multiple exposure, negative retouching, combination printing, and photomontage. She shows photography to be an inspired blend of fabricated truths and artful falsehoods.
It’s exciting to see different artist take and perspective with this technique. This book was fascinating to look and read. It is full of impressive work, and at the back of the book, it defines how each image was made. For me, that is useful, because sometimes you wonder how they do put the image together or what other techniques they use.
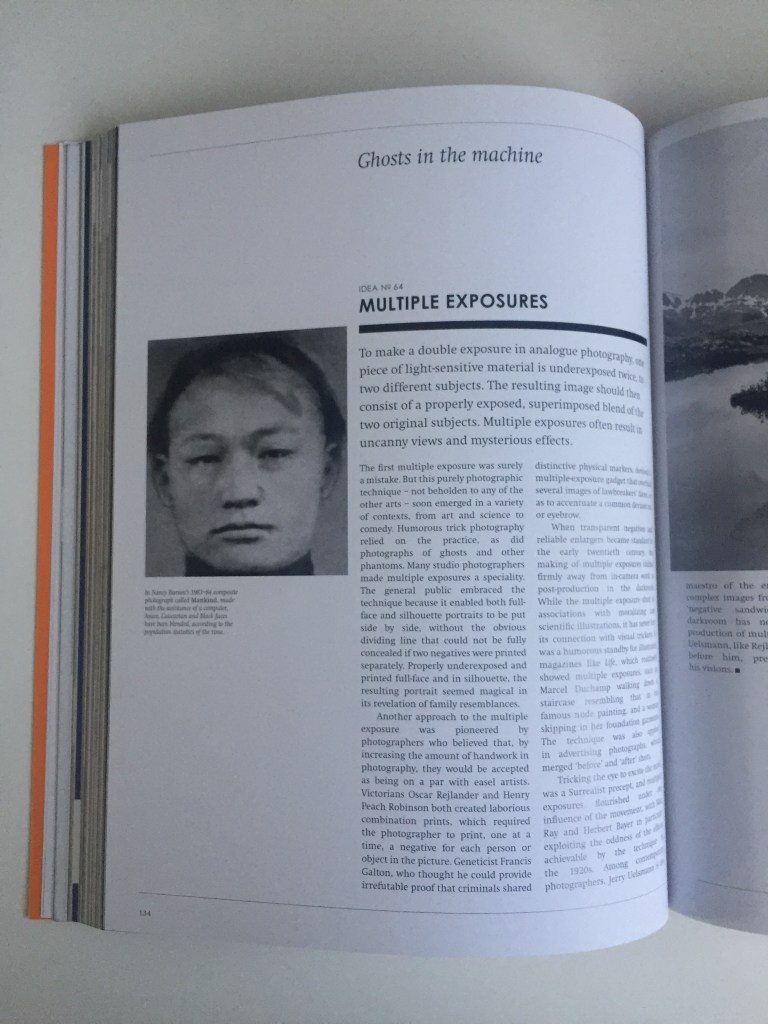
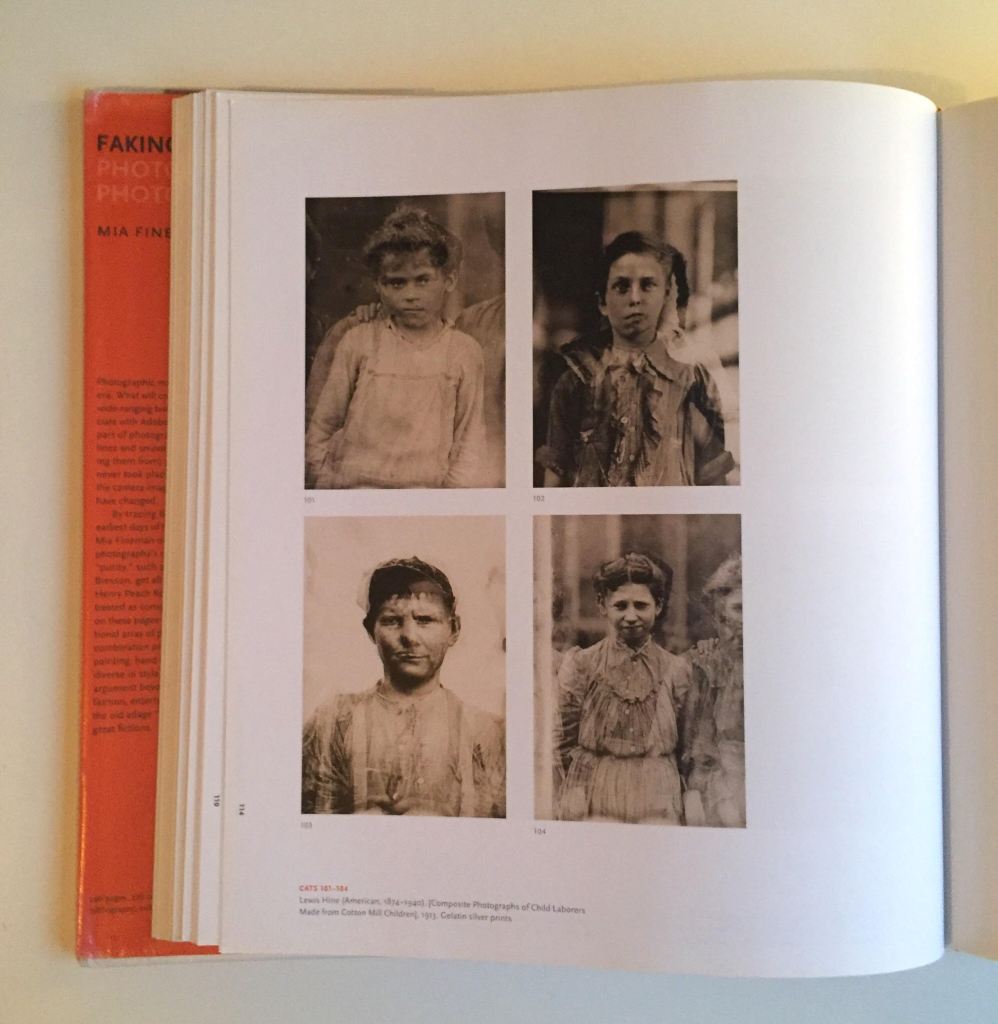
The image where there are four children is by American photographer Lewis Hine, and is a composite photographs of child labourers made from Cotton Mill Children, 1913. “From 1908 to 1918 Lewis Hine photographed working children for the National Child Labour Committee (NCLC). His heartrending photographs of tiny, malnourished human beings engulfed by enormous machines were published in newspapers and freestanding posters and influenced the passage of several laws”. “Hine created each image by rephotographing several individuals portraits of children on a single plate; the result was a series of Frankensteinesque amalgams that barely disguise the disparity of their parts… composite photographs were used mainly to generate the average or typical appearance of a social type whether healthy or degenerate. Yet Hine’s composites show little concern for physical similarities. In one image, he went so far as to combine a photograph of a young boy who worked as a doffer with one of an adolescent girl deformed”. These images became “posters for the ‘NCLC’ with titles such as ‘Making Human Junk: Shall Industry Be Allowed To Put This Cost On Society?” (Fineman, 2012)
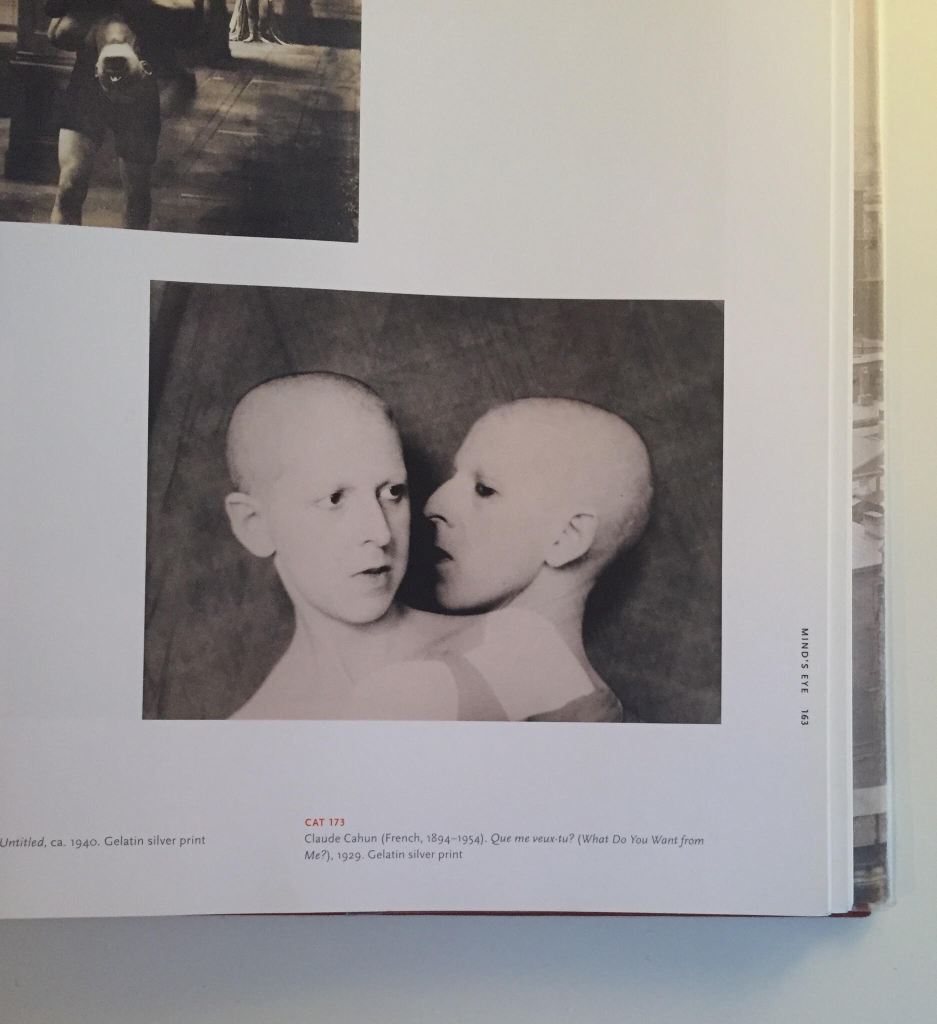
Claude Cahun is “openly grappled with her gender identity for the greater part of her life ad artistic career.” Her image above of the two baldish heads is her image called ‘What Do You Want From Me?’, 1929. Nevertheless, Cahun’s experimental photography and personal eccentricity resounded with the Surrealist taste for odd juxtapositions and unorthodox sexuality, and she remains one of the movement’s foremost figures. Doubling, especially of the eyes, lips, or head, is a recurring device in surrealist photography. Like her shaved head and unusual wardrobe, the doubled self was one of Cahun’s strategies for representing her struggle to come to terms with her own narcissism. This self-portrait exudes an almost erotic charge: the two Cahuns look in on each other like Siamese twins, or the dueling heads of a monster. The title of the work demands an elusive answer not only from the viewer but also from one Cahun to the other: ‘ What do you want from me?” (Fineman, 2012)
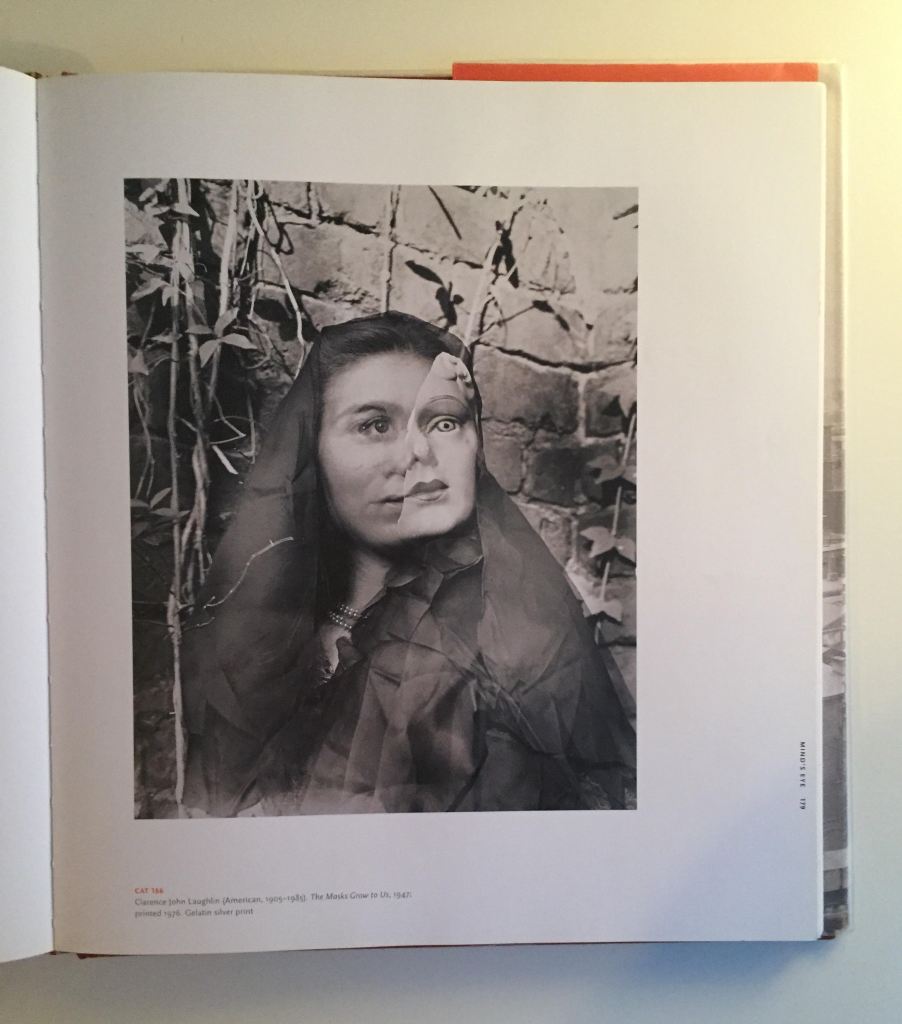
Clarence John Laughlin wanted “to be a writer himself but having failed to attract a publisher for his literary work, Laughlin turned to photography at the age of twenty-five.” The image of the women at the bottom left is Laughlin’s. “He found the technique of multiple exposure to be a fitting vehicle for his interest in signs, subtexts, and the commingling of visual and intuitive realities. In ‘The Masks Grow To Us, a young woman wearing a pearl necklace gazes upward while part of her face hardens into a glossy mask. As the exposures of the woman and the mask meld on a single negative, photographic process and allegory become one. ” (Fineman, 2012)
Laughlin wrote, “In our society, most of us wear protective masks (psychological ones) of various kinds and for various reasons. Very often the end result is that the mask grown to us, displacing our original characters with our assumed characters. This process is indicated in visual, and symbolic, terms here by several exposures on one negative – the disturbing factor being that the mask is like the girl herself, grown harder and more superficial.”
HOW DO YOU PRODUCE A MULTIPLE EXPOSURE IMAGE?
MAKE SURE YOU HAVE THE RIGHT EQUIPMENT
Not all DSLRs cameras have a multiple exposure setting; fortunately, my camera does. “Depending on what you’re trying to achieve, a tripod, a shutter release cable, a flash and plain white or black background (it could be a muslin backdrop or that empty wall in your apartment) might come in handy, too!” (CanonUSA, 2016)
KNOW YOUR CAMERA’S MULTIPLE EXPOSURE FEATURE
“While shooting double exposures is essentially just shooting two images in a single frame, different cameras handle this process differently. So, it’s important to familiarize yourself with how your camera’s multiple exposure function works. Read the manual and practice the process, if need be, before you go out and shoot.” (CanonUSA, 2016)
However, some Canon cameras allow you to take two or more exposures in one image, offering users more flexibility.
UNDERSTANDING AND SHOOTING DOUBLE EXPOSURES
“Now, before you start shooting, it’s important to understand how double exposures actually work. In the days of film, taking multiple shots in a single image usually involved snapping one frame, rolling back the film and taking another snapshot to overlay the original. In today’s digital age, we’re still overlapping images, but instead of re-exposing film, it’s simply a matter of blending data and pixels.
Technically, shooting double exposures with your digital camera is easy. Simply set your camera to Multiple Exposure mode, shoot your first layer (or select one from your camera’s memory card, if permitted), then shoot your second layer, and you’ve got your double exposure. The hardest part comes when you’re choosing, framing and positioning your two shots so that they blend well together into one image.
The first exposure or layer of your image serves as the base layer upon which elements of the second frame will blend into. The second layer is just as important as your base, and, in many ways, it can be the hardest layer to shoot. Sure, you can just randomly pick a subject, point and shoot, and hope for the best. But picking a great subject or scene, and working with your camera’s angles so that it fits perfectly and complements (or provides a striking contrast to) the base layer will yield much better results.” (CanonUSA, 2016)
DARK VS BRIGHT
“Darker subjects or scenes will blend more easily, while brighter or lighter subjects may blow out some details in your double exposure.
This is why silhouettes are fantastic for double exposures, as are busy urban scenes or colorful graffiti and street art. A sunny sky or an overly bright landscape as your base photo, on the other hand, might produce a washed out image. In fact, many photographers prefer to shoot darker scenes first and lighter scenes second.” (CanonUSA, 2016)
CHOOSE YOUR BASE EXPOSURE CAREFULLY
“As previously mentioned, many photographers (film or digital) who have mastered the art of double exposure tend to use a darker subject or scene as their base or first exposure. But this not a rule of thumb. In fact, your base exposure really depends on the image you are trying to create.
For double exposures that show movement or ghostly apparitions, you’re more likely to use the same scene for the both layers. The only difference is, when shooting the second layer, you’ll have your subject move out the frame or to a different position to get that translucent, ghost-like appearance. (A tripod is recommended for this type of photo).” (CanonUSA, 2016)
VIDEOS THAT WERE USEFUL
The video explains how particular environments can affect the overall image dramatically. And also what the different settings within the camera can change the look for what you are after. Even though most of the images produced in this video aren’t the concept I was going for, it was useful to learn the techniques and understand the different setting, so I am prepared for the upcoming shoots.
Fineman, M. (2012). Faking It Manipulation Photography Before Photoshop. New York: Metropolitan Museum of Art, pp.23, 114, 127, 163, 164, 165, 178, 179, 185, 190, 191, 233, 247, 251.
Marien, M. (2012). 100 ideas that changed photography. London: Laurence King, pp.134, 135.
Routex, D. (2012). Crazy Photography. [Erscheinungsort nicht ermittelbar]: Vivays Publ., p.74.